36
Reassembly procedure (continued)
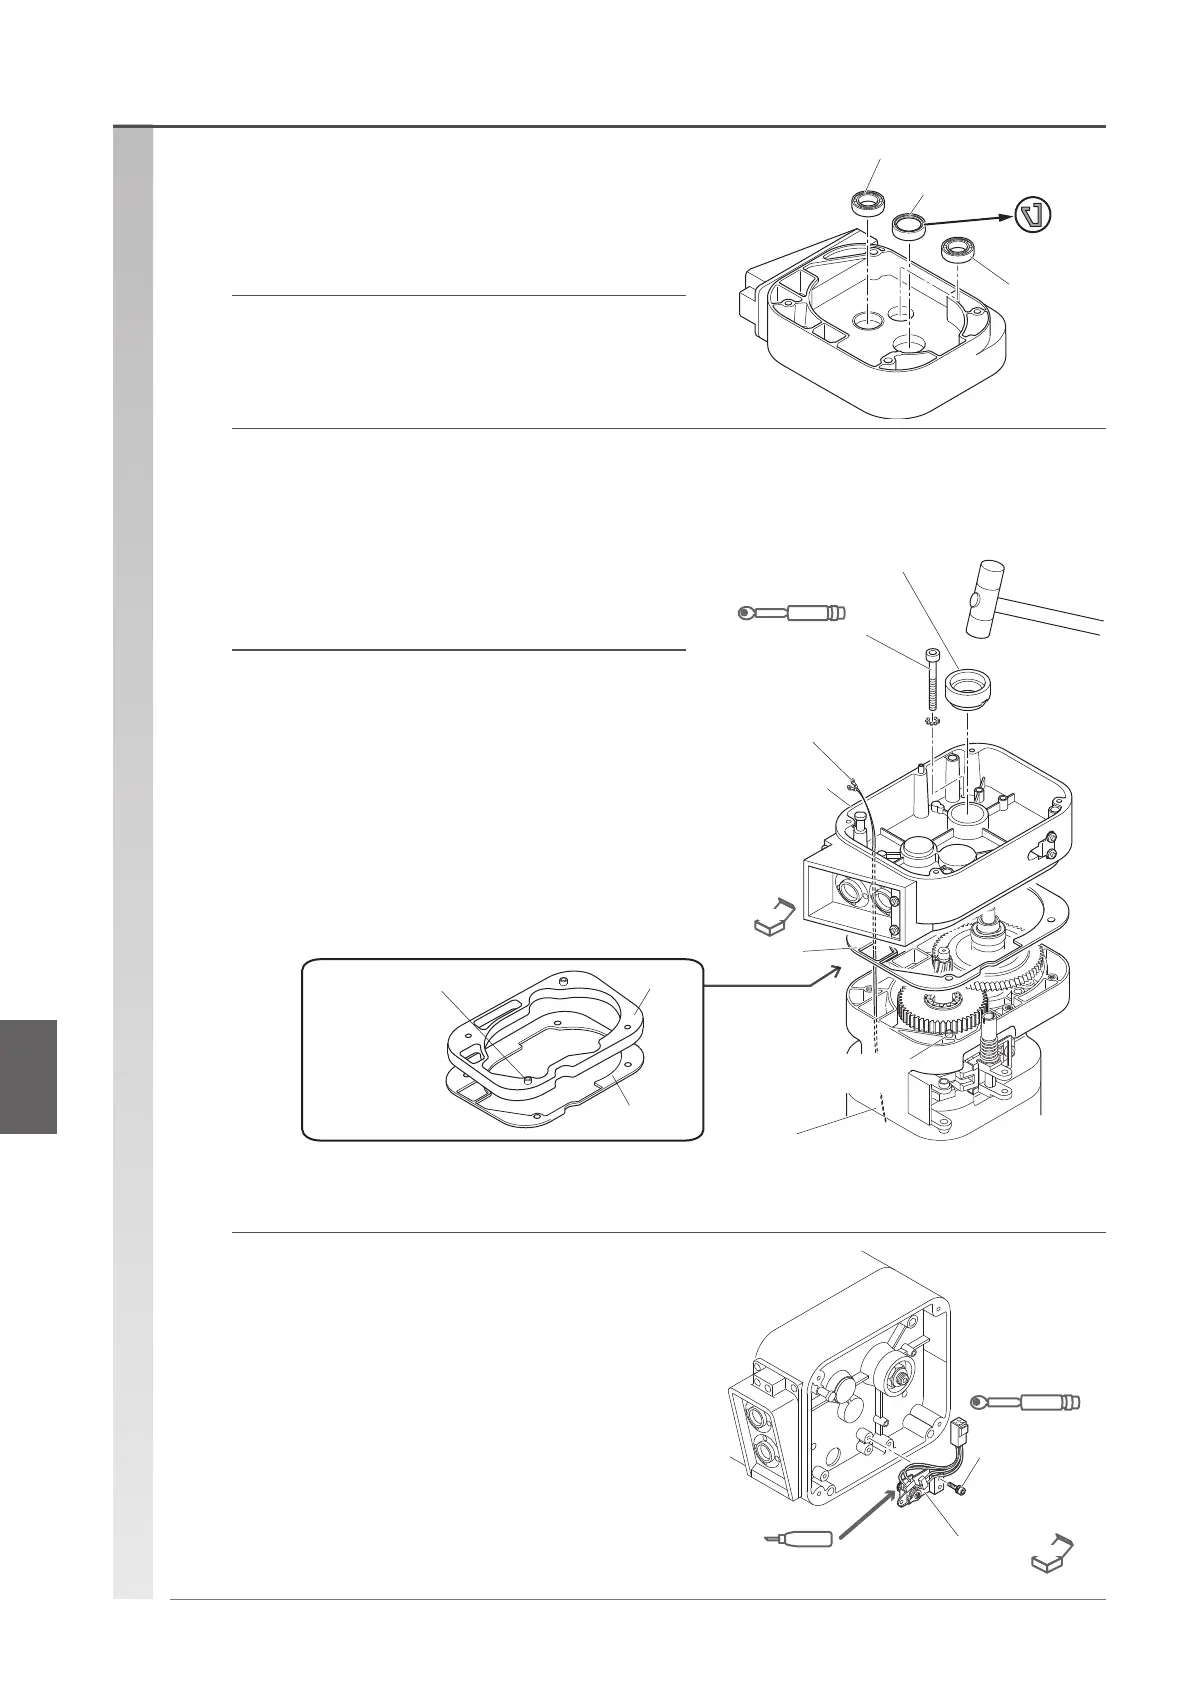
(3) Press-tthebearingforthepiniontothe
gear case using a proper jig.
(6) Mount a new Packing G on the body, and
install the gear case by hammering it with a
plastic hammer.
•
At the same time, install the 2 set pins.
•
Be careful so that the lead wire won't get caught.
•
Temporarily install the gear case with the 4 socket bolts
(5 for F type), and tighten them sequentially, alternating
diagonally.
•
For Friction clutch with mechanical brake specication,
install Spacer M with Packing G between Gear case and
the body.
Tightening torque M6 : 10.8 N·m
M8 : 37.2 N·m
Toothed lock washer : Yes
Socket bolt (x4)
Friction plug
* (x5) for F type
Gear case
Lead wire
Body
Set pin (x2)
(Another one exists in the
opposite side, on the
diagonal line.)
NEW
Torque
Packing G
Install it while
hammering
around the pin
charging part
gently.
(4) Install the oil seal to the gear case using a
proper jig.
(5) Install the friction plug by hammering it with
a plastic hammer.
Bearing
Oil seal
Cross-sectional
shape
Bearing
(triple reduction
specification
only)
(7) Install the limit switch from the gear case
side (inside of the panel plate) (if removed).
•
Replace O ring attached to the shaft of the limit switch
with a new one and apply oil to it.
•
Align the shaft salient of the limit switch to the notch of the
lever pin when inserting it.
•
Insert it gently not to scratch the O ring.
•
Perform wiring of the limit switch.
After installation, move the limit lever manually and check if
it performs follow-up operation.
Tightening torque M6 : 10.8 N·m
Spring lock washer : Yes
Limit
switch
Apply oil.
Socket bolts
(x3)
Install it in advance.
NEW
Torque
Oil
Spacer M
Packing G
Set pins (two locations)
Another one exists
in the opposite side,
on the diagonal line.
Reassembly procedureAssembling the gear parts

 Loading...