template brackets
22"h - ybate22
25"h - ybate25
bracket detail
bracket detail
STEPS:
1. Attach (2) horizontal rail cradles (A) to
the desk end leg using (2) ½-20 x 1"
machine screws (G) per desk cradle (A).
2. Attach (1) pair of horizontal rails to cradles (A)
by loosely fastening (2) cradle clamp brackets
(B) to each cradle (A) using (4) ¼- 20 x
5
/
8
"
machine screws (H). Install end caps in all
horizontal rails using the rubber mallet.
NOTE: Rails are typically 3" shorter than
the top length. Ex: 42" wide top uses 39"
wide rail. Slide rail all the way through
cradle/clamp assembly with rail paint
holes facing up and toward center of the
desk assembly. Use the installation gauge
to determine the desk cradle location in
relation to the end of the rails. Tighten the
screws (H) in cradle clamp brackets (B).
3. Create (2) desk support adapter assemblies
by using a
5
/
16
-18 x ¾" machine screw (I)
to attach desk to pedestal cradle (D) to
desk to credenza adapter block (E).
4. Attach (2) desk support adapter assemblies
to previously assembled credenza or
floorstanding cabinet top using (2) ¼-14 x
7
/
8
"
wood screws (J). Note that the assemblies
must be spaced apart from each other the
same distance as the horizontal rail cradles
attached to the desk end leg. See drilling
pattern template for metal/ wood storage.
5. Join desk assembly to pedestal by laying
rails onto desk support adapter assemblies
created in step 4. Attach (2) cradle clamp
brackets (B) loosely to desk support adapter
assemblies using (4) ¼-20 x
5
/
8
" machine
screws (H) per assembly. Use the installation
gauge to determine the desk support adapter
assembly location in relation to the end of
the rails. Tighten cradle clamp brackets (B).
6. Place desk top on base assembly and
attach using (2) #14 x 1" FH wood screws
(K) per cradle/desk support adapter. Screws
should line up with the appropriate predrilled
holes in the underside of the desk top.
7. Surfaces 48" wide and greater require a spacer
(C) for additional support. When necessary,
a spacer (C) should be placed between the
top of each rail and the underside of the top,
centered on the width of the top. Spacers
(C) are attached to the top using (1) #12 X
¾" black wood screw (F) per spacer.
8. Adjust leg and cabinet glides as
needed to level assembly.
Desk Supported by 22 ½" High Template Storage
Pattern Numbers Represented:
22 ½"H Case Support Adapters, YBATE22
Legs for Desks or Returns (Desk Height), YEL__
Starter Rails with End Caps, YBRS_
Part List:
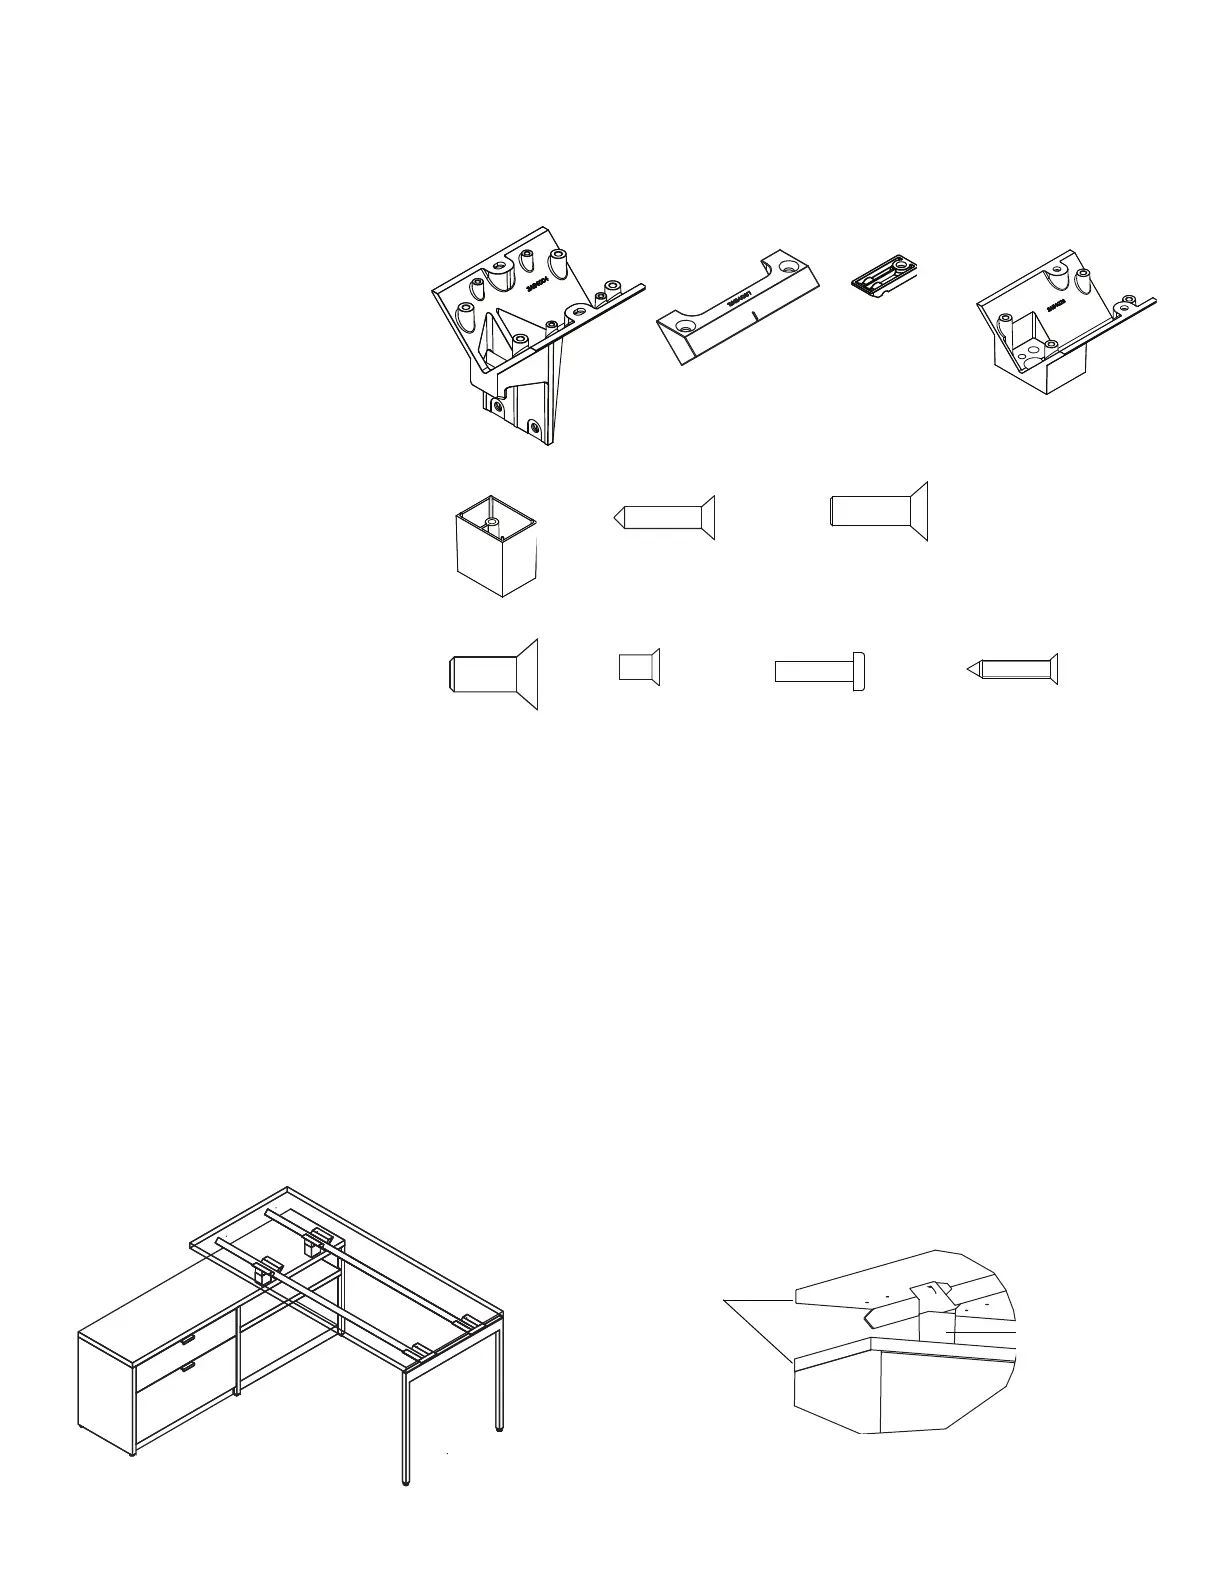
Horizontal Rail Cradle (A)
Cradle Clamp Bracket (B)
Spacer (C)
Desk to Pedestal Cradle (D)
Desk to Credenza Adapter Block (E)
#12 X ¾" Black Wood Screw (F)
¼-20 x 1" Machine Screw (G)
¼-20 x
5
/
8
" Machine Screw (H)
5
/
16
-18 x ¾" Machine Screw (I)
¼-14 x
7
/
8
" Wood Screw (J)
#14 x 1" FH Wood Screw (K)
Rails
End Caps
Desk End Leg
Top
Tools Needed:
Drill
Phillips #2 and #3 bits
Install Gauge
Rubber Mallet
7434100
Screw, SM, FLP 14 X 1 Type A CAD or Zinc
K.) 74 34100I.) 7060440
J.) 4A214020140
B.) 3AB4007*
F.) 7196440
A.) 3AB4004*
E.) 3AB4027*
D.) 3AB4026*C.) 3AB401252
G.) 7194140
H.) 7189140
Adapter block
aligns with front
edge of supportive
surface. See step 4
Side of
worksurface
aligns with back
of storage
22" High Support Detail
Desk Supported by 22 ½" High Storage
4A214020140
Screw, Mach, PNP 1/4-14 X .875 Type AB
3AB4040
Screw, Mach, FLP 1/4-20 X 1
Storage