STEPS
Note: These steps include instructions for the
big table assembly as it relates to supportive
25"H Template or Antenna wood cabinets
and the use of the YBATBT25 adapter. For
additional assembly steps see Big Table
with Intermediate Leg instructions.
1. Attach (4) desk to pedestal cradles (C) to
previously assembled and leveled Template
or Antenna 25"H cabinet top using (2)
¼-14 x
7
/
8
" wood screws (D) per desk
support cradle (C). Use the drill template
(G) to locate the cradle positions.
2. Prepare end leg or intermediate leg
assemblies, as necessary, for support of the
big table end opposite the 25"H storage. (See
Big Table Intermediate Leg instructions.)
3. Fasten (2) cradle clamp brackets (B) loosely
to each desk to pedestal cradle (C) using
(4) ¼-20 x
5
/
8
" machine screws (E). Slide
one end of (4) rails into the cradles, with rail
paint holes facing up and toward the center
of the assembly. If glass tops are being
used, holes are to face down and toward
the center of the big table assembly.
NOTE: Starter rails are typically 3" shorter than
top width. i.e.: 72" wide tops use 69" wide rails.
Position the ends of the rails so they
are 1 ½" from the back edge of the
Template unit. Tighten the screws (E)
in the cradle clamp brackets (B).
4. Install (4) end caps into the outside ends
of the starter rails with a rubber mallet.
5. Follow the steps on the Big Table Intermediate
Leg instructions for rail connection details
to any intermediate legs, end legs, and
additionally linked rails. Install end caps with a
rubber mallet on the opposite ends of the rails.
6. Place center beams into position on
top of the Template or Antenna 25"H
unit. The end of the beam should align
with the back of the storage unit.
7. Follow the steps on the Big Table Intermediate
Leg instructions for beam connection
details to any intermediate legs, end
legs, and additionally linked beams.
8. Hook (1) aluminum bracket (A) onto each
side of the beam on top of the 25"H
storage unit, so that inside of each bracket
aligns with the front of the storage unit.
9. Using (2) #14 x 1" FH wood screws (F) per
bracket (A), attach the brackets to the top of
the storage unit, securing the beam’s location.
10. Lay tops on base assembly. Use install
gauge to properly position tops. See
Install Gauge Guidelines. Attach tops
using (2) #14 x 1" FH wood screws (F)
per desk to pedestal cradle (B).
11. Secure flat brackets and spacers, as
required. (See Big Table Intermediate Leg
instructions for recommendations.)
12. Install center beam end caps, as
needed, to finish beam ends. (See
Center Beam End Cap instructions.)
13. Adjust glides as needed to
level big table assembly.
Big Table with 25"H Template End Support
Pattern Numbers Represented:
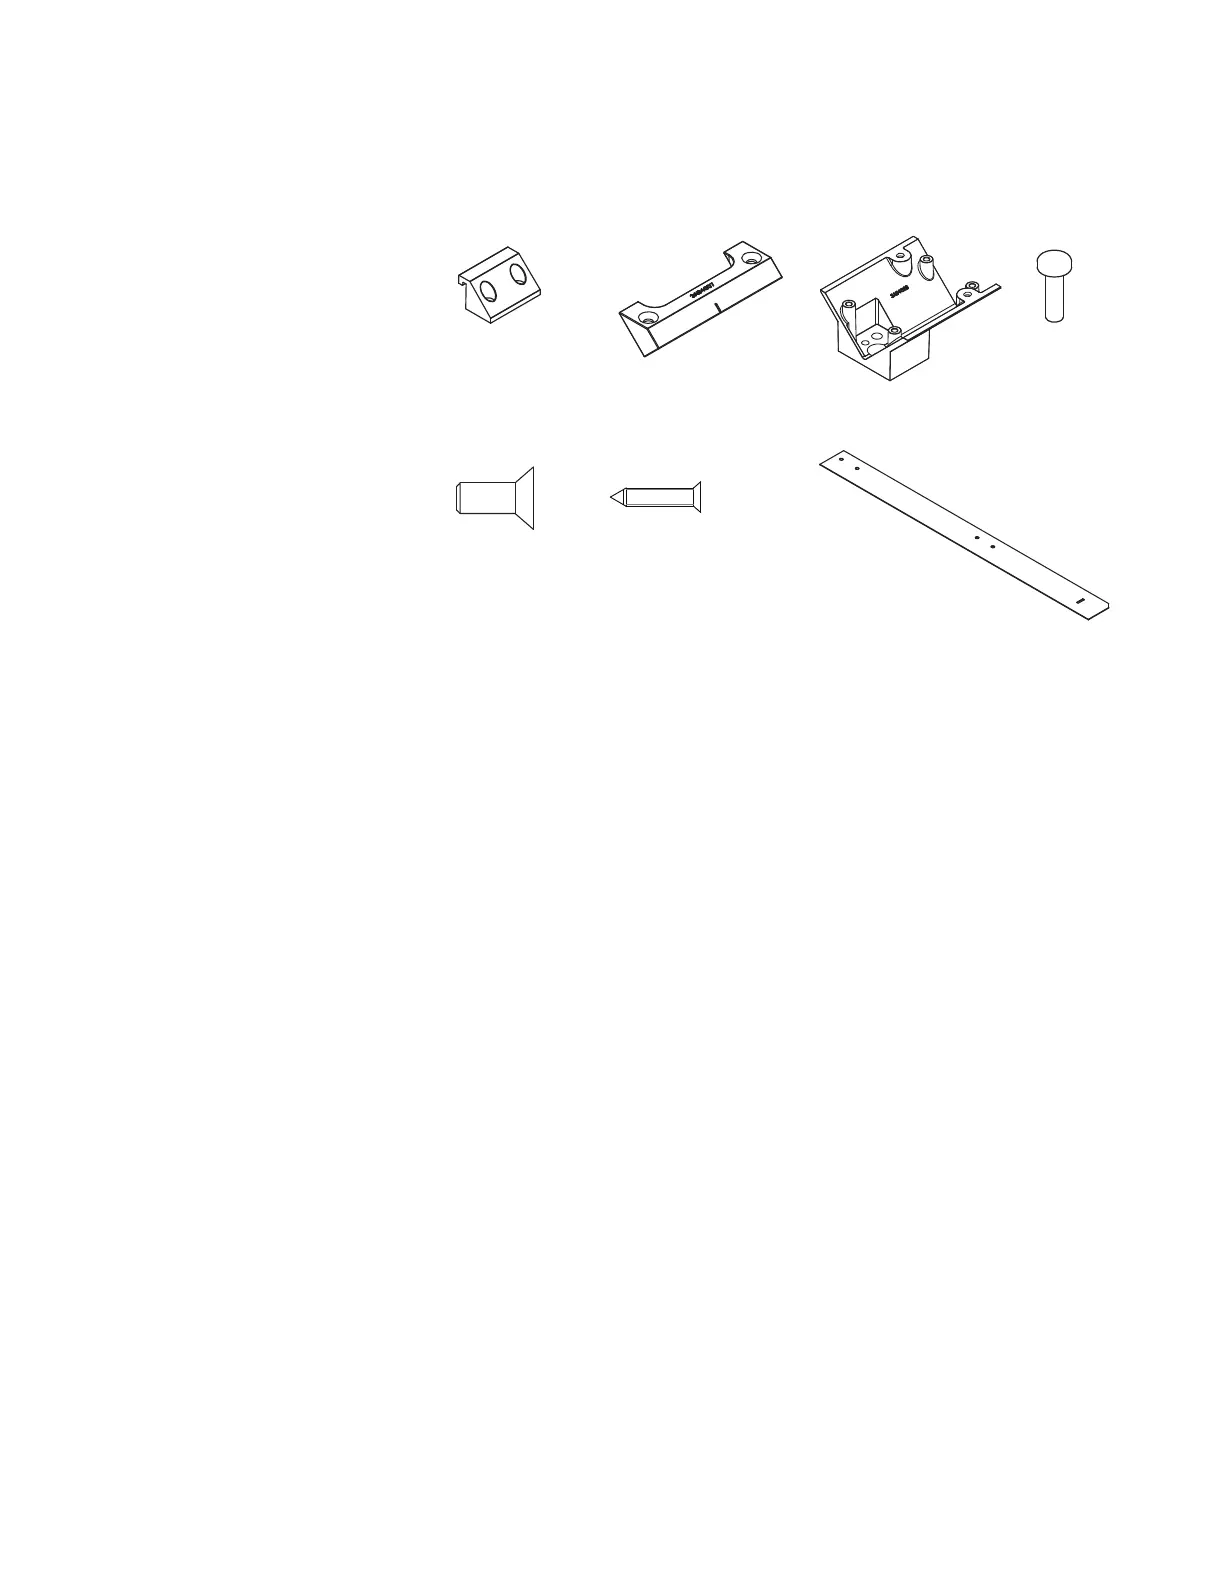
Support Adapters for Big Table -
25"H Case YBATBT25
Parts List:
Center Beam to Template Mounting Bracket (A)
Cradle Clamp Bracket (B)
Desk to Pedestal Cradle (C)
¼-14 x
7
/
8
" Wood Screw (D)
¼-20 x
5
/
8
" Machine Screw (E)
#14 x 1" FH Wood Screw (F)
Drill Template (G)
Center Beam
Rails
End Caps
Tops
Tools Needed:
Drill
Phillips #2 and #3 bits
Rubber Mallet
Install Gauge
(A) 3AB4174*
(E) 7189140
(G) 3AB417395
(B) 3AB4007*
(F ) 743410 0
(C) 3AB4026* (D) 4A214020140
7434100
Screw, SM, FLP 14 X 1 Type A CAD or Zinc