Desk with Return (Inset Leg on Return)
Pattern Numbers Represented:
Legs for Desks or Returns
(Desk or Standing Height), YEL__
Return Rails for Desk, YBRR_
Part List:
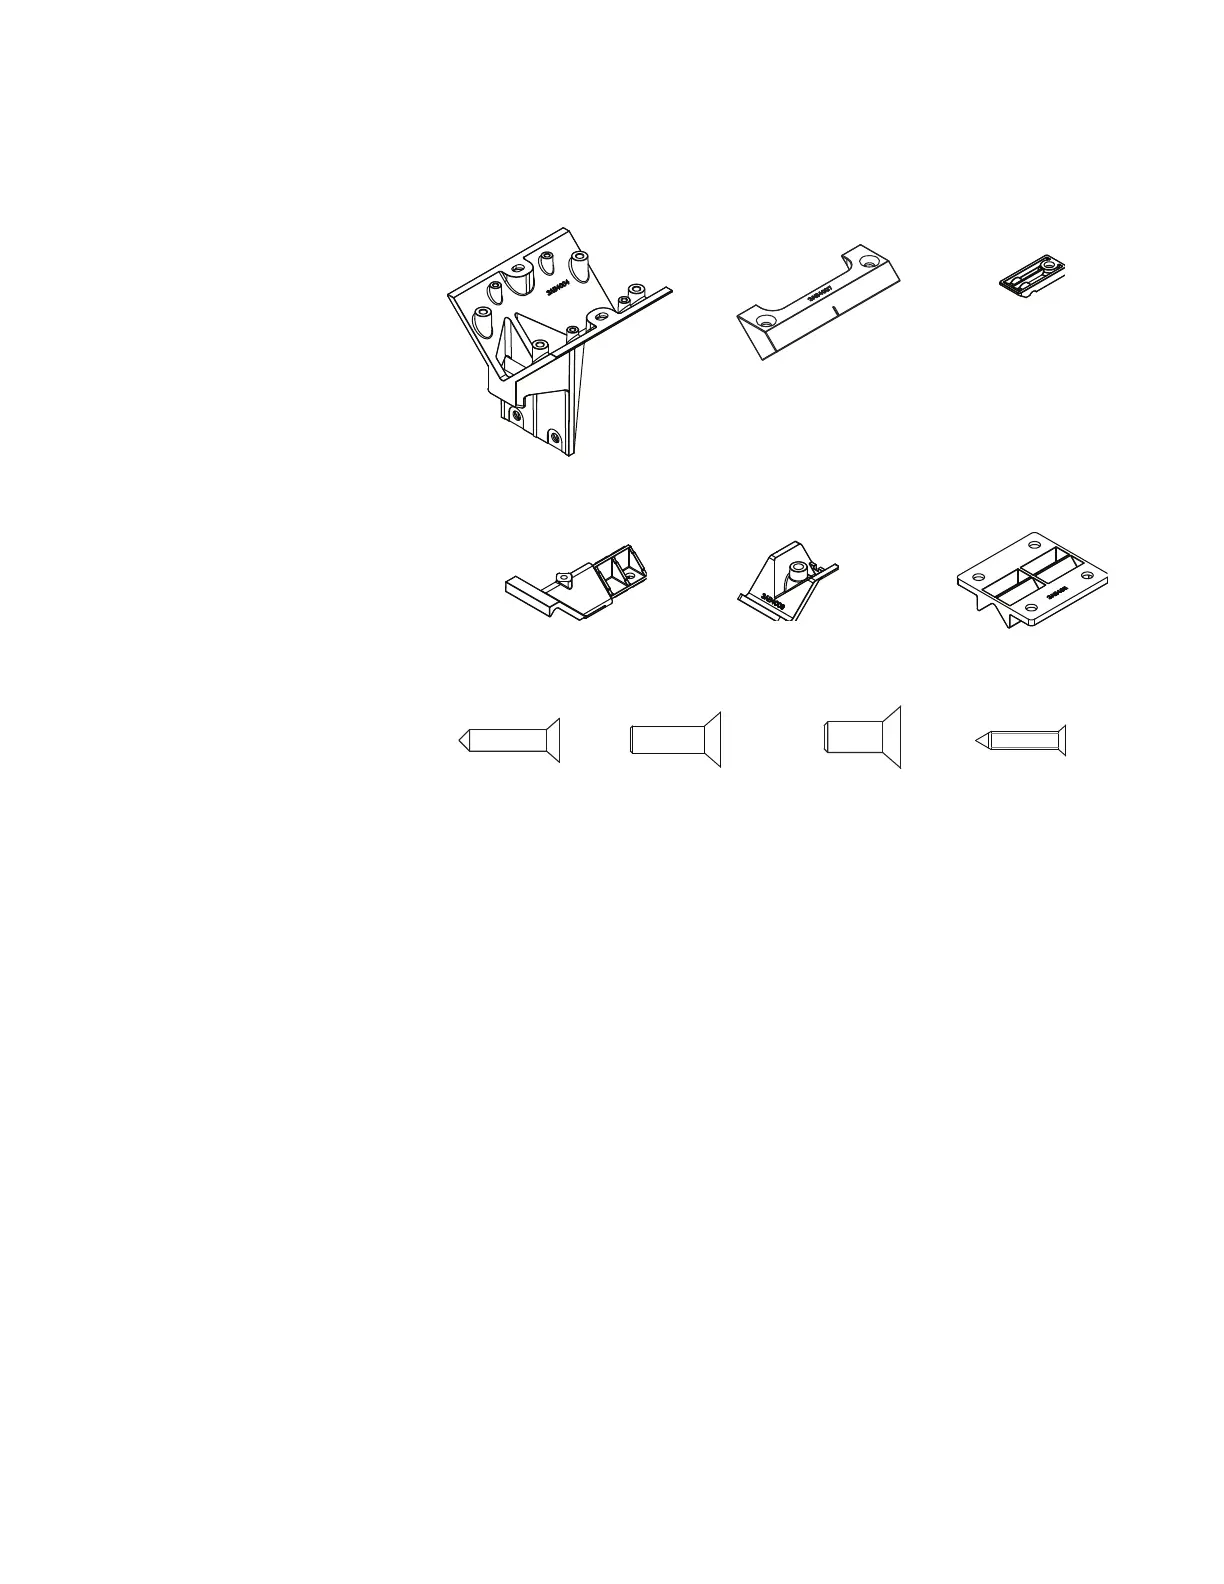
Horizontal Rail Cradle (A)
Cradle Clamp Bracket (B)
Spacer (C)
Return Rail Hook Top Bracket (D)
Return Rail Clamp Bottom Bracket (E)
W-Bracket (F)
#12 X ¾" Black Wood Screw (G)
¼-20 x 1" Machine Screw (H)
¼-20 x
5
/
8
" Machine Screw (I)
#14 x 1" FH Wood Screw (J)
Rails
End Caps
Desk End Leg
Return Top
Tools Needed:
Drill
Install Gauge
Phillips #2 and #3 bits
Rubber mallet
STEPS:
1. Build table desk assembly (see table
desk assembly instructions).
NOTE: that the Horizontal Rail Cradles (A)
at the end of the desk receiving a return
must be repositioned so they are
at the end of the desk rails.
2. Attach (2) cradles (A) to desk end leg using (2)
¼-20 x 1" machine screws (H) per cradle (A).
3. Attach 1 return rail (YBRR_ _) to each
cradle (A) by first fastening 2 cradle clamp
brackets (B) loosely to each cradle using
(4) ¼-20 x
5
/
8
" machine screws (I).
NOTE: Return rails are 3" longer than the return
top width when connected to a 24"d main top.
Return rails are 6" longer than the return top
width when connected to a 27"d main top.
Return rails are 9" longer than the return top
width when connected to a 30"d main top.
NOTE: Rails are an ADDITIONAL 12"
long when return is connected to an
extension top or cabinet on free end.
For both rails, slide rail into cradle/clamp
assembly with rail paint holes facing up and
toward center of table desk assembly. Use
install gauge to locate the leg position on the
rail. See Install Gauge Guidelines. Tighten the
screws (I) in the cradle clamp brackets (B).
4. Insert (1) end cap onto each
rail with rubber mallet.
5. Install return rail hook top brackets
(D) to other end of each return rail.
6. Attach return rail hook top brackets (D)
perpendicular to and on top of main table
desk rail. Attach a return rail clamp bottom
bracket (E) with (1) ¼ -20 X 1" machine screw
(H) to each return rail hook top bracket (D).
NOTE: The horizontal rail cradles (A) at
the end of a desk receiving a return may
need to be repositioned; The outside
edge of the cradles (A) must be flush with
the end of the desk rails. This repositioning
is unnecessary for table desk cradles as they
are already positioned at the end of the rails.
NOTE: Main table desk top may need to
be loosened to allow clamp to be installed.
7. If applicable, add suspended storage
units at this time. (see suspended
storage installation instructions)
8. Position a W-bracket (F) on each return rail
halfway under the main table desk top.
9. Surfaces 48" wide and greater require a spacer
(C) for additional support. When necessary, a
spacer (C) should be placed between the top
of each rail and the underside of the return
top, centered on the width of the return top.
Spacers (C) are attached to the return top using
(1) #12 X ¾" black wood screw (G) per spacer.
10. Lay return top on return rail/leg assembly. Use
gauge to properly position top. See Install
Gauge Guidelines. Attach return top using (2)
#14 x 1" FH wood screws (J) per cradle into pre-
drilled holes in the underside of the return top.
11. Secure main table desk top and return top
to return rail W-brackets (F), using (4) #14
x 1" FH wood screws (J) per W-bracket.
12. Adjust glides as needed to level return.
7434100
Screw, SM, FLP 14 X 1 Type A CAD or Zinc
3AB4040
Screw, Mach, FLP 1/4-20 X 1
A.) 3AB4004* B.) 3AB4007* C.) 3AB401252
D.) 3AB4008* E.) 3AB4009* F.) 3AB4095*
J.) 7434100I.) 7189140H.) 7194140G.) 7196440