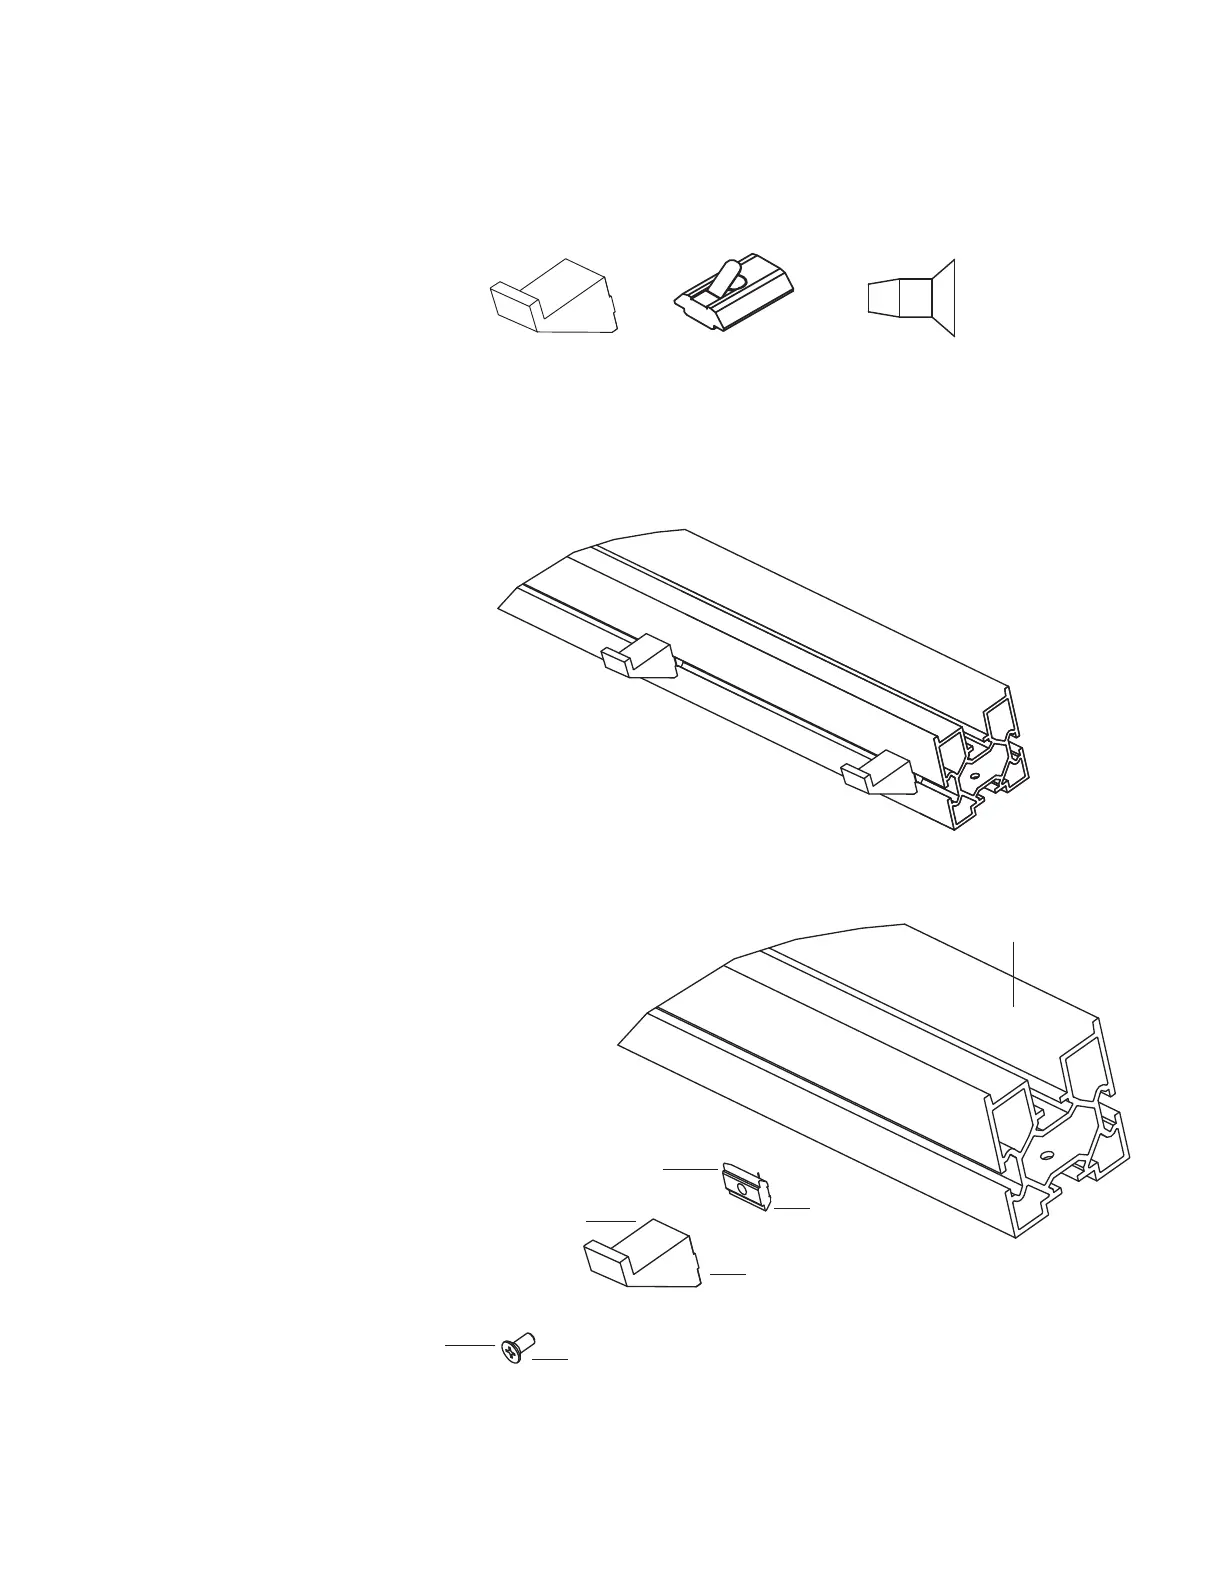
Beam Mounted Finger Bracket for Hinged Access Tops
STEPS:
NOTE: The number of finger brackets
required will vary based on the size of the
top to be installed. The appropriate number
of brackets will ship with the worksurface.
1. For each finger bracket (A) insert (1)
spring nut (B) into the horizontal slot
on the side of the center beam.
2. Align each finger bracket (A) with a
spring nut (B) and attach loosely with
(1) M6 x 14mm machine screw (C).
3. Slide the finger bracket assemblies along the
beam, spacing them evenly along the length
of the top, being sure to position two finger
brackets so they support the ends of the
hinged access door. If supplied, the 3rd finger
bracket should be located in the middle.
4. Tighten all the M6 x 14mm machine screws
(C) to secure the finger bracket’s positions.
(A) 3AB4058* (B) 3AB402196 (C) 3AB405640
Pattern Numbers Represented:
Overlay Hinged Access Tops, YPH__
Antenna Hinged Access Tops, YTH__
Antenna 120 Hinged Access Tops, YTH____
Parts List:
Stop, Flip Door- "Finger Bracket" (A)
Spring Nut (B)
M6 x 14mm Machine Screw (C)
Tools Needed:
Drill
Phillips #2 and #3 bits
Center Beam with (2) Finger
Brackets Installed
Exploded Finger Bracket Assembly
Step 1
Step 2
Step 2 and 4
Spring Nut (B)
Center Beam
Finger Bracket (A)
M6 x 14mm Machine Screw (C)