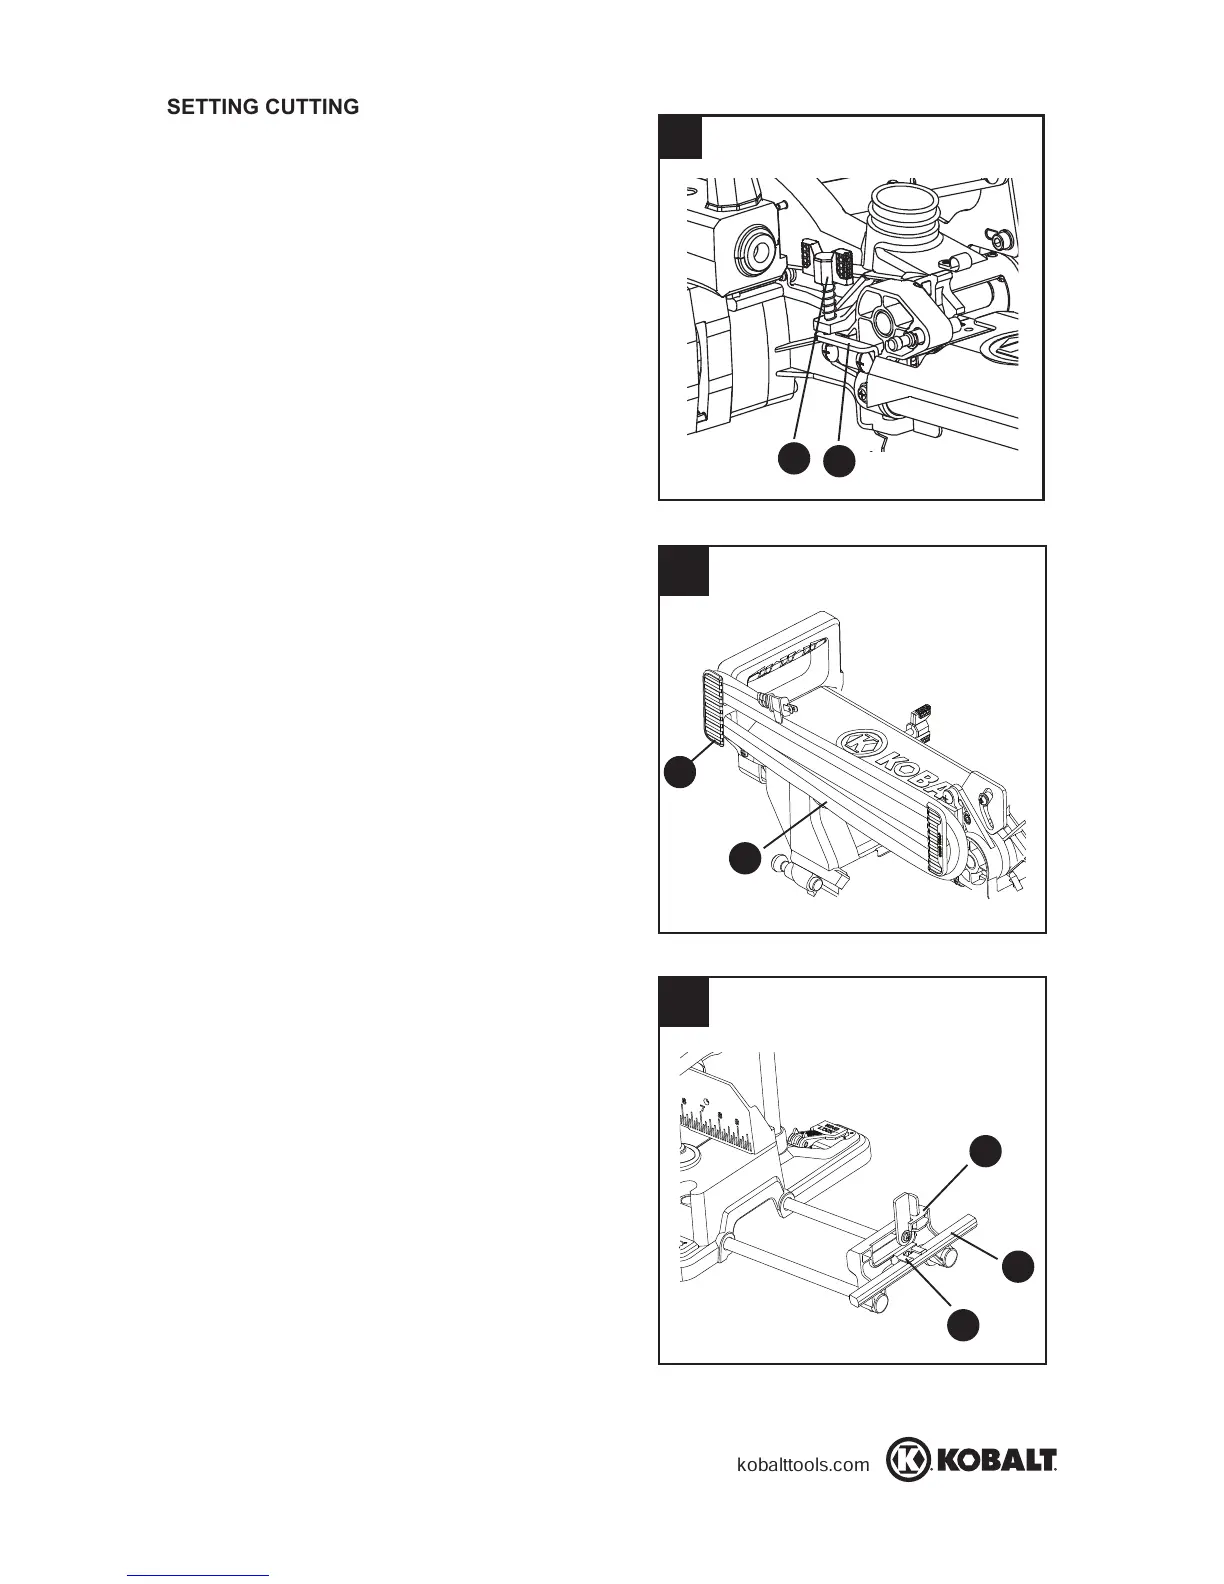
SETTING CUTTING DEPTH (FIG. 19)
The depth of cut can be preset for even and
repetitive shallow cuts.
● Adjust the cutting head down until the teeth
of the blade are at the desired depth.
● While holding the upper arm in that position,
turn the stop knob (1
) until it touches the
stop plate (2).
● Recheck the blade depth by moving the
cutting head front to back through the full
motion of a typical cut along the control arm.
MAXIMUM CUTTING DEPTH (FIG. 19)
The maximum depth travel of the cutting head
was set at the factory. Check to see that the
cutting head does not extend more than 1/4 in.
below the table insert and does not touch the
control arm throat or any part of the base or
table. If the maximum depth needs readjusting:
● Loosen the bolts of the stop plate (2).
● Move the cutting head down until the blade
extends just 1/4 in. below the table insert.
● Adjust the stop plate (2) to touch the bottom
of the stop knob (1) when the stop knob is
raised fully.
● Recheck the blade depth by moving the
cutting head front to back through the full
motion of a cut along the control arm. If the
blade touches the inside of the control arm,
readjust the setting.
POWER CORD STORAGE (FIG. 20)
For convenience and to prevent damage to the
power cord when the miter saw is not in use or
during transportation, the slide carriage has two
clamps on the left side for cord storage.
● Wrap the power cord (1) onto the storage
clip (2) when saw is not in use.
PENCIL STORAGE (FIG. 21)
Storage bracket (1) for the pencil (2) (not
included) is located on the right extension
wing (3) of the miter saw.
NOTE: Storage for the blade wrench is shown
on page 12.
19
20
1
2
21
1
3
2
1
2
 Loading...