TP-6322 9/0434 Section 6 Service Part Replacement
6.3.3 Reassembly, 200 Amp Models
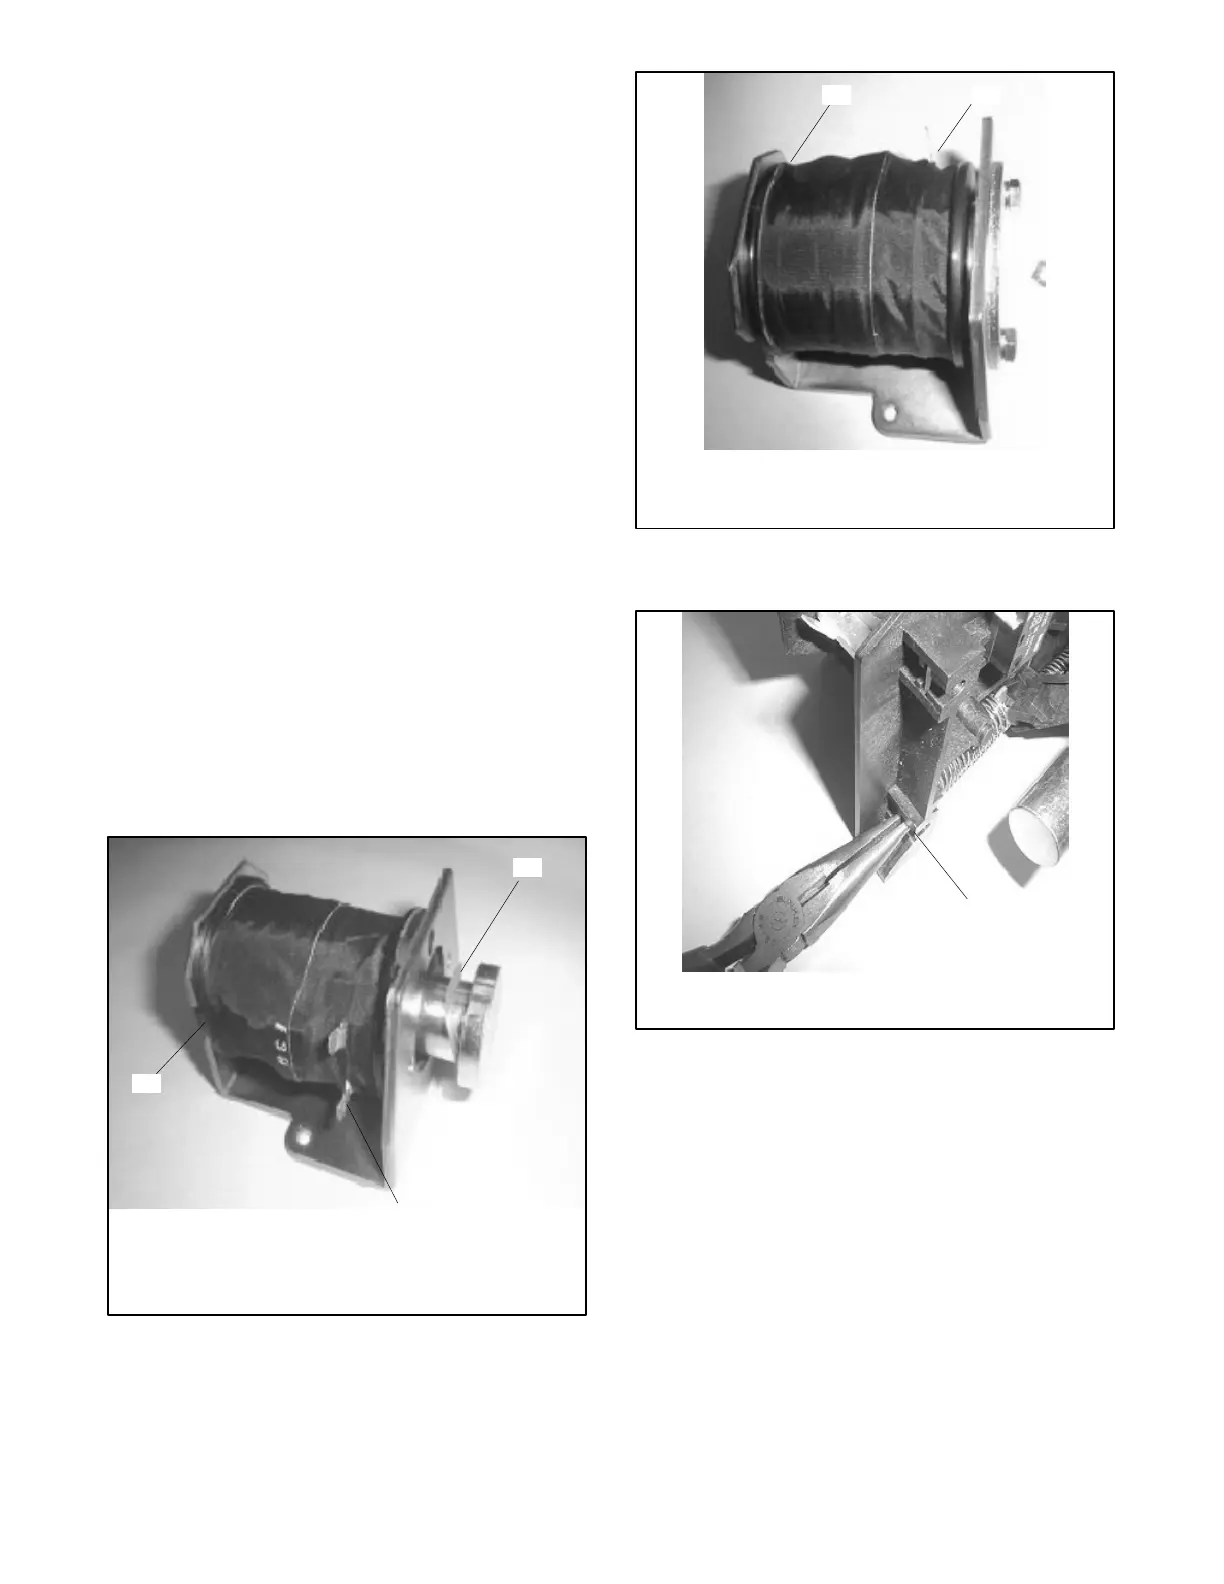
1. Position the coil in the bracket with the tab on the
top of the coil and operating circuit terminal
oriented as shown in Figure 6-4 for the Normal
source coil or in Figure 6-5 for the Emergency
source coil.
2. Insert the steel core with washer into the coil. See
Figure 6-4.
3. Install the core plate and tighten the two core plate
screws. See Figure 6-2.
6.3.4 Solenoid Assembly Installation
1. Insert the two square nuts into the grooves on the
frame. See Figure 6-6.
2. Align locating hole in the solenoid bracket with the
locating protrusion in the frame. See Figure 6-7.
3. Install and tighten the two mounting screws. Use
pliers to hold the nuts while inserting and tightening
the screws. See Figure 6-8.
4. Operate the contactor using the manual operating
handle to verify that the mechanism operates
smoothly without binding.
5. Follow the instructions under After Service in
Section 6.1.
1. Core and washer
2. Operating circuit terminal
3. Coil orientation tab, Normal source coil
1
tp5992
2
3
Figure 6-4 Coil Assembly, Normal Source Coil
Shown (note the coil orientation)
1. Coil orientation tab, Emergency source coil
2. Operating circuit terminal
2
tp5992
1
Figure 6-5 Emergency Source Coil Assembly (note
the coil orientation)
1
tp5992
1. Insert square nuts into the grooves in the frame
(two locations)
Figure 6-6 Reinstalling the Coil Assembly Nuts

 Loading...

