TP-6322 9/04 37Section 6 Service Part Replacement
D Don’t bend or drop the circuit board or any of its
components.
D Don’t strike the circuit board or any of its components
with a hard object.
D Clean dusty or dirty circuit boards only with a vacuum
cleaner or dry brush.
D Never attempt component-level circuit repairs.
D Never remove or install a circuit board with power
connected.
D Label wiring when disconnecting it for reconnection
later.
6.5.1 Controller PCB Removal
1. Disable the generator set and disconnect all power
sources as described in Section 6.1 before
opening the transfer switch enclosure.
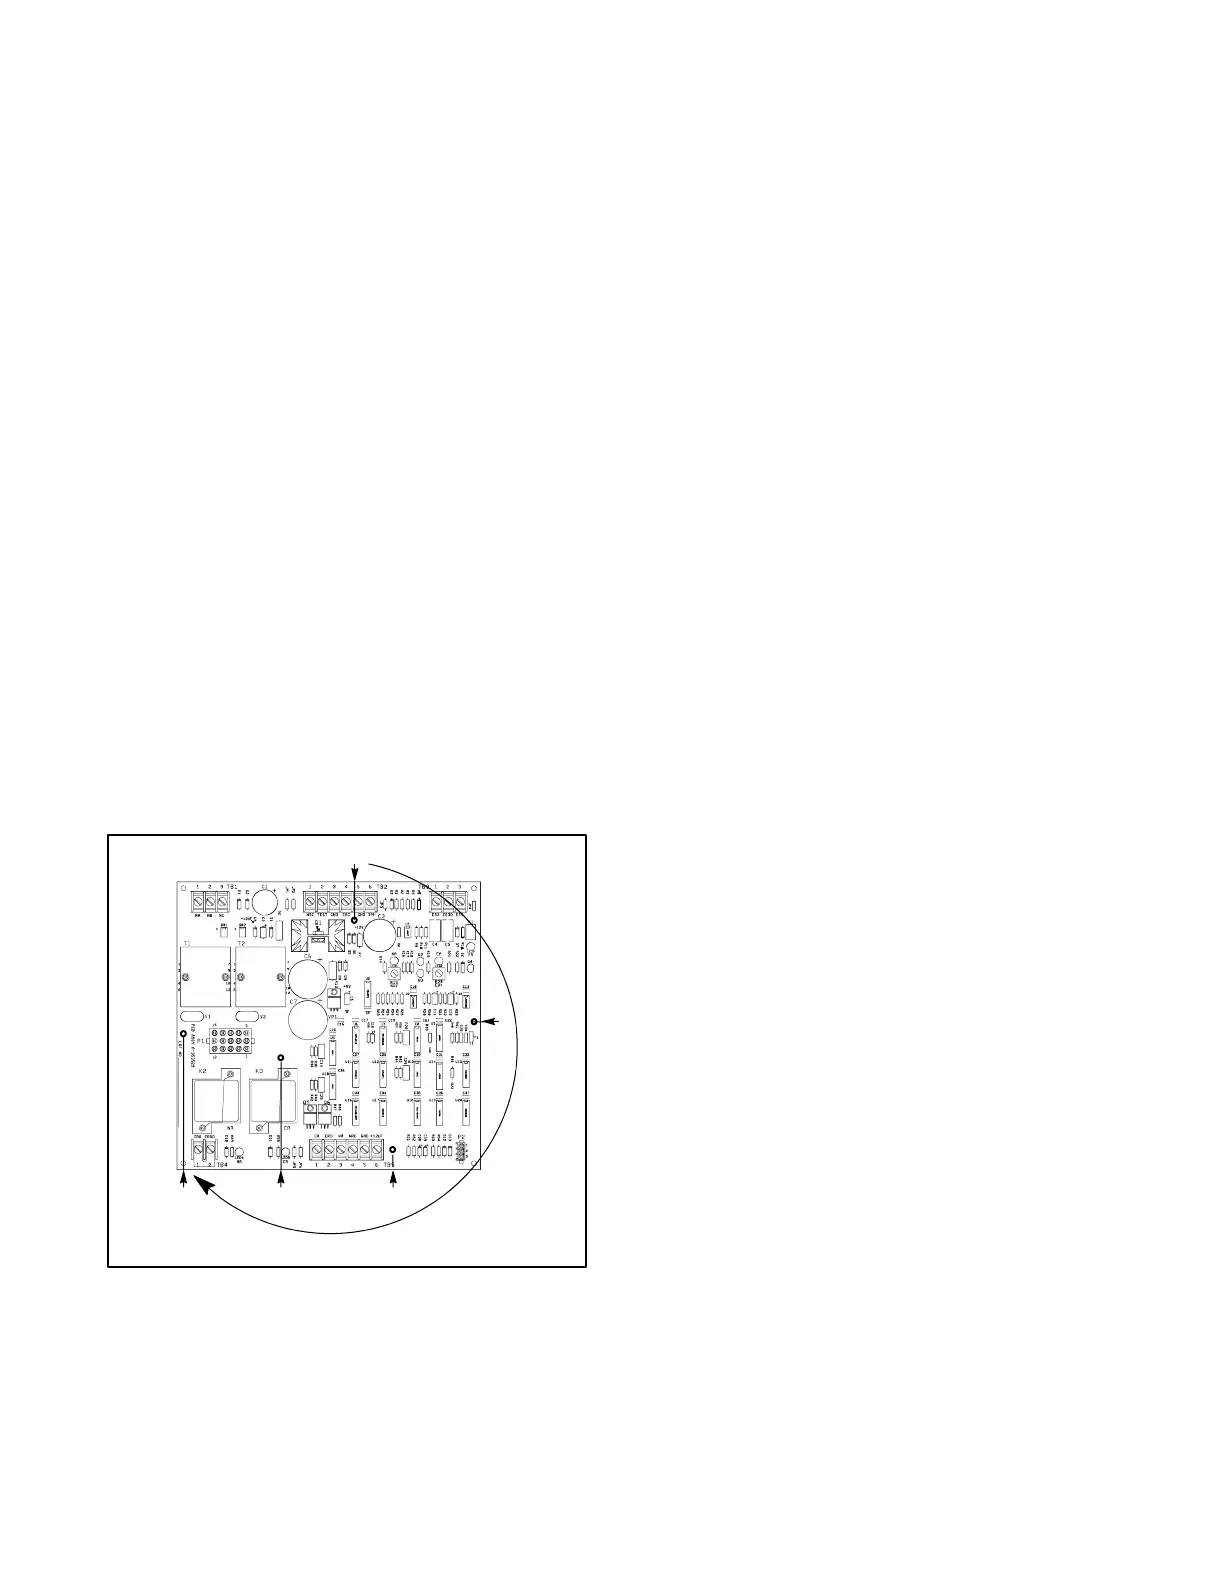
1. Remove the four screws located at the four corners
of the main c ontroller circuit board assembly.
2. Five push-on PCB standoffs at various locations on
the mounting plate also holds the circuit board.
Carefully pry the circuit board away from each
standoff at the locations shown by the arrows in
Figure 6-13. Pry near the standoff located below
terminal strip TB2 first and work clockwise.
A-353529
Figure 6-13 PCB Removal
6.5.2 Controller PCB Installation
1. Position the circuit board over the push-on PCB
standoffs on the mounting plate.
2. Gently push the circuit board onto the standoffs.
3. Replace and tighten the four screws at the corners
of the circuit board.
4. Follow the instructions under After Service in
Section 6.1.
6.6 Other Service Parts
The removal and installation of other service parts listed
in Section 7, such as plug-in relays, auxiliary switches,
brackets, and other hardware, for which removal and
installation instructions are not previously given is
covered by the following generic procedures.
6.6.1 Other Service Part Removal
1. Disable the generator set and disconnect all power
sources as described in section 6.1 before opening
the transfer switch enclosure.
2. Disconnect wiring from the part(s), noting the
locations from which wiring was removed for later
reconnection. Tape and label the wires.
3. Note the position of the part(s) and loosen or
remove hardware that holds the part(s) in place.
Note the location, type, and condition of hardware
removed and compare it with the parts list.
Replace damaged or missing hardware.
4. Carefully remove the part(s) from the unit. Gently
rock plug-in parts, such as relays, from side to side
while pulling straight out to remove them without
bending circuit boards.

 Loading...

