KORG D12 Guided Tour
18
Tip: Once you’ve edited an effect, the display will indicate “EDIT” to the left of the effect name. You can then to the “Store”
button in the display, press ENTER, to “U001”, rotate the [DIAL] and select one of 128 user effect locations: to
“Exec.” and then press ENTER to save to a new user location. Note that the factory user effects are identical to the preset
effects. For more information, see the D12 Owner’s Manual, page 46.
Work with the Counter:
1. Press [STOP] to stop playback, and press [IN/LOC1] to reset the song to the beginning.
2. Press to highlight “000:00: 000 on the “Counter”, then rotate the [DIAL] until the “Counter” reads “001:03:147”(you’ll need to
set the “Counter” position to “001:03:000” and then use the [DIAL] to set to “147”).
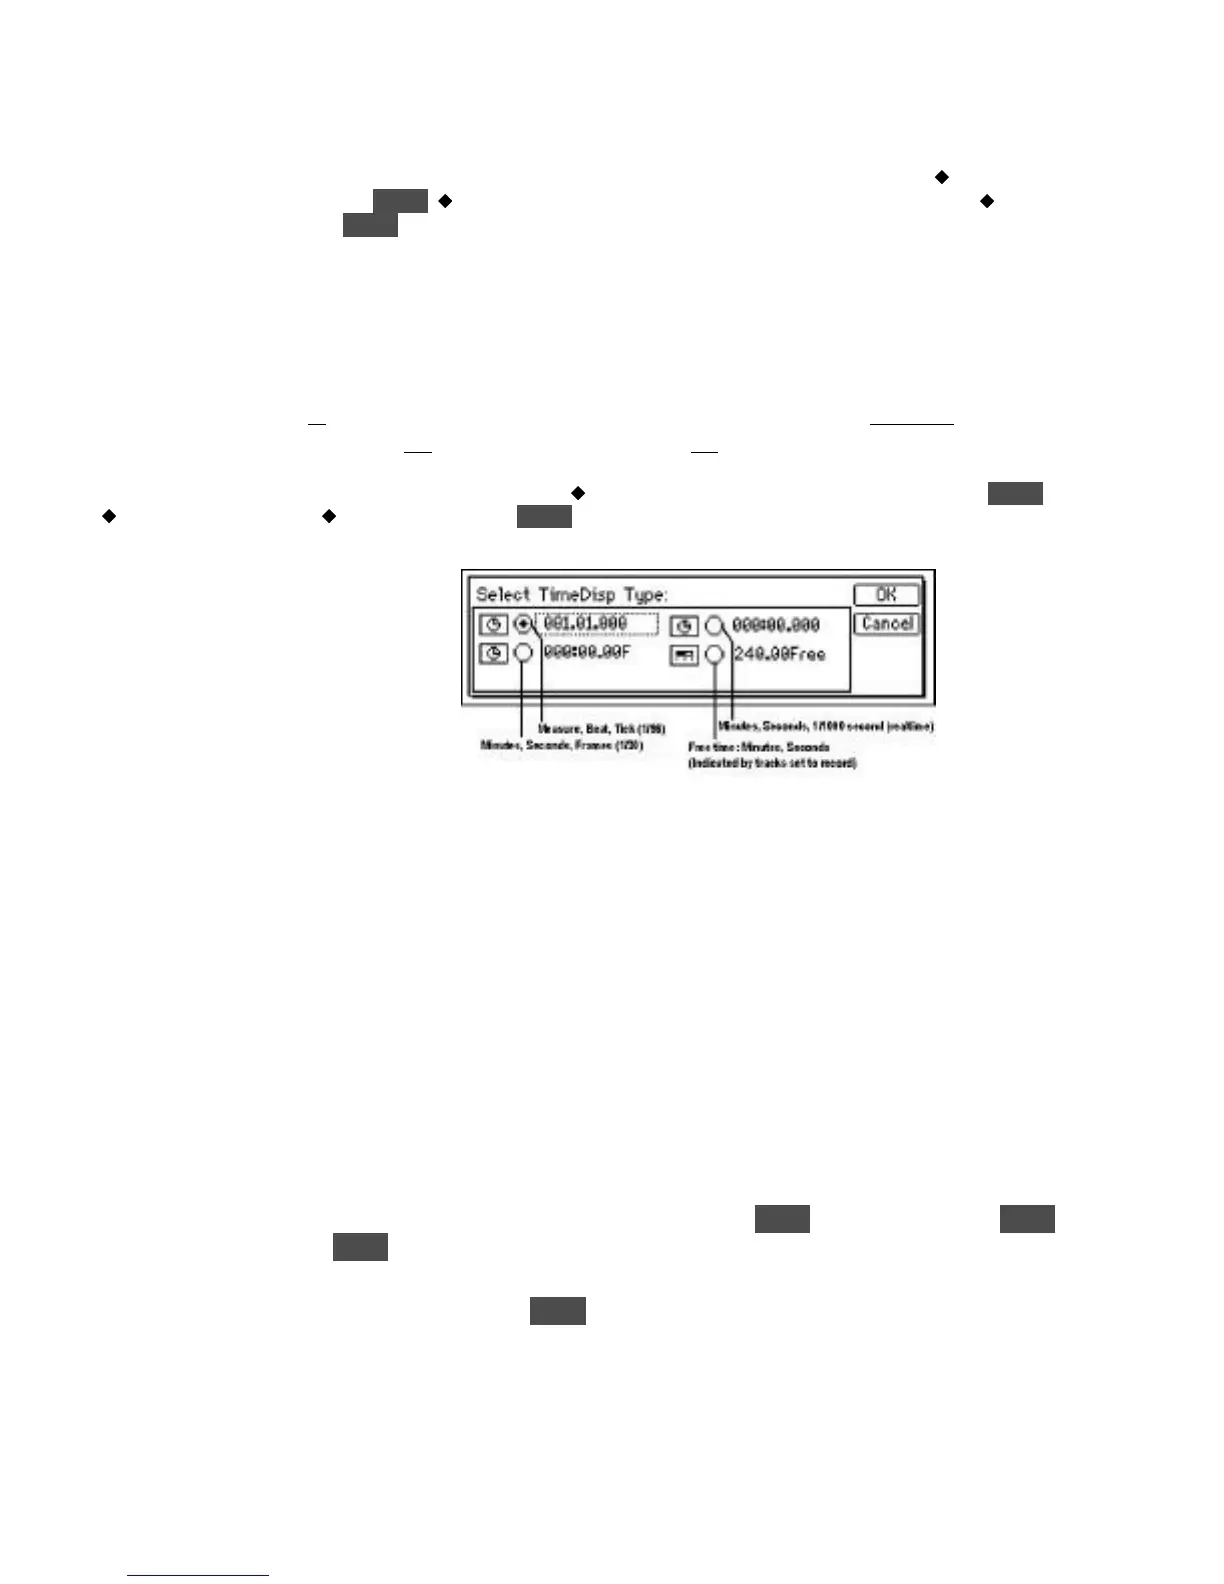
The Counter display type can be set to read in four formats: to the “Clock” icon to the left of the “Counter”, press ENTER,
to the desired display type, to “OK”, and then press ENTER:
Note: In addition to the Counter display, the display can be set to read in Tempo, Mark, or Scene formats, by selecting from the
popup menu below the song name edit cell.
Note: If you’ve just made changes to the “Counter” settings, reset the counter to read in Minutes, Seconds, 1/1000 of second
(realtime) as originally set. Also note that the Counter time location display defaults to Measures, Beats, Ticks when a new
song is created.
Work with the synth bass track (Track 4):
1. Press the Channel 4 (synth bass track) [TRACK STATUS] key so that it lights green (un-muted). Tracks 1, 5, 6, 7/8 should
also be un-muted (TRACK STATUS keys lit green).
Scrub the audio to find and set a precise locate point:
2. Press [SCRUB], then u to the
>
> popup button in the upper-left of the display. Press ENTER, then u to “Trk4”, press ENTER
and u to “OK”, then press ENTER.
3. Rotate the [DIAL] left or right to see (and hear) just the synth bass track’s waveform. You can u to the “ZOOM” buttons to the
left of the waveform display, and repeatedly press the ENTER key to resize the waveform view, then u to the “Loc:” position
(upper-left) and rotate the [DIAL] to the right or left to continue scrubbing the audio.
4. Rotate the [DIAL] until the “crosshair” is at approximately “001:03:147”).
5. Press [STORE], then press [TO/LOC3]. You can use this new locate point whenever you like, to reset to the stored locate point
for this track.