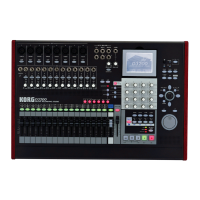
KORG D12 Guided Tour
26
Rename the song:
3. u to the “Rename” button in the display and press ENTER. (You’ll name the song “My Demo”).
4. u to the “ClearAll” button and press ENTER, then u to the “A…/ a…” button and press ENTER to insert letters in the name
cell (press ENTER repeatedly to select between upper and lower case characters, then u to the
>
> button and press ENTER to
move through the name edit cell). Note: You can also use the [DIAL] to select characters when highlighting the
>
> button.
5. When you've finished inputting characters, u to the “OK” button and press ENTER to finish naming the new song.
Basic Recording
To get started, you'll use the new song you just created, and record basic tracks. For the following exercises, you can use the built
in microphone and headphones. You can use an external mic, electric guitar or another mono output instrument if you like,
but to make this demo quick and easy, the steps in each exercise refer to the use of the internal microphone:
Note: The CURSOR key is indicated by
Assign the built-in microphone and set the input level:
1. Connect headphones to the front panel PHONES jack, then lower the front panel PHONES LEVEL knob to the (0) position. Set
the rear panel MONITOR knob to the minimum (0) position (alternatively, you can zero-out the level or power-off your external
monitoring source).
2. Lower the MASTER Fader and all the Channel Faders to "oo".
3. Set the front panel MIC INPUT switch to 1 (the MIC LED will light). This assigns the internal mic to channel 1.
4. Press the Channel 1 [TRACK STATUS] key 2x, until the LED lights RED (Record status).
5. Raise the Channel Fader for TRACK 1 to the "0" position, and set the PAN knob to center.
6. Raise the MASTER Fader to the "0" position.
Check the Pre Fader Level and adjust the input signal:
7. Press [METER/TRACK VIEW].
8. u to the
>
> popup button in the upper-left of the display and press ENTER.
9. u to “PreFaderLev” and press ENTER, then u to the “OK” button and press ENTER.
10. Now speak into the internal microphone, and watch the “Pre Fader” level meter as you speak.
11. Rotate the INPUT 1 TRIM knob (front panel) as high as possible without allowing the LED to light red (input clipping), and raise
the PHONES LEVEL knob to a comfortable listening position.
12. If the input signal reaches the “CLP” line on the level meter, lower the INPUT 1 TRIM knob. Set plenty of input signal (-6dB),
without clipping.