*
If
the
MIDI
device
to be
used
supports
song
select
or
song
position
pointer
functions,
the
sequencer
can
be
started
from
the
same
point
in
the
same
song
even
when
changing
measures.
Real Time Recording
When
recording
a new song,
first
erase
the
data
of
the
previous
song by using F 3 - 2,
INITIALIZE
SONG
and
set
the
time
signature
.
1.
Set
the
mode
(
[AJ
) to RIP
and
select
the song (
[m
) and the
track
(
[g)
to be recorded.
Make
certain
that
the MI
DI
channels
of
the
external
keyboard
and the
track
are the same.
2.
Set
the
tempo (
[g]
)
of
the song and
set
the
Program
([El
)
and
the
volume
(
[Q]
)
of
the track.
3.
Press
the
START/STOP
key
after
pressing
the
REC
key; it will
light
up.
4.
Recording
starts
after
a
lead-in
of
two
measures
. In
addition
to
external
data
from
MIDI,
foot
controller,
tempo
(
~
)
(over
a
range
of
-50% to +50% ),
Program
change
([El),
and
volume
(
[QJ
),
are
recorded.
If
other
tracks
have
been
already
recorded,
they also are
played
at
the same time.
5.
The
measure
is
reset
when
stopping
the
recording
by
pressing
the
START/STOP
key. A
recorded
song
can
be
played
back
immediately
by
pressing
the
START/STOP
key
again
.
When
re-recording,
press
the
ST
ART/STOP
key
after
pressing
the REC key.
*
*
*
*
*
When
recording
on
tracks
whi
ch
already
have
recorded
song
data,
the
previous
data
is
erased
.
Setting
resolution
or
metronome
to
ON/OFF
in
the
next
page
affects
the
recorded
tracks
.
Recording
in
the
R/P
mode
is
always
executed
from
the
first
measure.
(Recording
from
the
middle
can
be
done
by
punch-in
recording
.)
Ot
her
modes
or
functions
cannot
be
selected
while
recording.
Tempo
change
affects
all
8
tracks
, no
matter
on
what
track
it
is
recorded.
(Therefore,
unnatural
and
unexpected
effects
may
result
when
several
tracks
include
tempo
change.)
NOTE: Memory space equal to 1 step
is
taken up by a single bar line. Memory of 2 steps
is
taken up by notes
which bridge over the bar line.
NOTE: After touch and other controller data comsume a great deal of memory. It
is
recommended to set the
after touch
in
the GLOBAL Mode function F 5-2, MIDI Filtering, to DISABLE, especially when recording with a
Program that does not use after touch or other controllers.
Punch-In Recording
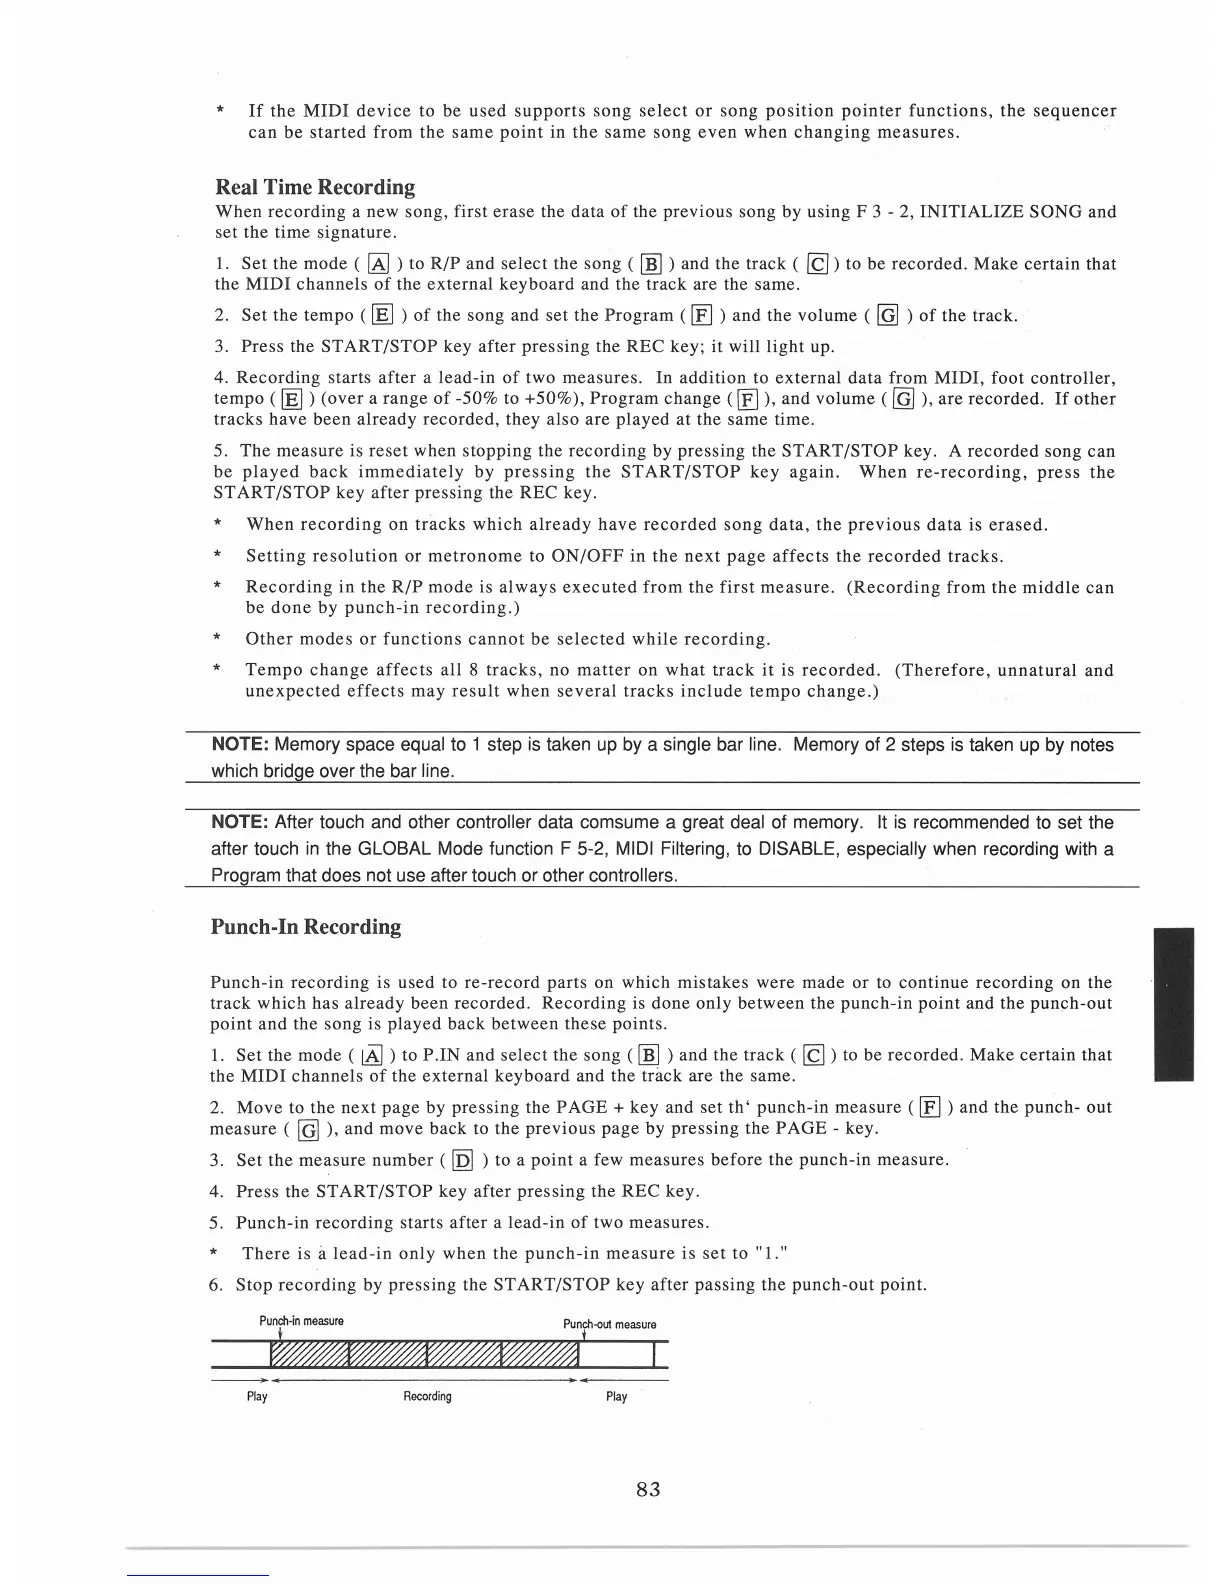
Punch-in
recording
is used to
re-record
parts
on which
mistakes
were
made
or
to
continue
recording
on
the
track
which
has
already
been
recorded.
Recording
is done
only
between
the
punch-in
point
and the
punch-out
point
and
the song is
played
back
between
these
points.
1.
Set
the mode (
lAJ
) to
P.IN
and
select
the song (
[m
) and the
track
(
[g)
to be recorded.
Make
certain
that
the
MIDI
channels
of
the
external
keyboard
and the
track
are the
same
.
2.
Move
to
the
next
page
by
pressing
the
PAGE
+key
and set
th'
punch-in
measure
([El
) and the
punch-
out
measure
(
[Q]
),
and
move
back to the
previous
page
by
pressing
the
PAGE
- key.
3.
Set
the
measure
number
(
[Q]
) to a poi
nt
a few
measures
before
the
punch-in
measure
.
4.
Press
the
START/STOP
key
after
pressing
the
REC
key.
5.
Punch-in
recording
starts
after
a
lead-in
of
two
measures
.
*
There
is a
lead-in
only
when
the
punch-in
measure
is
set
to
"1."
6.
Stop
recording
by
pressing
the ST
ART/STOP
key
after
passing
the
punch-out
point.
Punch-in
measure
Punch-out
measure
. '
~~~~I
Play
Recording
Play
83