13
Getting ready
The illustration below shows some typical connections for the microSAM-
PLER.
Turn off the power before you make connections. Careless operation may
damage your speaker system or cause malfunctions.
1. Connecting your monitor amp or mixer etc. to the
output jacks
Connect the microSAMPLER’s OUTPUT [L/MONO], [R] jacks to the
INPUT jacks of your mixer or powered monitors.
If you’re using a monaural connection, connect the OUTPUT [L/MONO]
jack.
2. Connecting your audio device to the input jack(s)
If you want to sample the sound from an audio device or rhythm machine,
connect your device’s OUTPUT jacks to the AUDIO IN [L/MONO], [R]
jacks, and set the AUDIO IN [ /LINE] switch to the “LINE” position
(
☞
p.12).
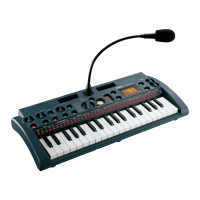
3. Connecting the mic
A mic is included with the microSAMPLER.
To attach the mic, connect it to the front panel AUDIO IN [ MIC] connec-
tor.
If you want to use a mic to sample your voice, connect the mic to the AUDIO
IN [ MIC] jack, and set the rear panel AUDIO IN [ /LINE] switch to the
“” position (
☞
p.12).
When disconnecting the mic, grasp its connector and pull it out.
Do not use excessive force when connecting or disconnecting the mic.
Do not apply excessive force to the gooseneck of the mic.
Be aware of the mic’s output level when making connections.
4. Connecting your MIDI equipment and/or computer
Make these connections if you want to use the microSAMPLER’s keyboard
or controllers to control an external MIDI sound module, or if you want to
use another MIDI keyboard or sequencer to play the microSAMPLER’s
sounds (
☞
p.42 “Using the microSAMPLER with other MIDI devices”).
Making connections
MIDI IN MIDI OUT
USB
Computer
Mic
Headphones
Monitor speakers
(with built-in amplifier)
to AC outlet
AC adapter
(included)
MIDI keyboard, sound
module, rhythm machine,
etc.
Getting ready