Reference guide
33
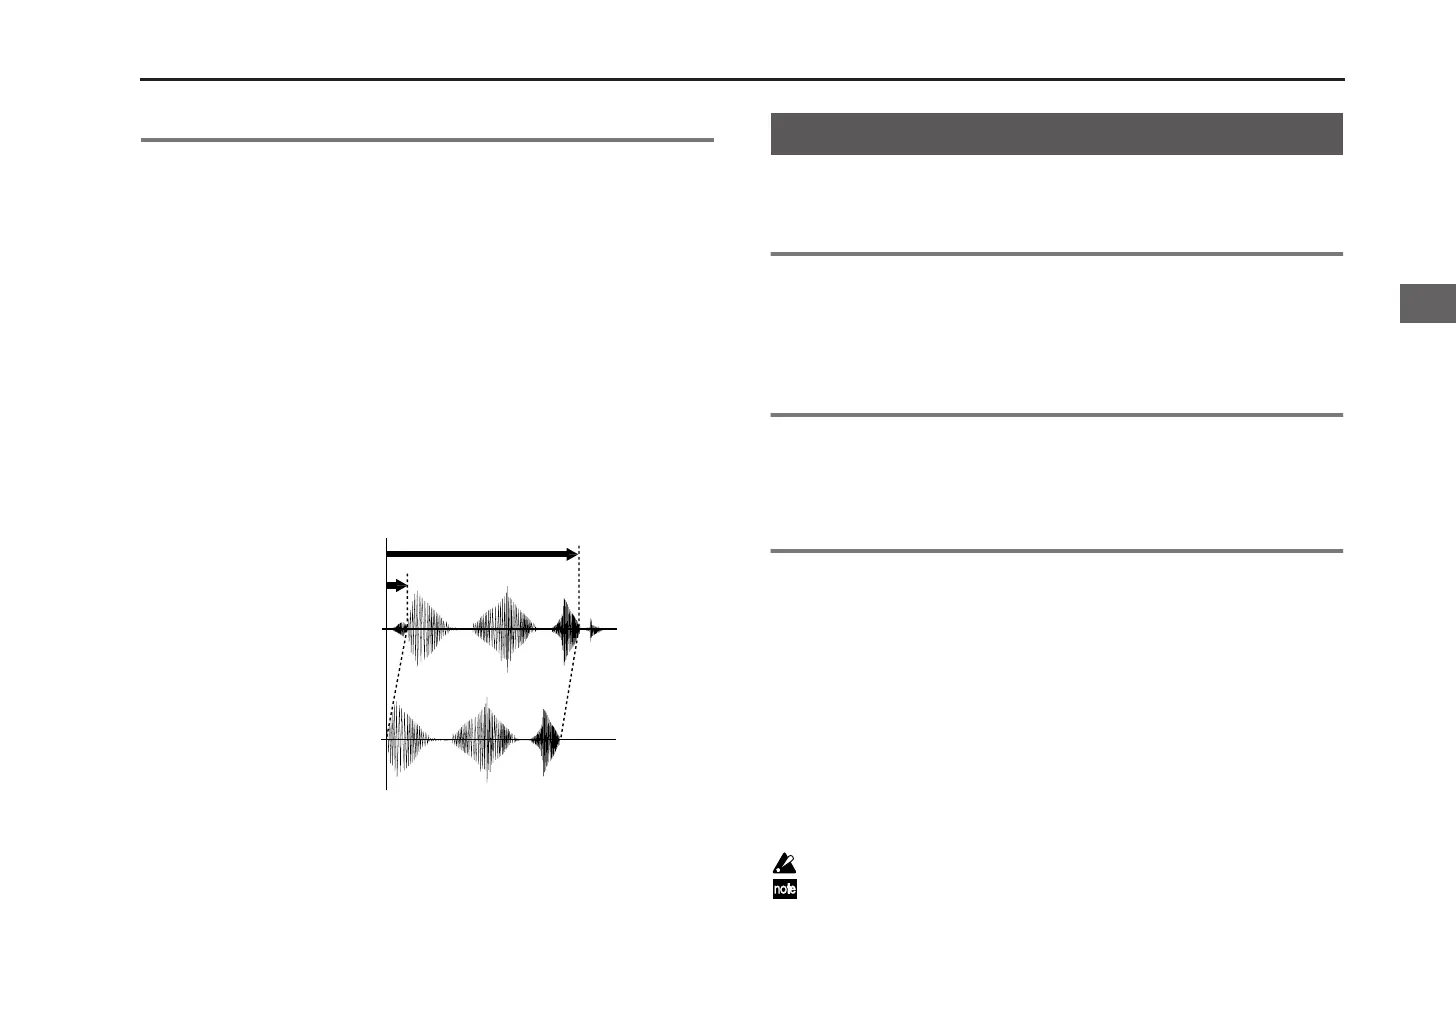
7. TRUNCATE
TRUNCATE
For the current sample (☞p.18) of the selected bank, this operation cuts the
portions before the start point and after the end point.
1. Press the [EDIT] button to make it blink.
If the [EDIT] button is not blinking, press it several times until it blinks.
2. Use the [PARAMETER/FX CONTROL 1] knob to select the “SAMPLE”
page.
3. Press the [EDIT] button to make it light.
4. Use the [PARAMETER/FX CONTROL 1] knob to select the “TRUN-
CATE” page.
5. Press the [ENTER/SHIFT] button.
6. When the display asks “SURE?,” press the [ENTER/SHIFT] button once
again to confirm. If you decide to cancel, press the [EXIT] button to
return to step 5.
When the sample data has been truncated, the screen will indicate
“COMPLETE.”
The pattern sequencer can record and play back trigger data in Keyboard
mode and Sample mode.
1. About patterns
Each bank holds sixteen patterns. Each pattern can be 1–99 measures long,
and one bank can contain a total of approximately 64,000 notes (a pattern
can be up to approximately 16,000 notes).
You can use patterns to create rhythm patterns by combining phrases you’ve
sampled, or to create simple songs.
2. Pattern recording method
Patterns are recorded using “realtime recording,” which records your per-
formance just as you play it. When you record into a pattern that already
contains data, the additional performance will be combined (overdubbed)
together with the existing material.
3. Recording a pattern
1. Press the [REC] button so that the microSAMPLER is in standby mode.
The [PLAY/STOP] button and [REC] button will blink.
2. Use the [PATTERN] dial to select the pattern (1–16) that you want to
record.
3. Use the [PARAMETER/CONTROL 1] knob to select the pattern
sequencer settings page, and use the [VALUE/CONTROL 2] knob to
specify the value.
4. When you’ve finished making pattern sequencer settings, press the
[PLAY/STOP] button or the [REC] button to start recording.
5. Press the [PLAY/STOP] button to stop recording and playback.
If you instead press the [REC] button at this time, recording will stop but
the pattern will continue playing. To stop playback, press the [PLAY/
STOP] button.
You cannot operate wIth [LOOP HOLD] button.
You can also make pattern sequencer settings by pressing the [EDIT] button
to access “PTRN SEQ.”
0
START
END
Before truncation
After truncation
Pattern sequencer
Reference guide