Audio recording Recording procedure
97
4. If the level is still not high enough, increase the
Recording Level using the on-screen slider.
Again, the goal is to get the level as high as possible without
activating the CLIP! or ADC OVERLOAD! messages.
Tips for eliminating distortion when using the
analog inputs
If sound from the analog inputs is distorted, but the CLIP!
message doesn’t appear, it’s possible that distortion is
occurring at the analog input stage, or that distortion is being
caused by the settings of the internal effects.
If the “ADC OVERLOAD!” message appears above the
Recording Level
meters, the distortion is due to excessive
levels at the input. In this case, lower the output level of the
external audio source, or adjust using the Analog Input Setup
dialog (SHIFT button and AUDIO IN button) so that this
message does not appear.
If there is distortion, but the “ADC OVERLOAD!” message
does not appear, it’s possible that the distortion is being
caused by the settings of the internal effects. To solve this
problem, either lower the input
Level
, or adjust the effects
settings (such as changing the individual effect Input Trim
parameters).
Examples of audio track recording
Recording an external input on audio track 1
In this example, we’ll explain how a guitar connected to the
Audio Input 1 jack can be recorded on audio track 1.
Recording and playback on an audio track can occur until
the end of the master track. You cannot record for longer
than 80 minutes.
Connect your guitar
1. Connect your guitar to the rear panel Audio Input 1
jack.
Select the LINE position using the Analog Input Setup
dialog (SHIFT button and AUDIO IN button), and set the
Analog Input Gain at about the center.
If you connect a guitar with passive pickups (i.e., a guitar
that does not contain a preamp), you will be unable to
sample it at the correct level because of the impedance
mismatch. Such guitars should be routed through a
preamp or an effect unit first, and then connected to the
NAUTILUS.
Setup
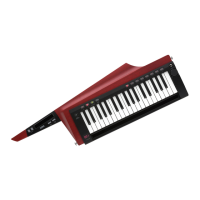
2. In the Home– Audio Input Sampling page, set the
Audio Input parameters as described below.
Use Global
setting
Off
Audio In
: On
– INPUT 1 –
Bus Select
: Off
Pan
: L000
Level
: 127
REC Bus
: Off
Note:
The meter to the left of the
Level
fader shows the
signal level immediately after A/D conversion,
before
the
Level
control. Changing the
Level
will not affect the
meter.
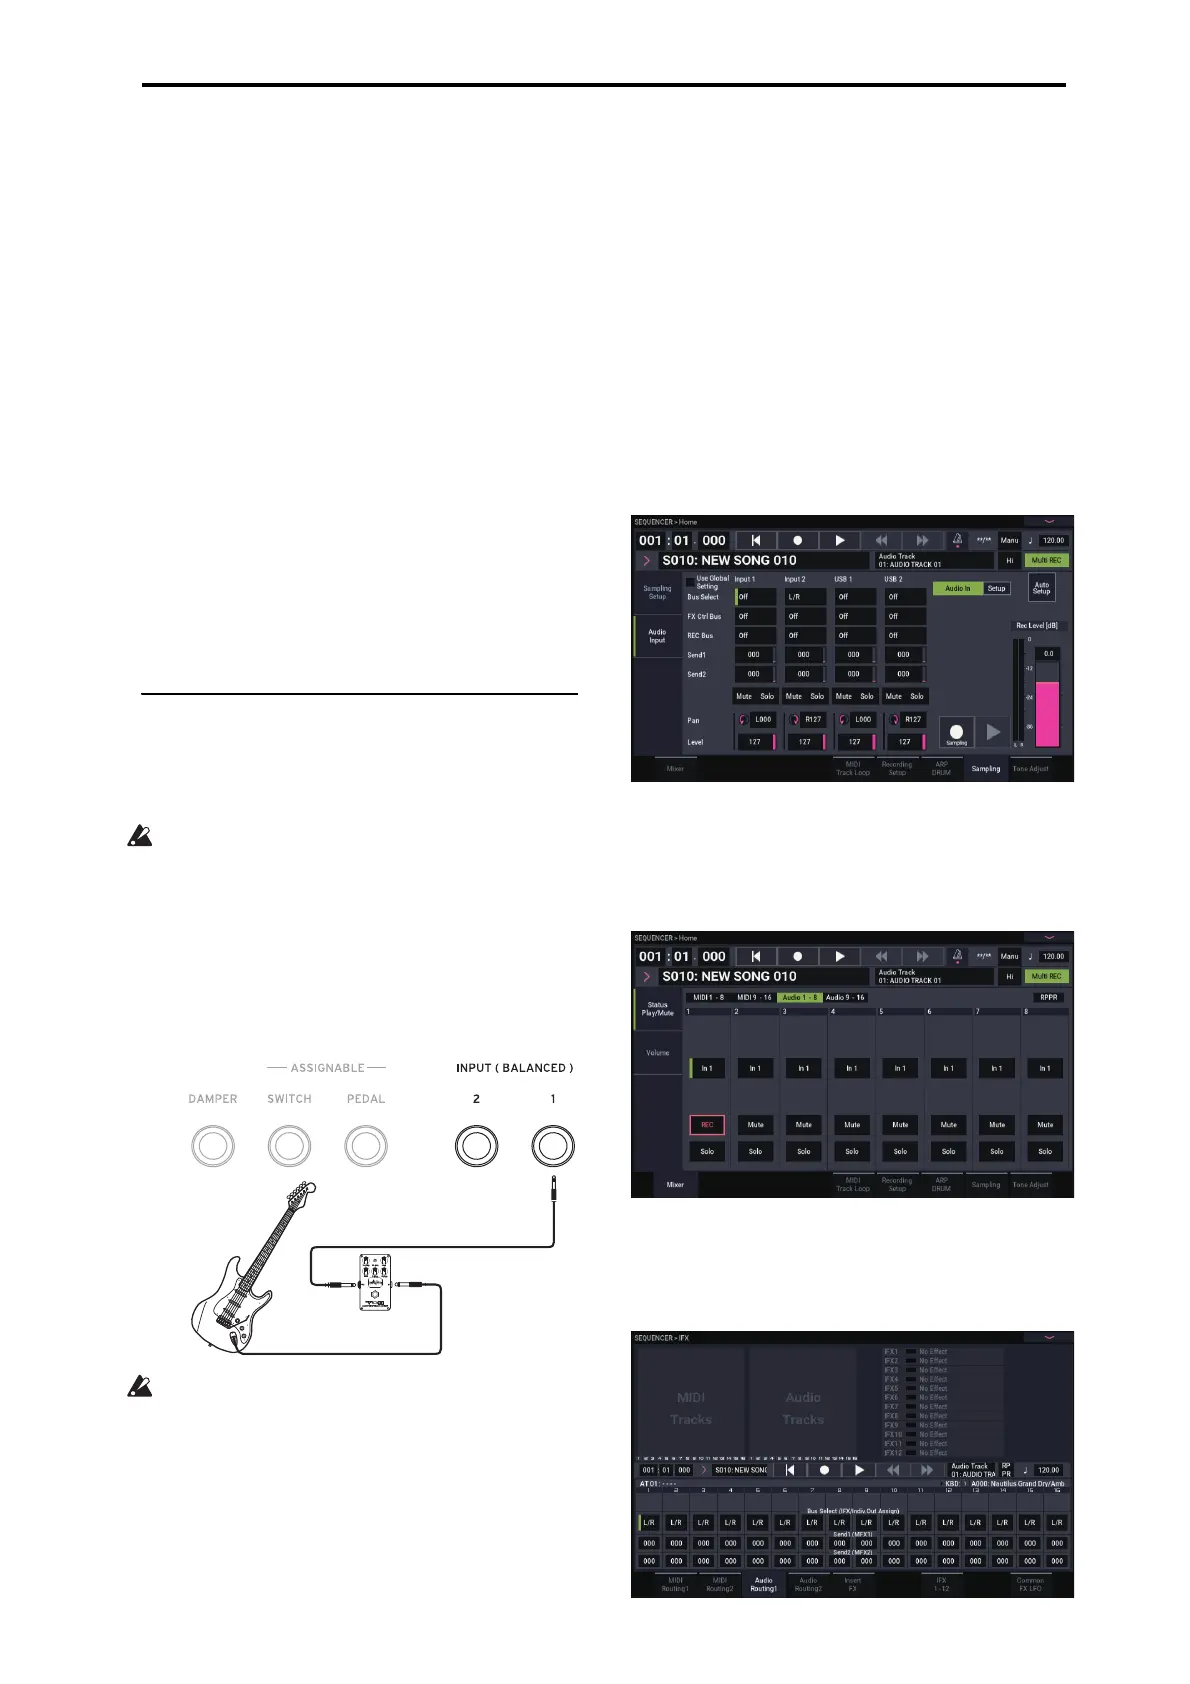
In the Home– Mixer page Audio Track, use
REC Source
to select Audio Input 1 (In 1), so that the signal from
Audio Input 1 will be recorded directly on audio track 1.
Audio Track 1
REC Source
: Audio Input 1 (In 1)
Audio Track 1
Mute/REC
: REC
Go to the IFX– Audio Routing1 page.
Set the output for Audio Track 1 as follows.
Bus Select (IFX/Indiv. Out Assign)
: L/R
Send1 (MFX1)
and
Send2 (MFX2)
: 000
 Loading...