Introduction to NAUTILUS
20
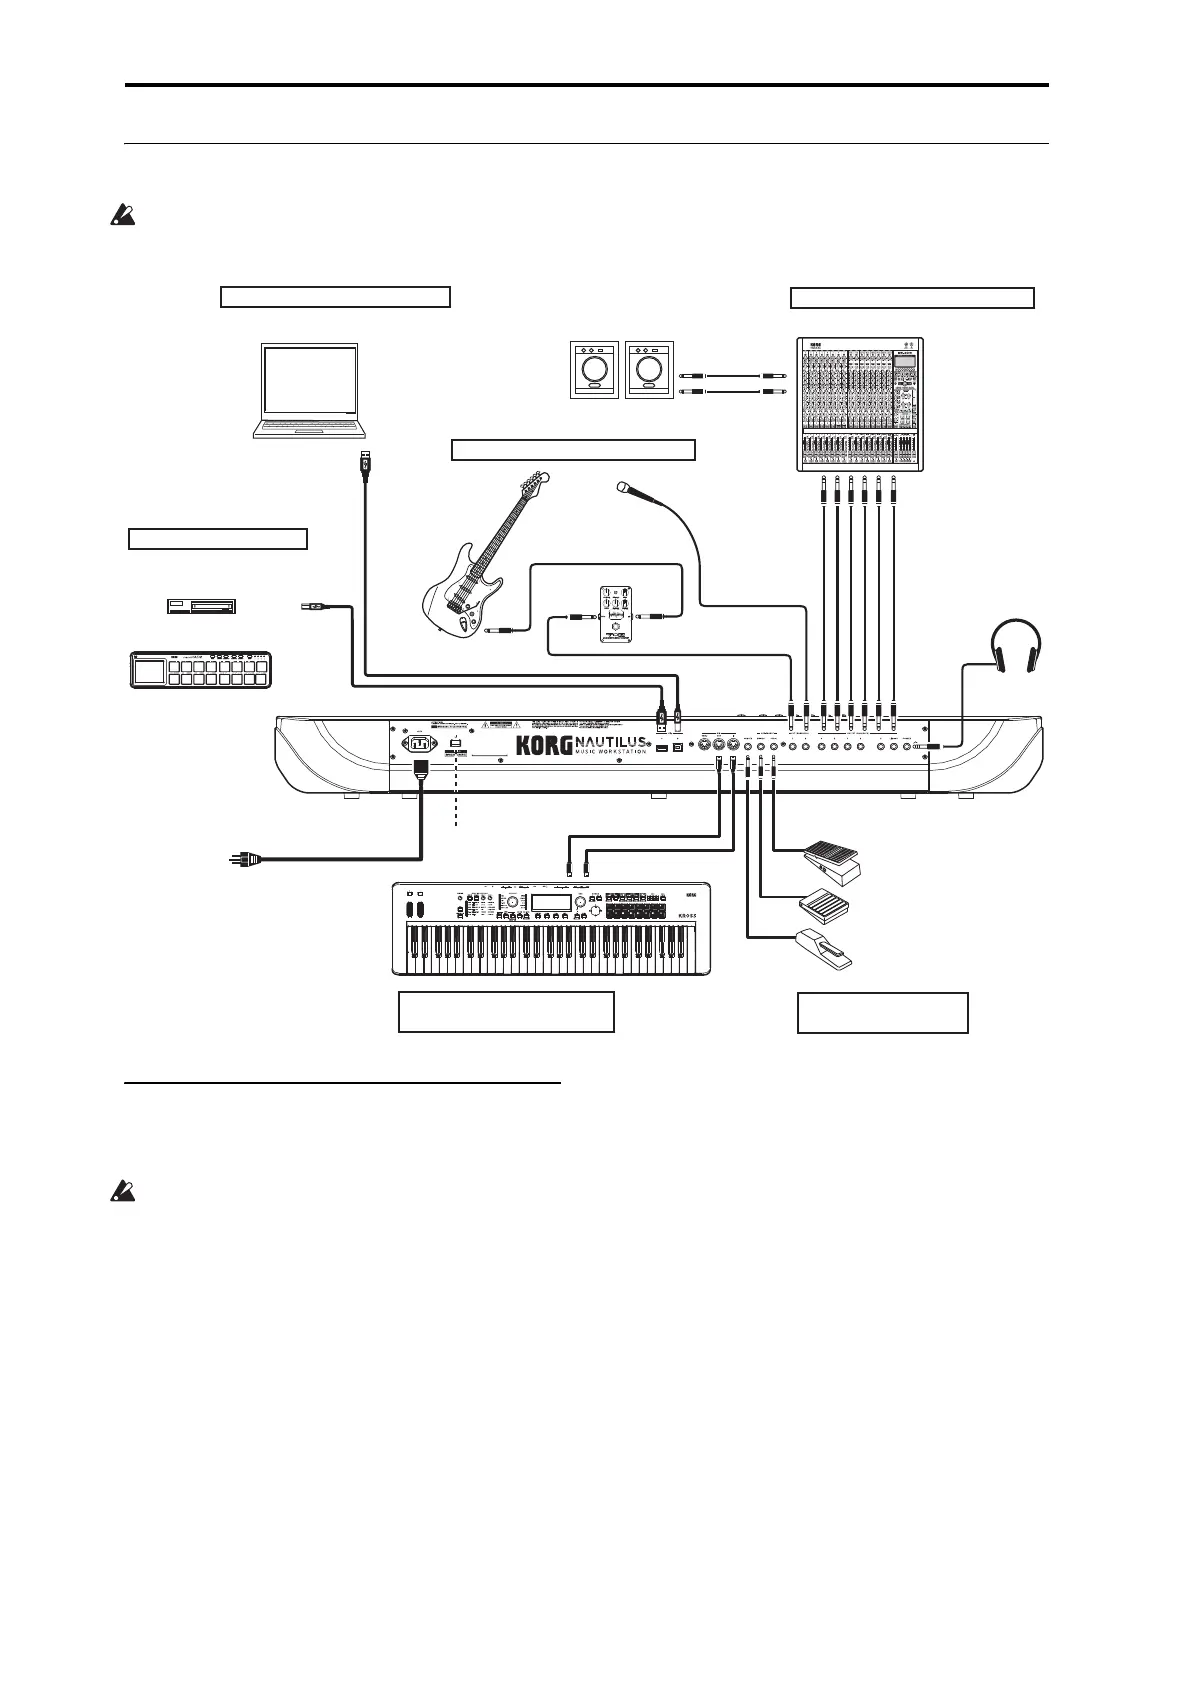
Connections
Connections must be made with the power turned off.
Please be aware that careless operation may damage your
speaker system or cause malfunctions.
1. Analog audio output connections
Here’s how to connect the NAUTILUS to your analog amp
or mixer.
If you’re using a home stereo system, be aware that
playing at high volume may damage your speakers. Be
careful not to raise the volume excessively.
Audio Outputs (main) L/MONO and R
These are the main outputs, accessed by setting
Bus Select
to L/R. All of the factory sounds use these outputs, and the
Master and Total Effects are always routed here as well.
All of the NAUTILUS analog outputs use 1/4" balanced
TRS jacks. For best results, use balanced connections to
your audio system.
1. Connect the Audio Outputs (main) L/MONO and R
outputs to the inputs of your amp or mixer.
If you’re using NAUTILUS in stereo, use both the (main)
L/MONO and R jacks. If you’re using NAUTILUS in
mono, use only the (main) L/MONO jack.
2. Use the MASTER VOLUME slider to adjust the
volume.
The MASTER VOLUME slider affects only the main
stereo outputs and the headphones; it does not affect the
individual outputs, or the USB output.
Audio Outputs (individual) 1…4
These are 4 additional analog outputs, which can be used as
individual mono outputs, stereo pairs, or any combination of
the two. Almost any signal source can be routed to these
outputs, including:
• Each note in a Drum Kit
• Insert Effect outputs
• Individual Programs in a Combination or Song (or the
sum of the Program’s oscillators in PROGRAM mode)
• Audio tracks
• Audio inputs
You can use these to isolate or group together sounds for
recording, or for complex live performance setups.
1. Connect the (individual) 1…4 outputs to the your amp
or mixer inputs.
AC power supply
to an AC outlet
Power cable (Included)
Power button
Headphone
PHONES
INPUT
Monitor
OUTPUT
AUDIO
OUTPUT
1. Analog audio output connections
MixerPowered monitors, etc.
MicGuitar
Eect unit
2. Analog audio input connections
CD-R/RW, hard disks,
removable disk, etc.
USB MIDI Controller
USB cable
USB A USB B
USB
Computer
6. Connecting to computers via USB
4. Connecting USB devices
AUDIO
INPUT
DAMPER
PEDAL
SWITCH
ASSIGNABLE
ASSIGNABLE
3. Connecting Foot Pedals
and Switches
Synthesizer
5. MIDI Connections to equipment
& Computers
 Loading...