Start-up
34
Pos: 17.26 /Überschriften/Überschriften 2/F-J/GGelenkwelle montieren @ 2\mod_1202398342788_78.docx @ 59253 @ 2 @ 1
6.4 Install the PTO shaft
Pos: 17.27 /BA/Inbetriebnahme/EasyCut/Anbau Gelenkwelle/Anbau Gelenkwelle EC 280/320 Bild @ 9\mod_1220874752688_78.docx @ 128271 @ @ 1
Figure
Pos: 17.28 /BA/Inbetriebnahme/EasyCut/Anbau Gelenkwelle/Anbau Gelenkwelle gezogene/angehängte EasyCuts @ 9\mod_1220874876438_78.docx @ 128292 @ @ 1
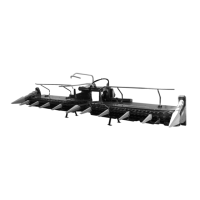
• Slide the PTO shaft (1) onto the PTO end of the tractor and secure it.
• Secure the PTO shaft guard against turning with the retaining chain (2).
Pos: 17.29 /Überschriften/Überschriften 2/U-Z/ZZwischengelenkwelle @ 3\mod_1204702241039_78.docx @ 71481 @ 2 @ 1
6.5 Intermediate PTO shaft
Pos: 17.30 /BA/Inbetriebnahme/EasyCut/Anbau Gelenkwelle/Zwischengelenkwelle/Zwischengelenkwelle Bild EC 280/320 @ 10\mod_1221208451104_78.docx @ 132403 @ @ 1
Figure
Pos: 17.31 /BA/Inbetriebnahme/EasyCut/Anbau Gelenkwelle/Zwischengelenkwelle/Zwischengelenkwelle Text EC 280/320 @ 10\mod_1221208014307_78.docx @ 132379 @ @ 1
The intermediate PTO shaft for the mowing unit drive is coupled to the gearbox via the friction
clutch (1) and to the mowing unit via the free-wheel (2). Fasten support chain (3) to the mower.
Pos: 17.32 /BA/Inbetriebnahme/EasyCut/Hinweis Reibkupplung @ 11\mod_1223358975938_78.docx @ 145593 @ @ 1
Note - Friction Clutch
Effect: Conserve functionality and increased service life
• The friction clutch (2) must be vented prior to commissioning and once a year prior to
harvesting. (See section Before the Start of the New Season "Friction clutch")
Pos: 17.33 /Layout Module /---------------Seitenumbruch---------------- @ 0\mod_1196175311226_0.docx @ 4165 @ @ 1