8
KHF - SERIES A FAN COIL UNITS
INSTALLATION, OPERATION, AND MAINTENANCE MANUAL
Figure 2a
Figure 2d | Figures 2a-2d: Typical drain pan removal
Figure 2b Figure 2c
DRAIN PAN
Standard drain pans are externally insulated, single wall
galvanized steel and can be equipped with a secondary
drain connection. The KHF drain pan is easily removable for
cleaning. See illustration below. Auxiliary drip pan to catch
condensed moisture from valves and piping must be sloped
toward the drain pan.
The condensate drain pan can be removed without requiring
common hand tools. The drain pan is secured to the unit by
four sheet metal tabs that slide into four respective slots on
the drain pan.
Prior to removing the drain pan, make sure all accessories
and field connections have been appropriately disconnected
from the drain pan. The drain pan can be removed in three
steps. First, push the drain pan engagement lever to unlock
the drain pan from the coil. Next, while continuing to push
the lever, support the weight of the drain pan and slide the
drain pan towards the drain connection. After the drain
pan slides approximately 1.5 inches, it will be completely
disengaged from the coil. Lastly, support the weight of
the drain pan and safely lower the drain pan for servicing.
Reinstall prior to unit startup.
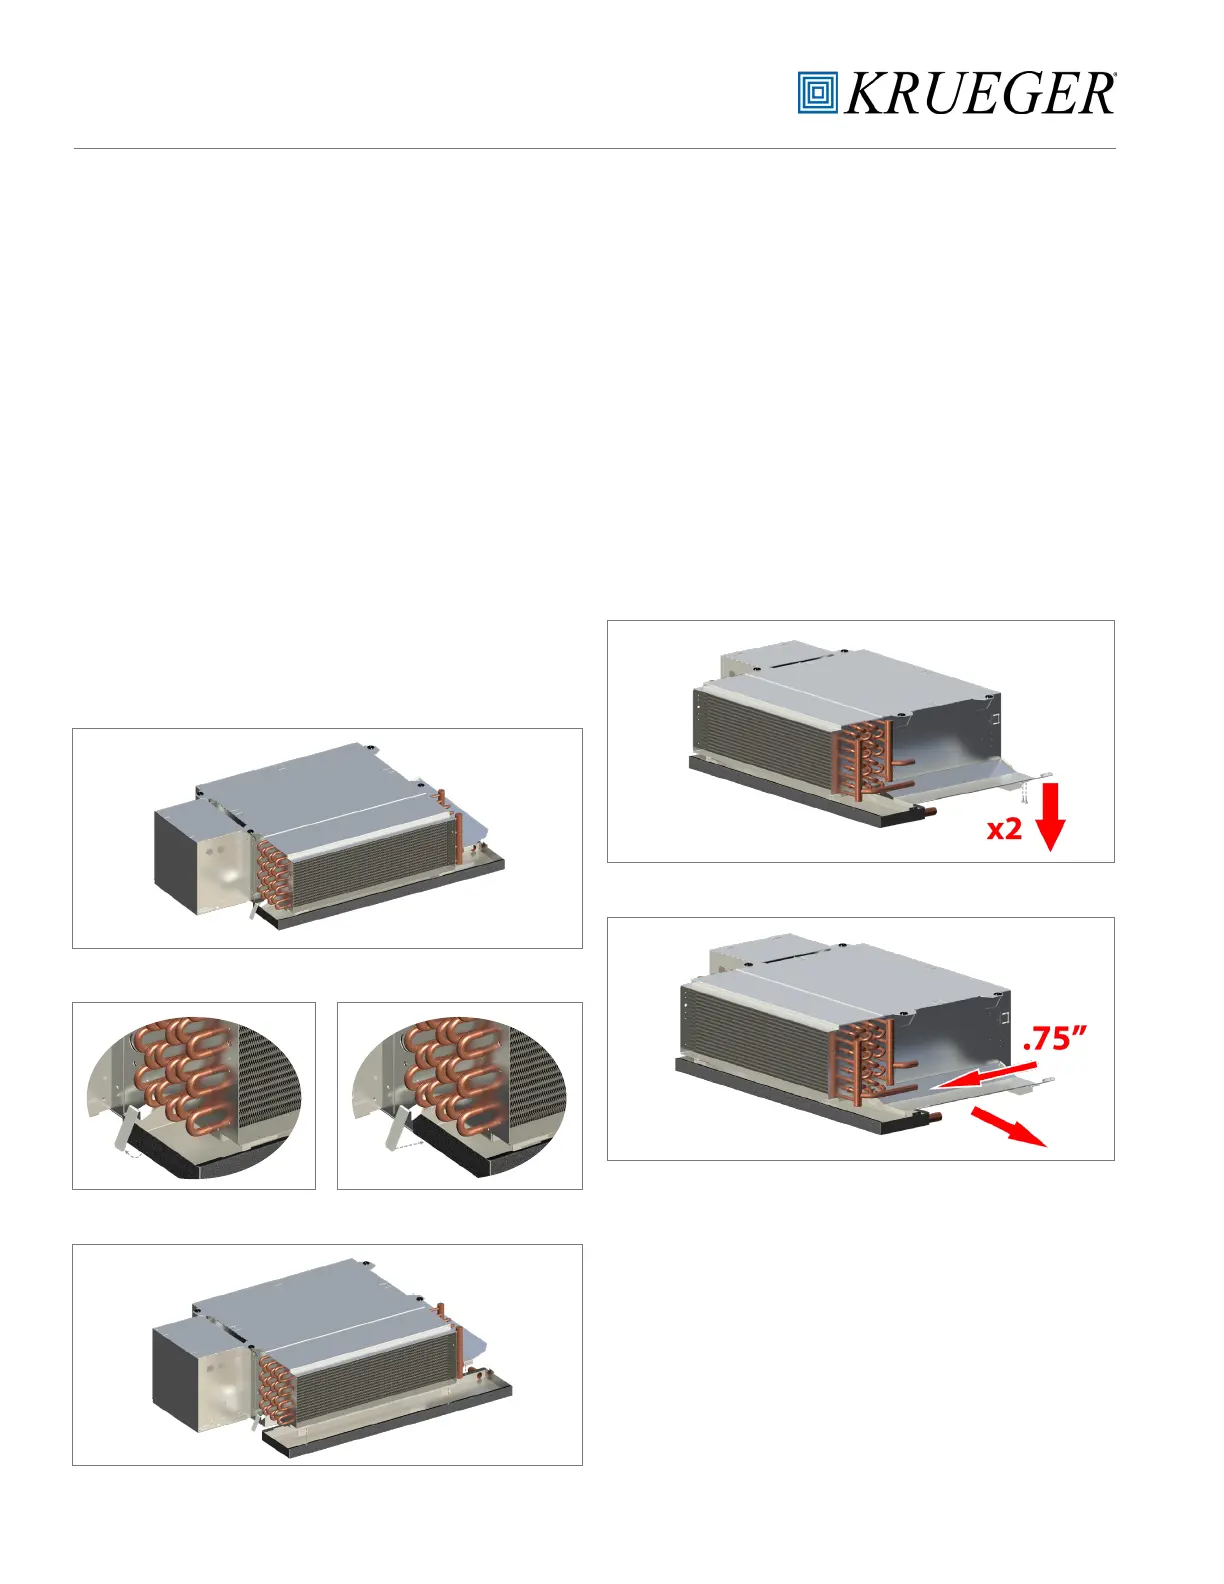
Figure 3a
Figure 3b
Figure 3a-3b: Typical auxiliary drain pan removal
AUXILIARY DRAIN PANS
Mounted directly to the unit drain pan, AUXILIARY DRAIN
PANS may also be secured by the mounting holes to field
supports or to the unit coil utilizing pipe hanger wire, plastic
ties, or metal strapping.
Prior to removing the auxiliary drain pan, make sure all
accessories have been appropriately disconnected from the
auxiliary drain pan. The auxiliary drain pan can be removed
in three steps. First, remove the two screws that attached
the auxiliary drain pan to the support bracket near the inlet
of the unit. Next, support the weight of the auxiliary drain
pan and slide the auxiliary drain pan towards the discharge
of the unit so the auxiliary drain pan lip will clear the drain
pan lip. After the auxiliary drain pan slides approximately
0.75 inches, the auxiliary drain pan will be free from the
drain pan. Lastly, support the weight of the auxiliary drain
pan and safely lower for servicing. Reinstall prior to unit
startup.
 Loading...
