7 Servicing/Maintenance
34 of 50
KSB Guard
4079.83/01-EN
CAUTION
Incorrect replacing of batteries
Damage to the connecting cable between the upper and the lower housing section!
▷ Never allow the upper section to hang from the connecting cable or suspend it
from the connecting cable for transport.
1. Unscrew and remove the four fastening screws (1) from the corners.
2. Pull off the upper part of the housing (2).
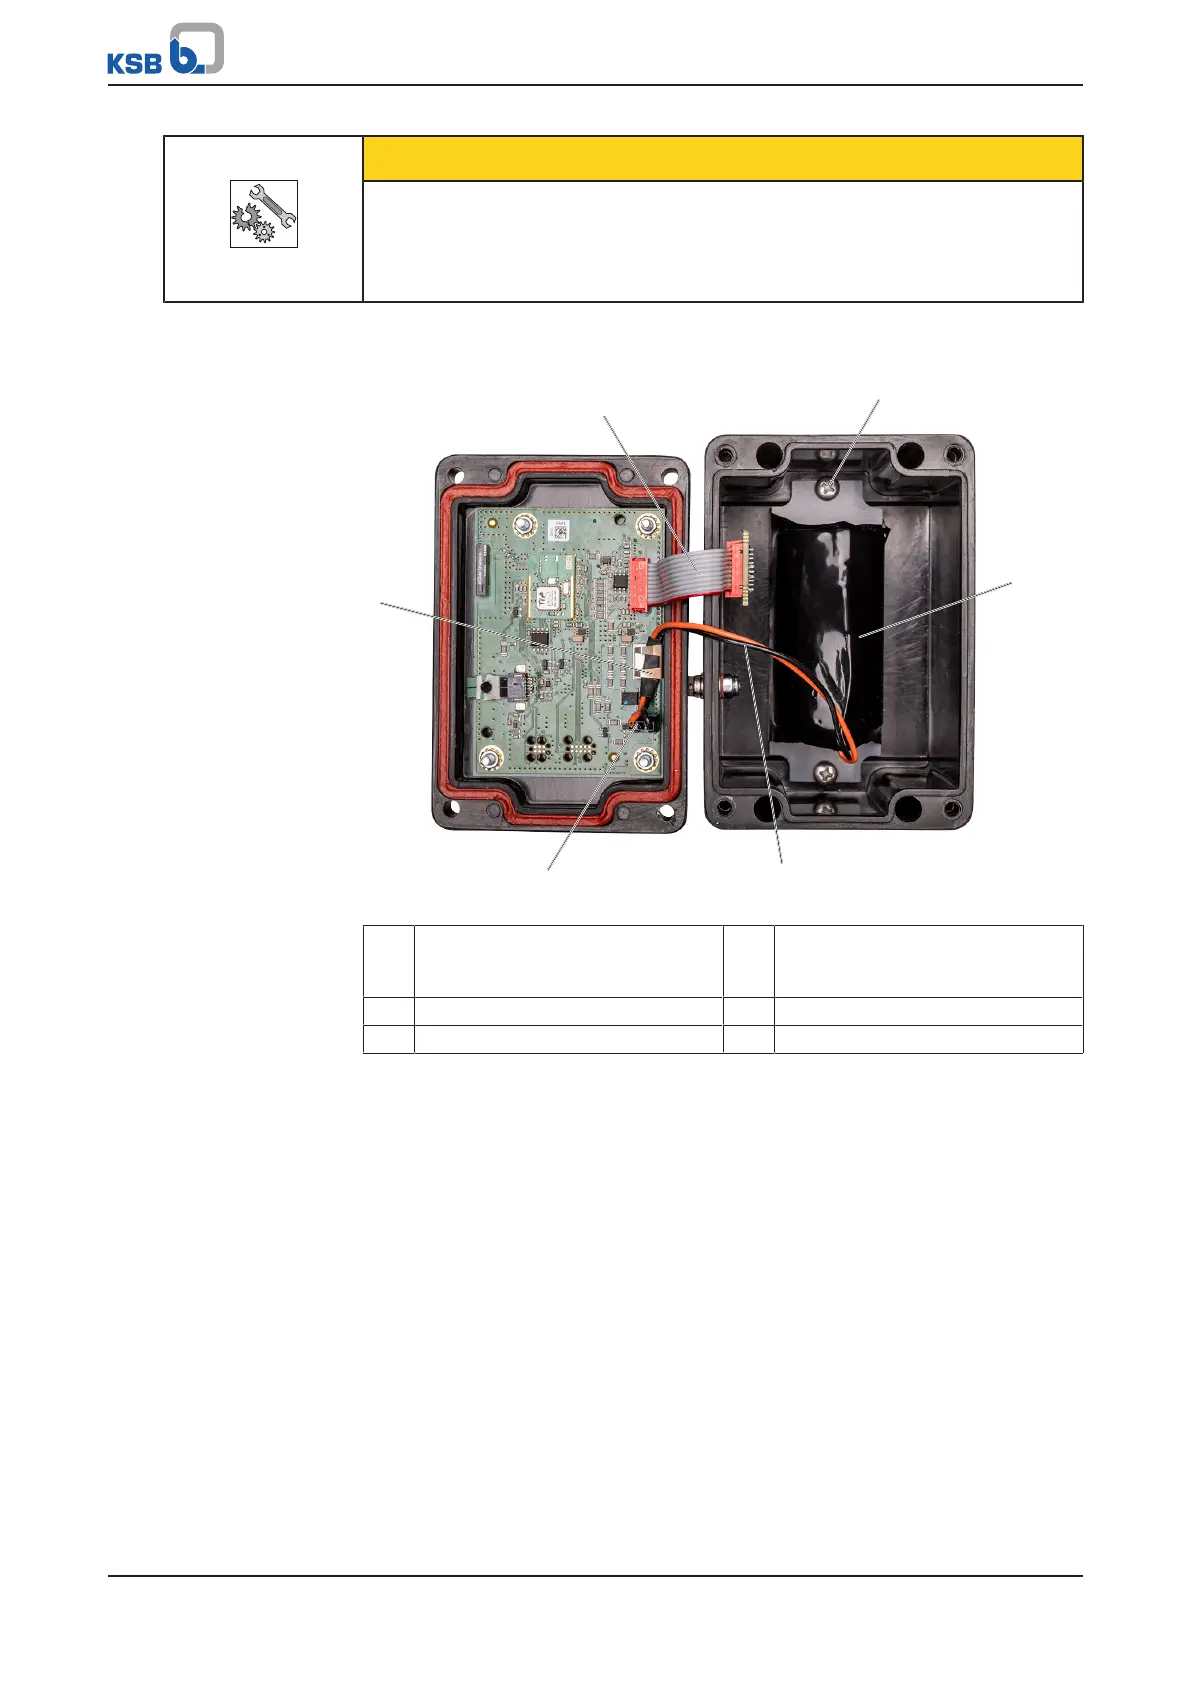
Fig.17: b
1 Connecting cable between the
upper part and lower part of the
housing
2 Battery retaining screws
3 Battery pack 4 Battery cables
5 Plug 6 Clip on printed circuit board
3. Remove the battery cables (4) from the clip on the printed circuit board (6).
4. Disconnect the plug (5) from the printed circuit board.
5. Undo and remove the two battery retaining screws (2).
6. Remove the battery pack (3).
7. Insert a new battery pack (3). Fasten it with the two battery retaining screws (2).
8. Connect the plug (5) to the printed circuit board. Observe the correct plug
orientation.
9. Briefly press the pushbutton on the top of the housing and check whether red
status LEDA lights up briefly. If status LEDA does not light up, check the plug.
10. Fit a black protective sleeve around the battery cables (4) in the area of the
printed circuit board. Insert the protected part underneath the clip on the
printed circuit board (6) to fasten the cables.
11. Place the upper part of the housing back on the lower part of the housing.
12. Screw the four fastening screws back in at the corners.
13. Restart the transmission and battery unit. (ðSection5.4,Page29)