2RV/2RW/2RX/2RY/3RA
4-7
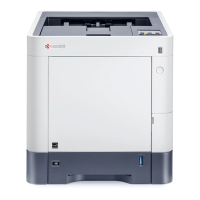
3. Detach the retard roller (b) from the
retard roller assembly (a).
Figure 4-5
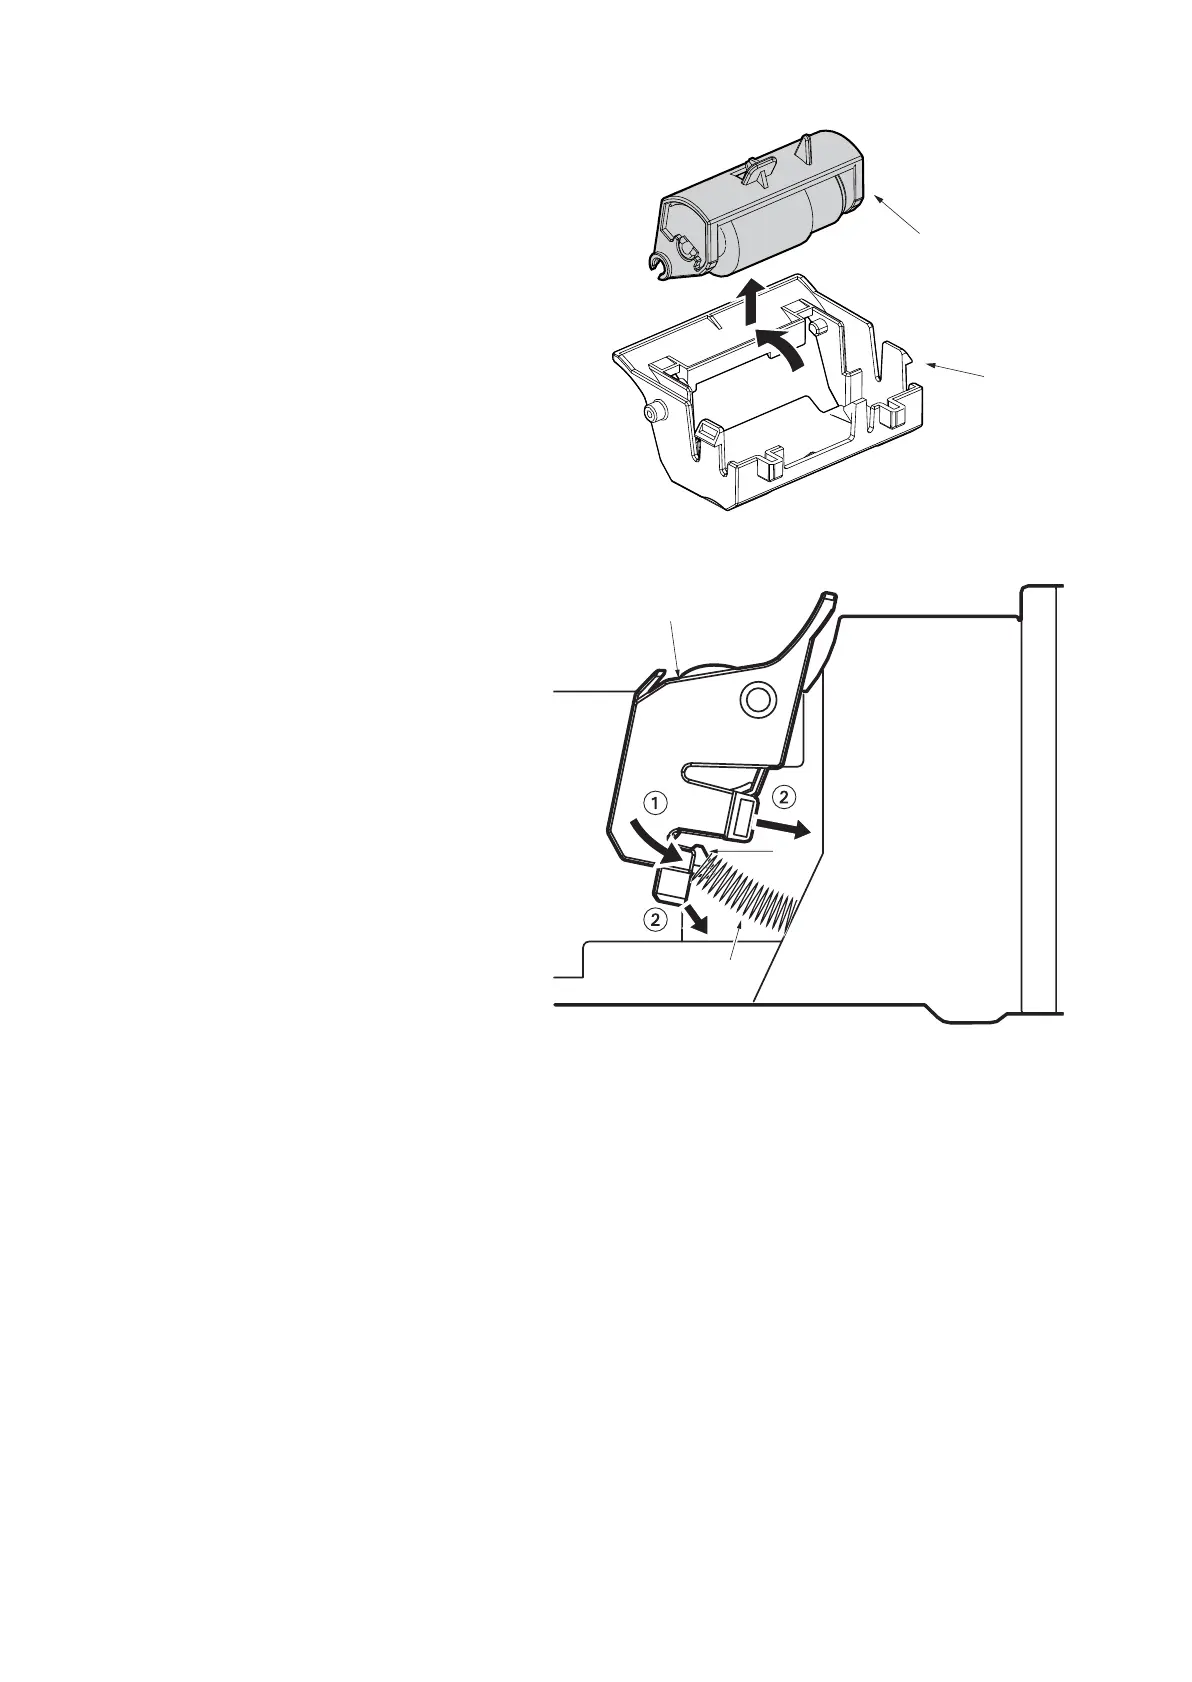
4. Check or replace the retard roller, reat-
tach the detached parts in the original
position.
Attention: When attaching the retard roller
assembly (a), make sure to attach the
spring (c) to the protrusion (b) of the retard
roller assembly.
Figure 4-6
b
a

 Loading...