2JL/2JJ/2JG/2JD
1-5-40
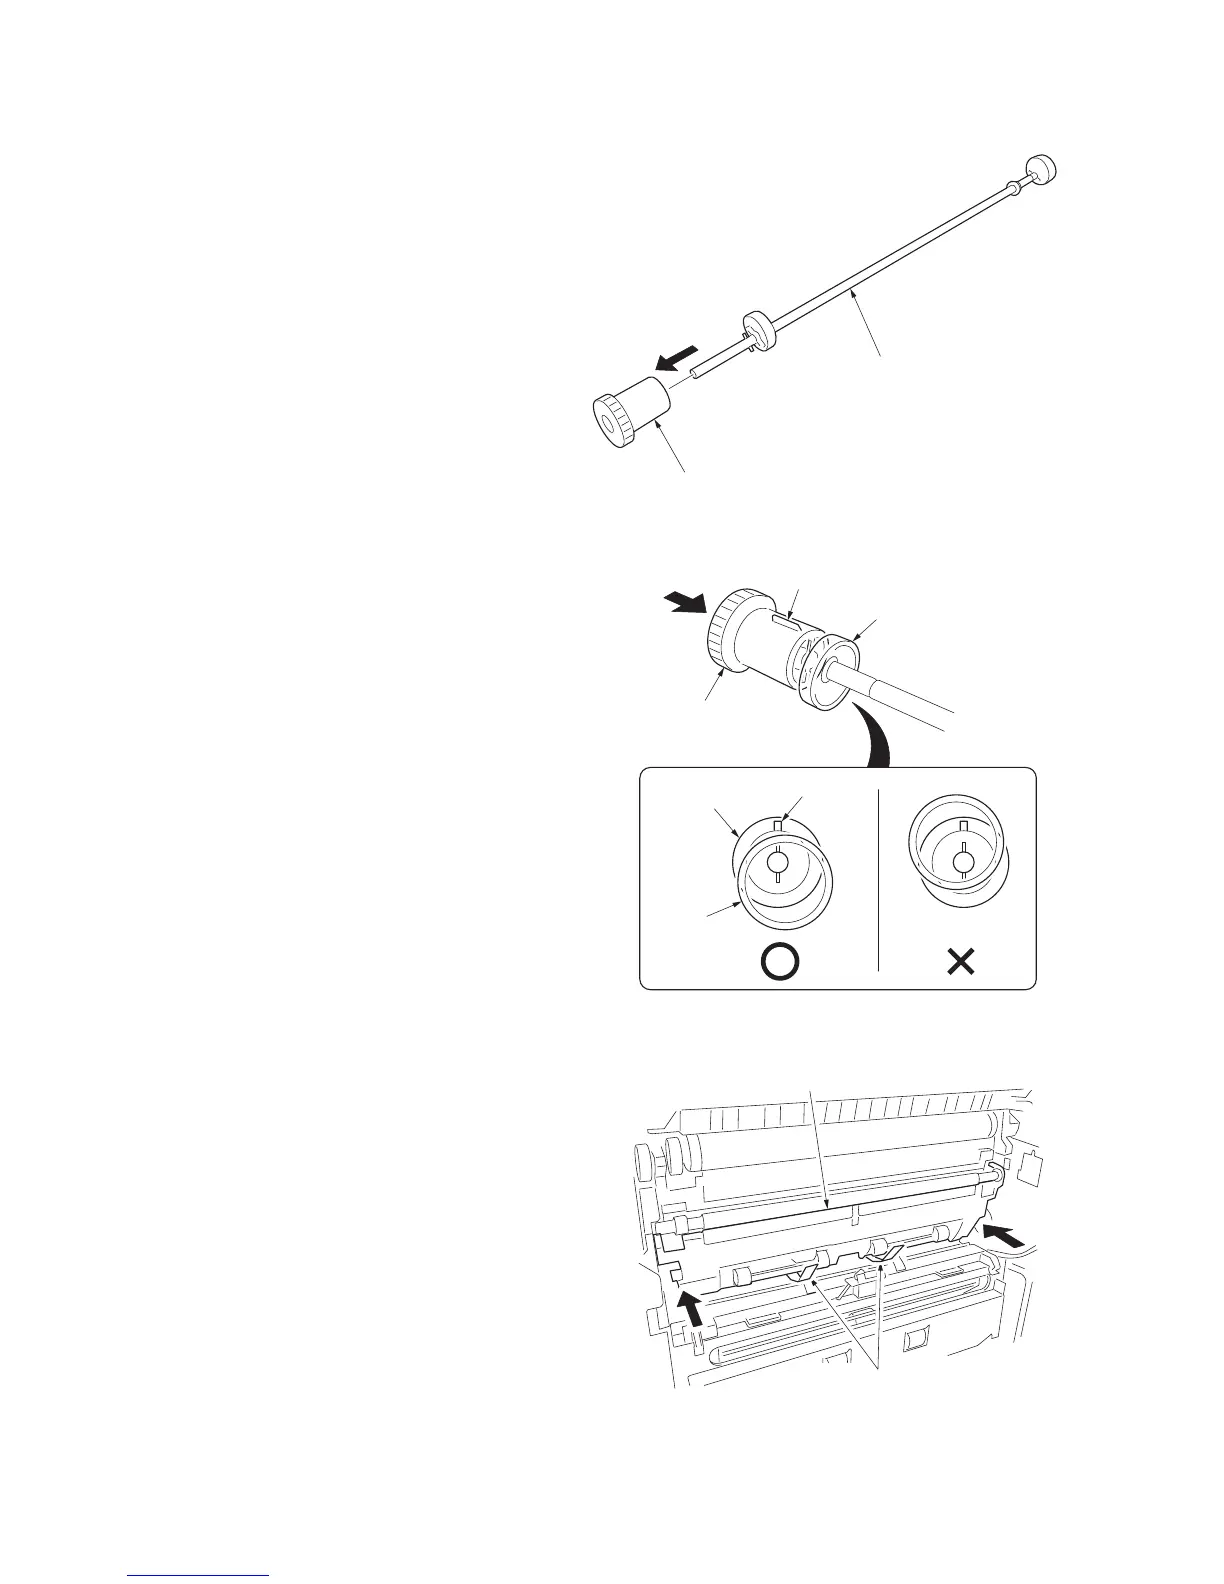
13. Remove the LSU cleaning clutch from the
LSU cleaning unit.
Figure 1-5-89
14. Replace the LSU cleaning clutch and install
the clutch to LSU cleaning unit.
Note: When replacing the clutch, align the
protrusion with cam as diagrammed.
15. Refit the LSU cleaning unit.
Figure 1-5-90
16. Refit the paper conveying guide unit.
Note: When installing the guide unit, use
care not to tuck the plastic tabs under the
guide unit.
17. Refit the conveying drive unit.
18. Refit the transfer high voltage PWB 2, inner
left cover and front cover.
19. Refit cassette 1 and image formation holder.
20. Refit the middle guide unit, conveying guide
and paper conveying unit.
21. Refit front left cover 1, rear cover, right cover
and interface cover.
Figure 1-5-91
LSU cleaning clutch
LSU cleaning unit
LSU cleaning clutch
LSU cleaning
clutch
Protrusion
Protrusion
Cam
Cam
Plastic tabs
Paper conveying guide unit
 Loading...