3S3
1-2-5
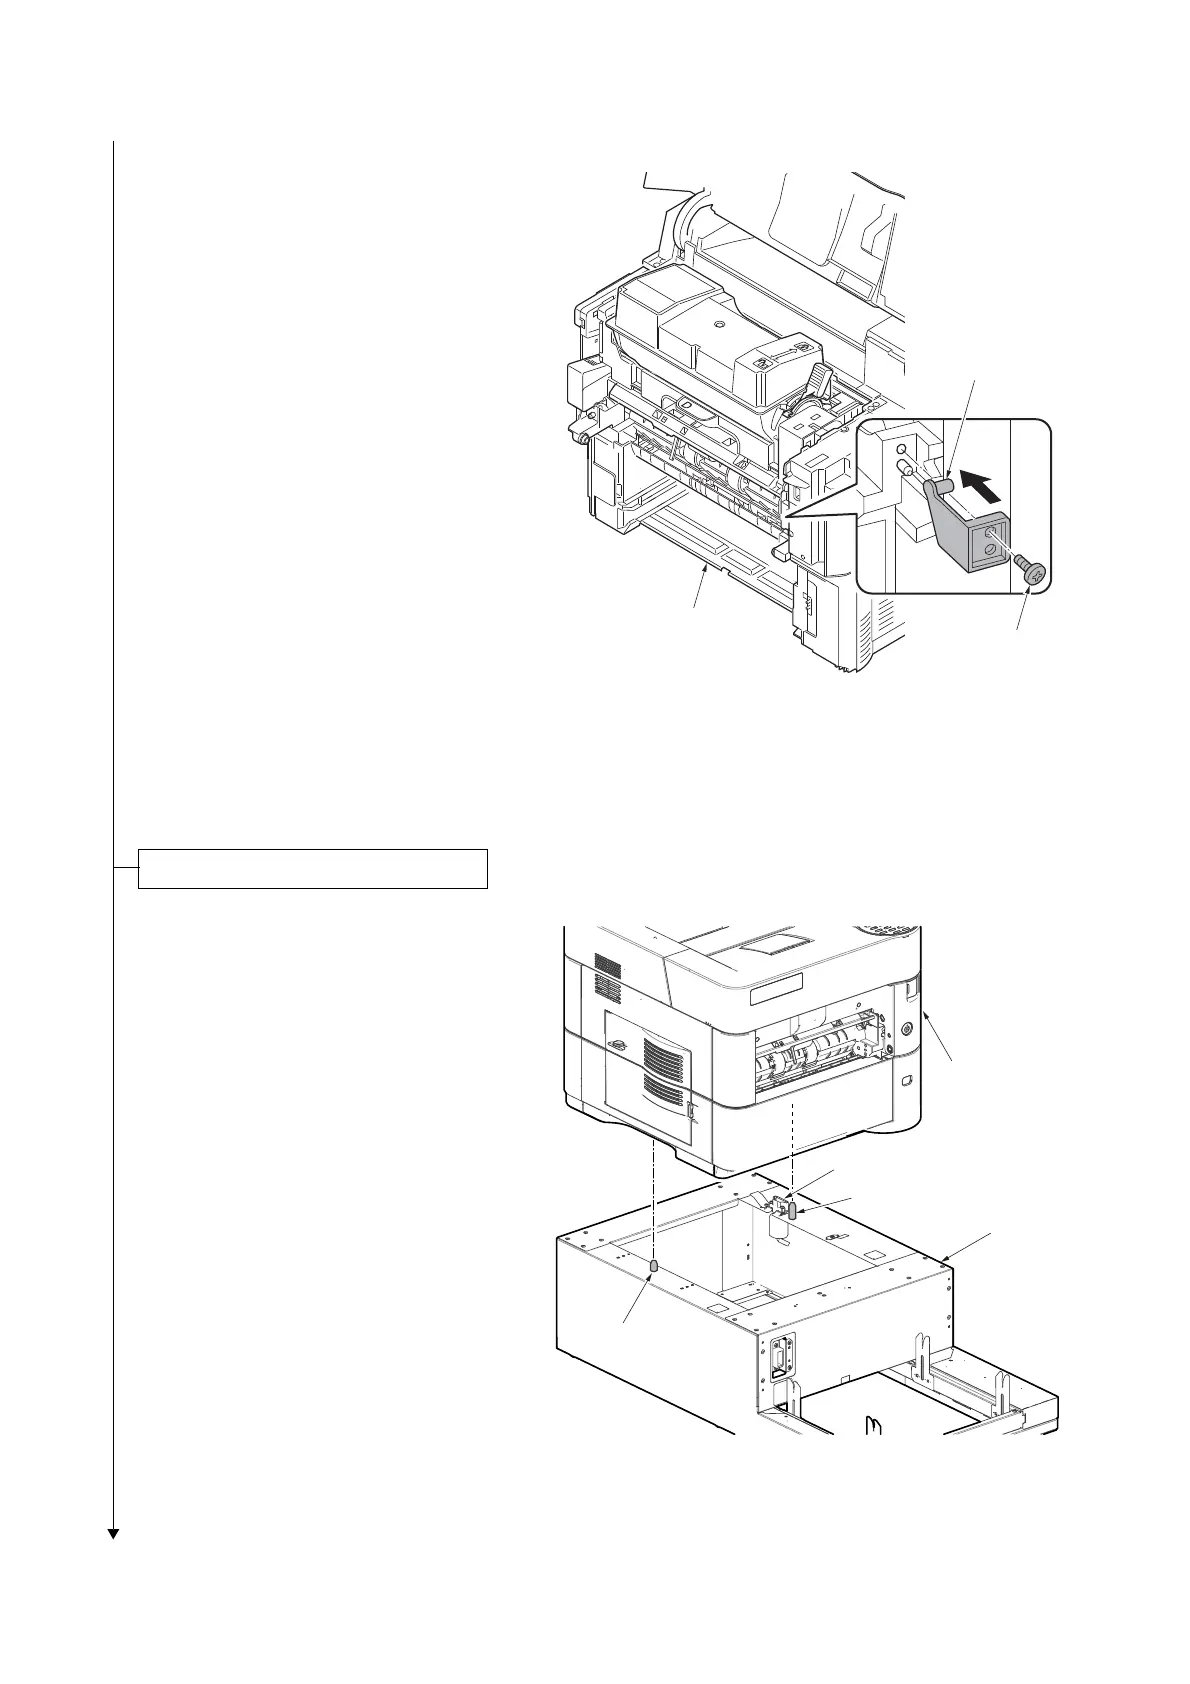
9. Attach the spacer by the screw to the printer.
10. Refit the removed front cover.
11. Close the top cover and the front cover.
12. Refit the removed cassette.
Figure 1-2-5
1. Align the positioning pins on the top of the
printer base with the holes in the base of the
printer, then slowly and carefully lower the
printer onto the printer base.
2. Make sure that the connector on the printer
base fits squarely into the corresponding
connector in the base of the printer. See fig-
ure right.
Figure 1-2-6
Installing the printer base and the printer
Positioning pin
Connector
Printer
Printer base
Positioning pin