Table Of Figures
Figure 1-1. LJControlPanel Main Window....................................................................................7
Figure 1-2. LJControlPanel U3 Configure Defaults Window ........................................................8
Figure 1-3. LJControlPanel U3 Test Window...............................................................................9
Figure 1-4. LJControlPanel Settings Window ..............................................................................9
Figure 1-5. Self-Upgrade Application.........................................................................................10
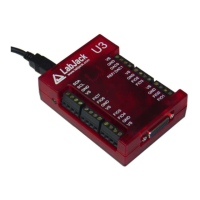
Figure 2-1. LabJack U3..............................................................................................................12
Table 2-1. Analog Input Pin Locations .......................................................................................13
Table 2-2. ConfigIO Factory Default Values .............................................................................14
Table 2-3. ConfigTimerClock Factory Default Values ................................................................14
Table 2-4. Positive Channel Numbers .......................................................................................15
Table 2-5. Negative Channel Numbers......................................................................................15
Table 2-6. Nominal Analog Input Voltage Ranges (DAC1 Disabled) .........................................16
Table 2-7. Calibration Constant Memory Locations ...................................................................16
Table 2-8. Fixed Point Conversion Examples ............................................................................17
Table 2-9. Nominal Analog Input Voltage Ranges (DAC1 Enabled)..........................................17
Figure 2-2. Non-Inverting Op-Amp Configuration ......................................................................20
Figure 2-3. Voltage Divider Circuit .............................................................................................21
Figure 2-4. Buffered Voltage Divider Circuit...............................................................................21
Figure 2-5. Current Measurement With Arbitrary Load or 2-Wire 4-20 mA Sensor ...................22
Figure 2-6. Current Measurement With 3-Wire 4-20 mA (Sourcing) Sensor .............................22
Figure 2-7. ±10 Volt DAC Output Circuit....................................................................................25
Figure 2-8. Driven Signal Connection To Digital Input ...............................................................26
Figure 2-9. Driven Signal Connection To Digital Input ...............................................................27
Figure 2-10. Basic Mechanical Switch Connection To Digital Input...........................................28
Figure 2-11. Passive Hardware Debounce ................................................................................28
Figure 2-12. Relay Connections (Sinking Control, High-Side Load Switching)..........................29
Table 3-1. Typical Feedback Function Execution Times (QuickSample=0, LongSettling=0) ....40
Table 3-2. Typical Feedback Function Execution Times (QuickSample=1, LongSettling=0) ....40
Table 3-3. Typical Feedback Function Execution Times (QuickSample=0, LongSettling=1) ....40
Table 3-4. Stream Performance.................................................................................................42
Table 3-5. Special Stream Channels .........................................................................................43
Table 4-1. Request Level Error Codes (Part 1)..........................................................................75
Table 4-2. Request Level Error Codes (Part 2)..........................................................................76
Table 4-3. Group Level Error Codes ..........................................................................................77
vi