Figure 1-1 shows the results from a typical search. The application found one U3 connected by
USB. The USB connection has been selected in Figure 1-1, bringing up the configuration
window on the right side.
• Refresh: Reload the window using values read from the device.
• Write Values: Write the Local ID from the window to the device.
• Config. IO Defaults: Opens the window shown in Figure 1-2.
• Reset: Click to reset the selected device.
• Test: Opens the window shown in Figure 1-3.
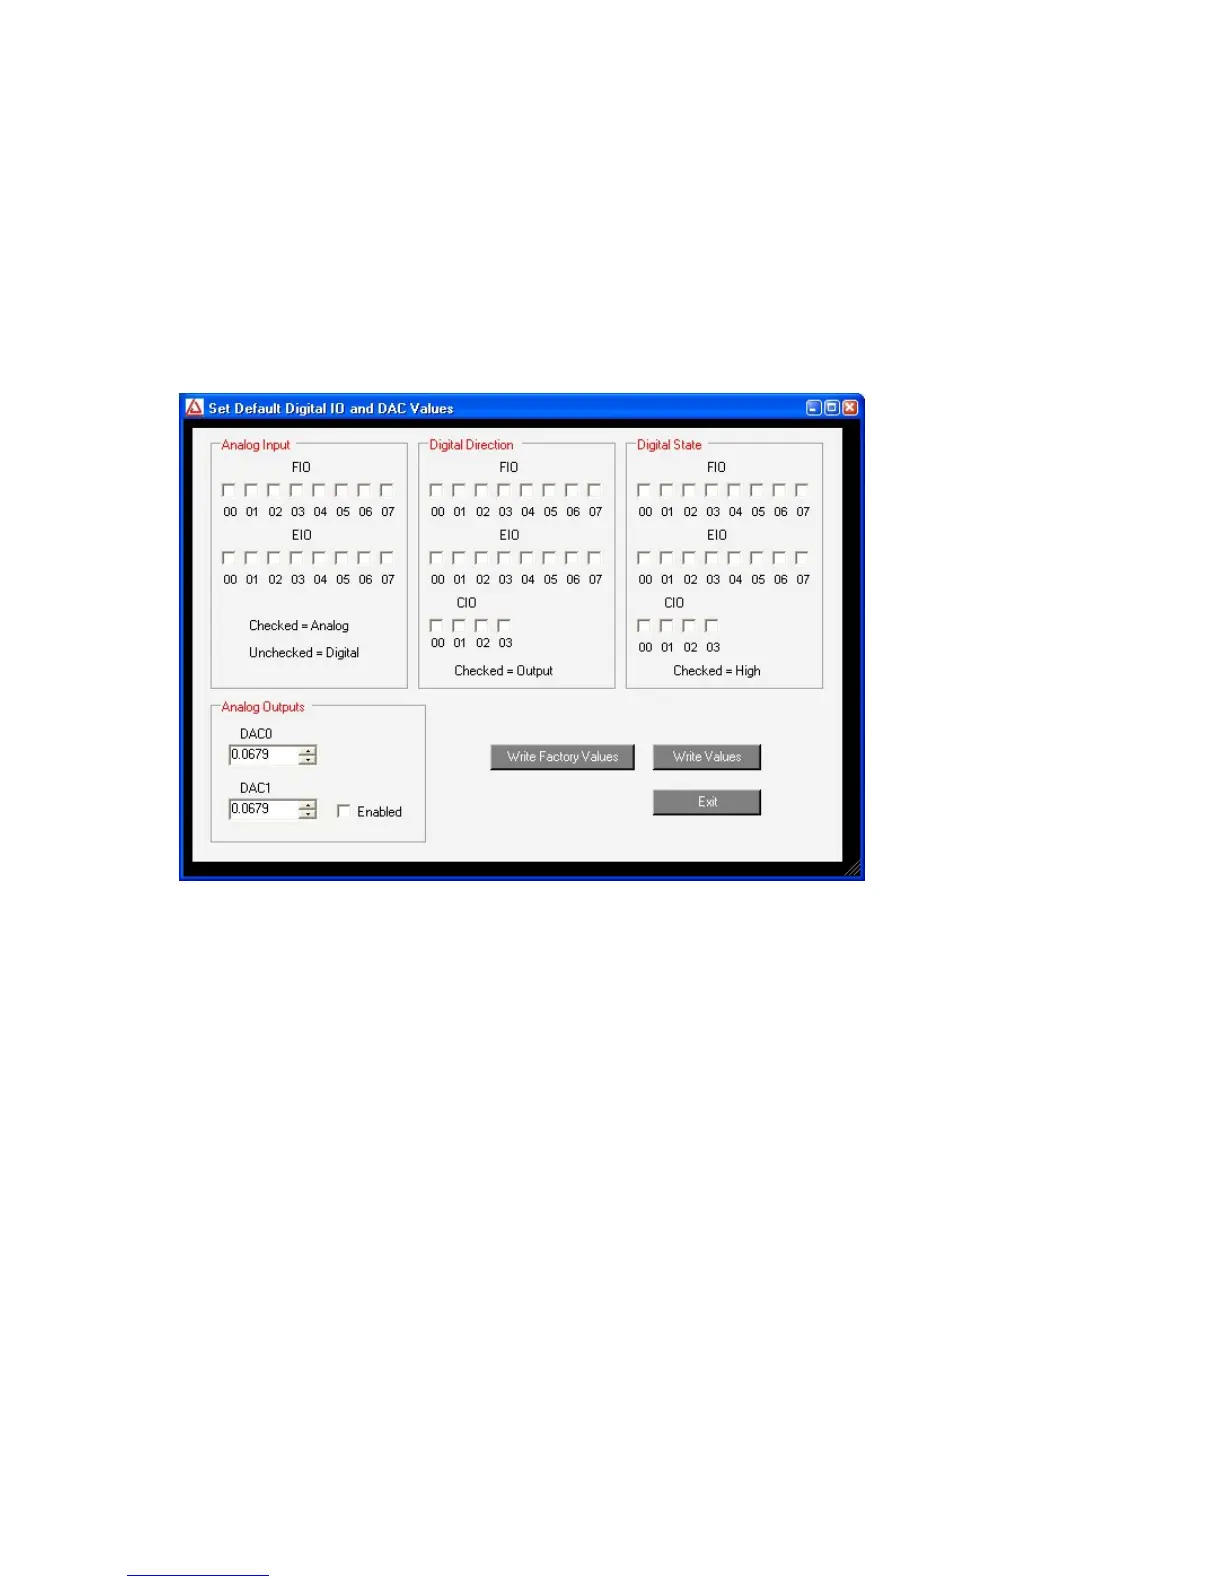
Figure 1-2. LJControlPanel U3 Configure Defaults Window
Figure 1-2 shows the configuration window for U3 defaults. These are the values that will be
loaded by the U3 at power-up or reset. The factory defaults, as shown above, are all lines
configured as digital input.
Figure 1-3 shows the U3 test window. This window continuously (once per second) writes to
and reads from the selected LabJack.
8