38
LAUNCH
X-431 PADII
User's Manual
Lens Diameter 7.0mm
Probe Tube Diameter 6.0mm
Viewable Angle 60
o
Lens Focal Length More than 50mm
Net Weight Approx. 270g
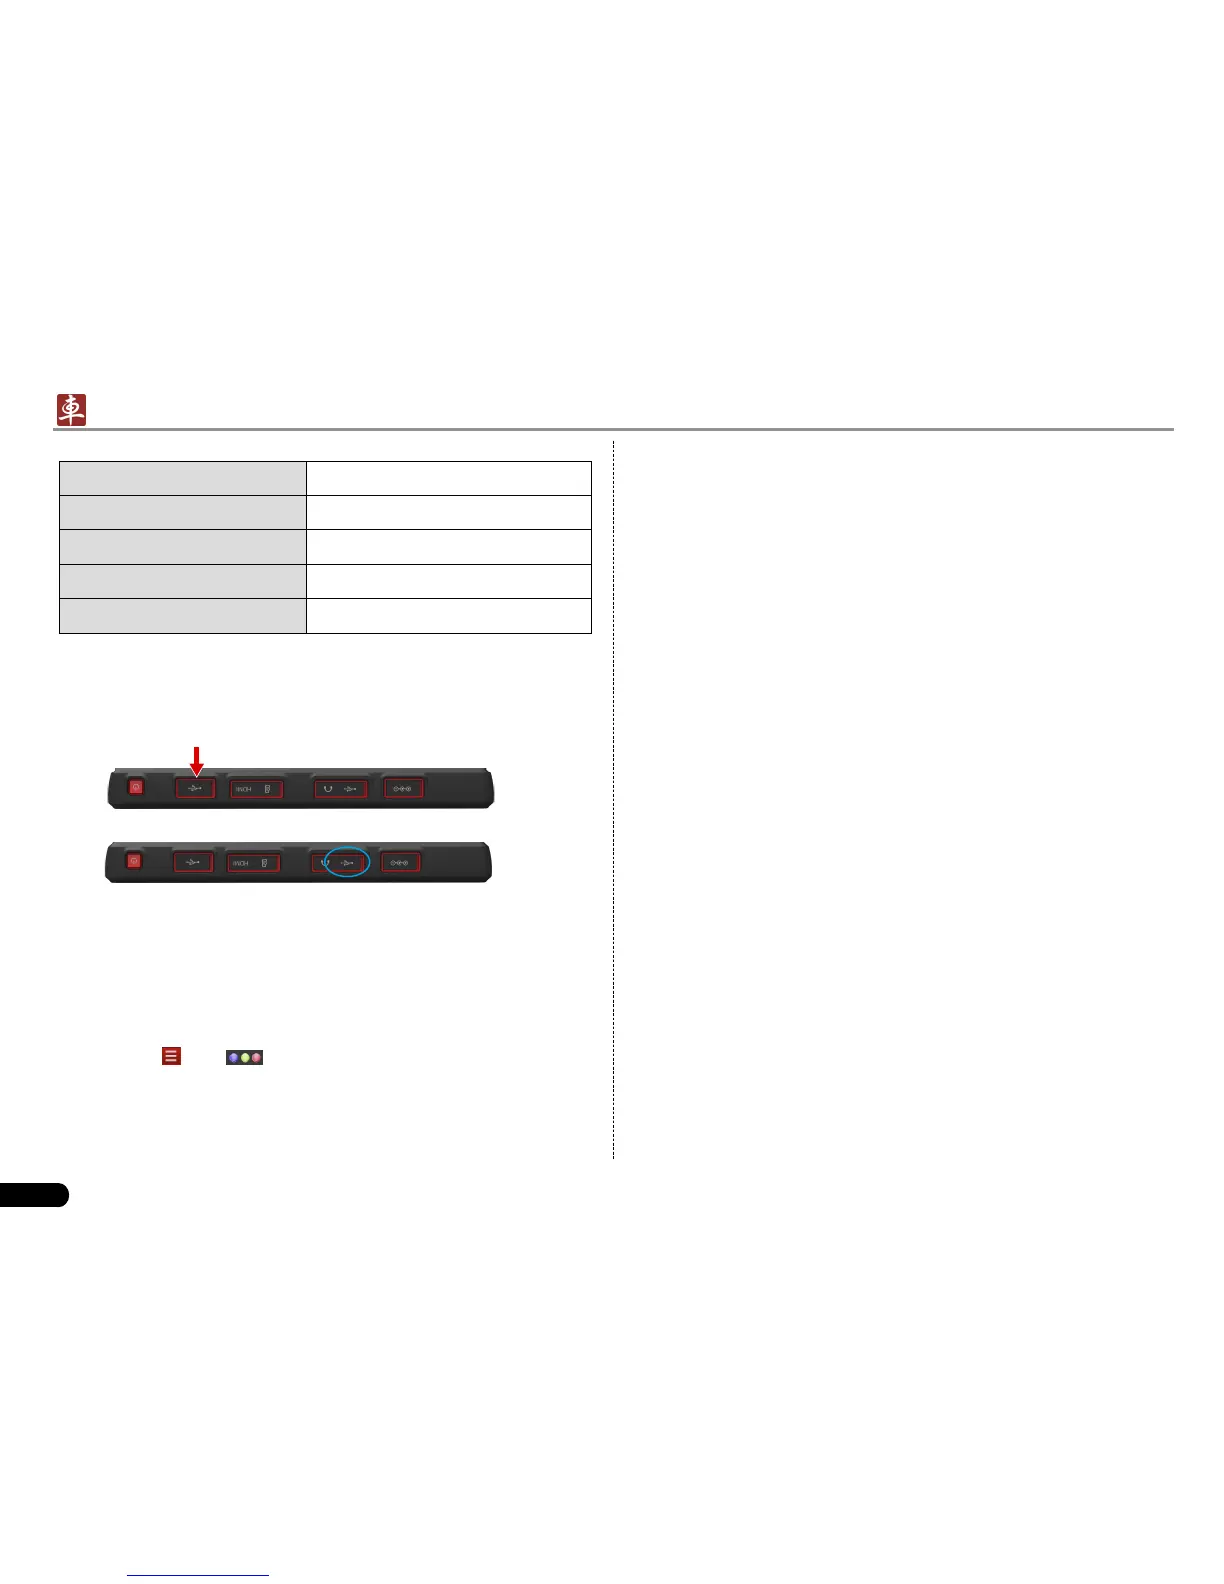
9.4 Connections & Operations
Locate the USB port of X-431 PADII. 1.
Insert the USB cable into the USB port of X-431 PADII.2.
Fig. 9-2
Bend the neck of the flexible tube as desired and extend the 3.
camera with adjustable LED lights to some unseen or unreachable
parts of engine, hydraulic system, nozzles etc.
After connections are properly made, press the [4. POWER] button
on X-431 PADII to turn it on. Wait until the system enters the main
menu, tap
. Tap and select [Borescope] to run it, then the
screen will display the scene captured from the borescope camera.
Adjust it until the lens stops in the desired place, then use the 5. dial
for LED light brightness to adjust the brightness.
Press the 6. Snapshot button on the borescope to take a photo.
Alternatively, you can also press the Snapshot button on the X-431
PADII to take photos.
To record a video, switch from Camera mode to Video mode and
tap Record button on the screen to start recording.
Images are captured in .jpg format and videos are recorded in .avi or
.mp4 format. All photographings and videos are saved in DCIM folder
where users can browse and replay it.