Advanced
61
• When you take a picture beyond the
available flash range, the exposure may
not be adjusted properly and the picture
may become bright or dark.
• The white balance may not be properly
adjusted if the flash level is insufficient.
(P68)
• If you repeat taking a picture, it may not
actually be taken even if the flash is
activated. Take a picture after the access
indication disappears.
• The red-eye reduction effect differs
between people. Also, if the subject was
far away from the camera or was not
looking at the first flash, the effect may not
be evident.
• When the flash is being charged, the flash
icon flashes red, and you cannot take a
picture even when you press the shutter
button fully.
• When taking pictures in continuous mode
or auto bracket, only 1 picture is recorded
for every flash fired.
• If you take pictures with the flash when
the lens hood is attached, the flash
may be obscured by the lens hood.
• When you attach an external flash, it takes
priority over the built-in flash. Refer to
P105 for the external flash.
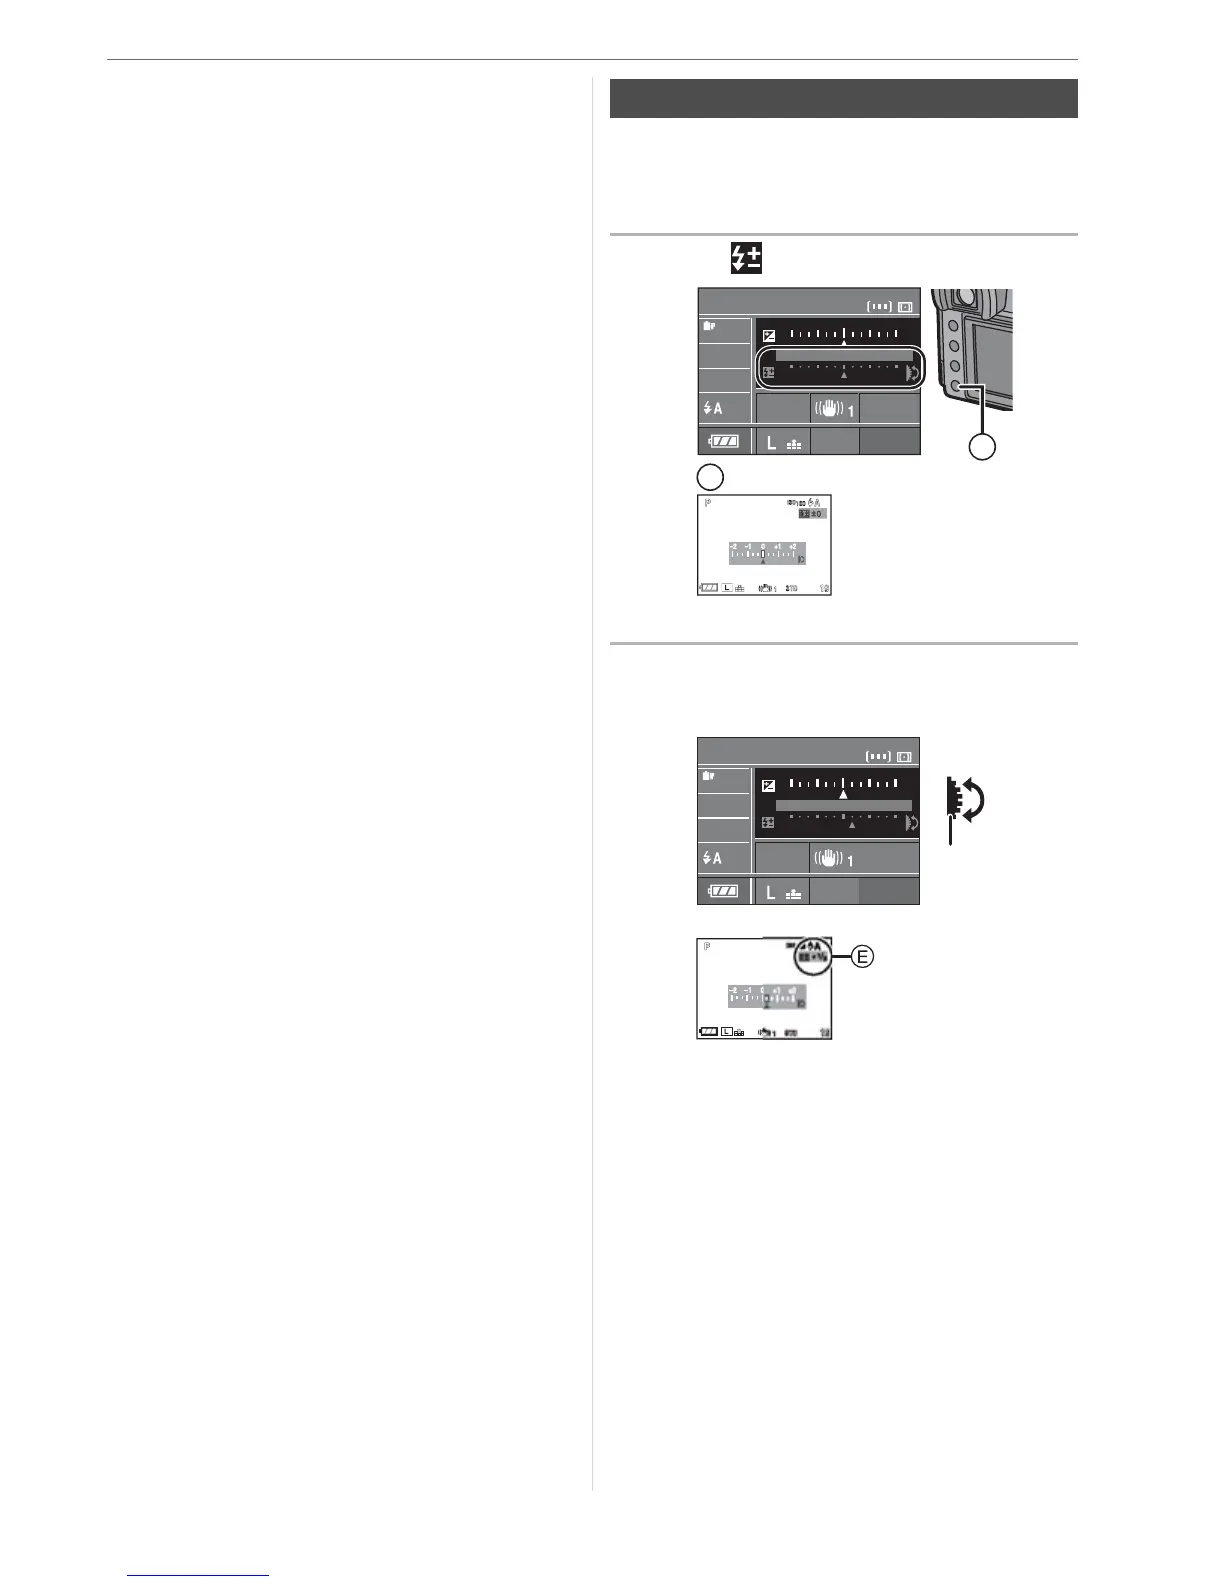
Adjust the flash output when the subject is
small or reflection ratio is extremely high or
low.
1 Press [ ] .
: When taking pictures with Live view
2 Rotate the command dial to
adjust the flash output.
: When taking pictures with Live view
• Rotate the command dial upwards to
adjust towards negative and rotate the
command dial downwards to adjust
towards positive.
• You can adjust from [B2 EV] to [A2 EV]
in steps of [1/3 EV].
• Select [0] to return to the original flash
output.
• The flash output adjustment value is
displayed on the LCD monitor when
taking pictures with Live View.
Adjusting the flash output
STANDARD
ISO
100
AUTO
WB
19
SINGLE
NORMAL
CUSTOM
+1
+2
B
A
STANDARD
ISO
100
AUTO
WB
19
SINGLE
NORMAL
CUSTOM
+1
+2
C
D

 Loading...