Advanced
66
Taking Pictures using
Auto Bracket
In this mode, up to 5 pictures are recorded
in the selected exposure compensation
range each time the shutter button is
pressed.
You can select the picture with the desired
exposure among different exposures.
1 Set the drive mode lever to [ ].
: Auto Bracket (When [3/ 1/3 EV] is
set)
: Viewfinder Display
: When taking pictures with Live View
• [ ] is displayed in the viewfinder. (It is
displayed on the LCD monitor when
taking pictures with Live View.)
2 Focus on the subject and take a
picture.
• If you press and hold the shutter button,
the number of pictures that you set is
taken.
• The auto bracket indication flashes until
the number of pictures that you set (3 or
5) is taken.
• The picture count is reset to [0] if you
change the auto bracket setting,
change the setting on the drive mode
lever or turn the camera off before all
the pictures that you set are taken.
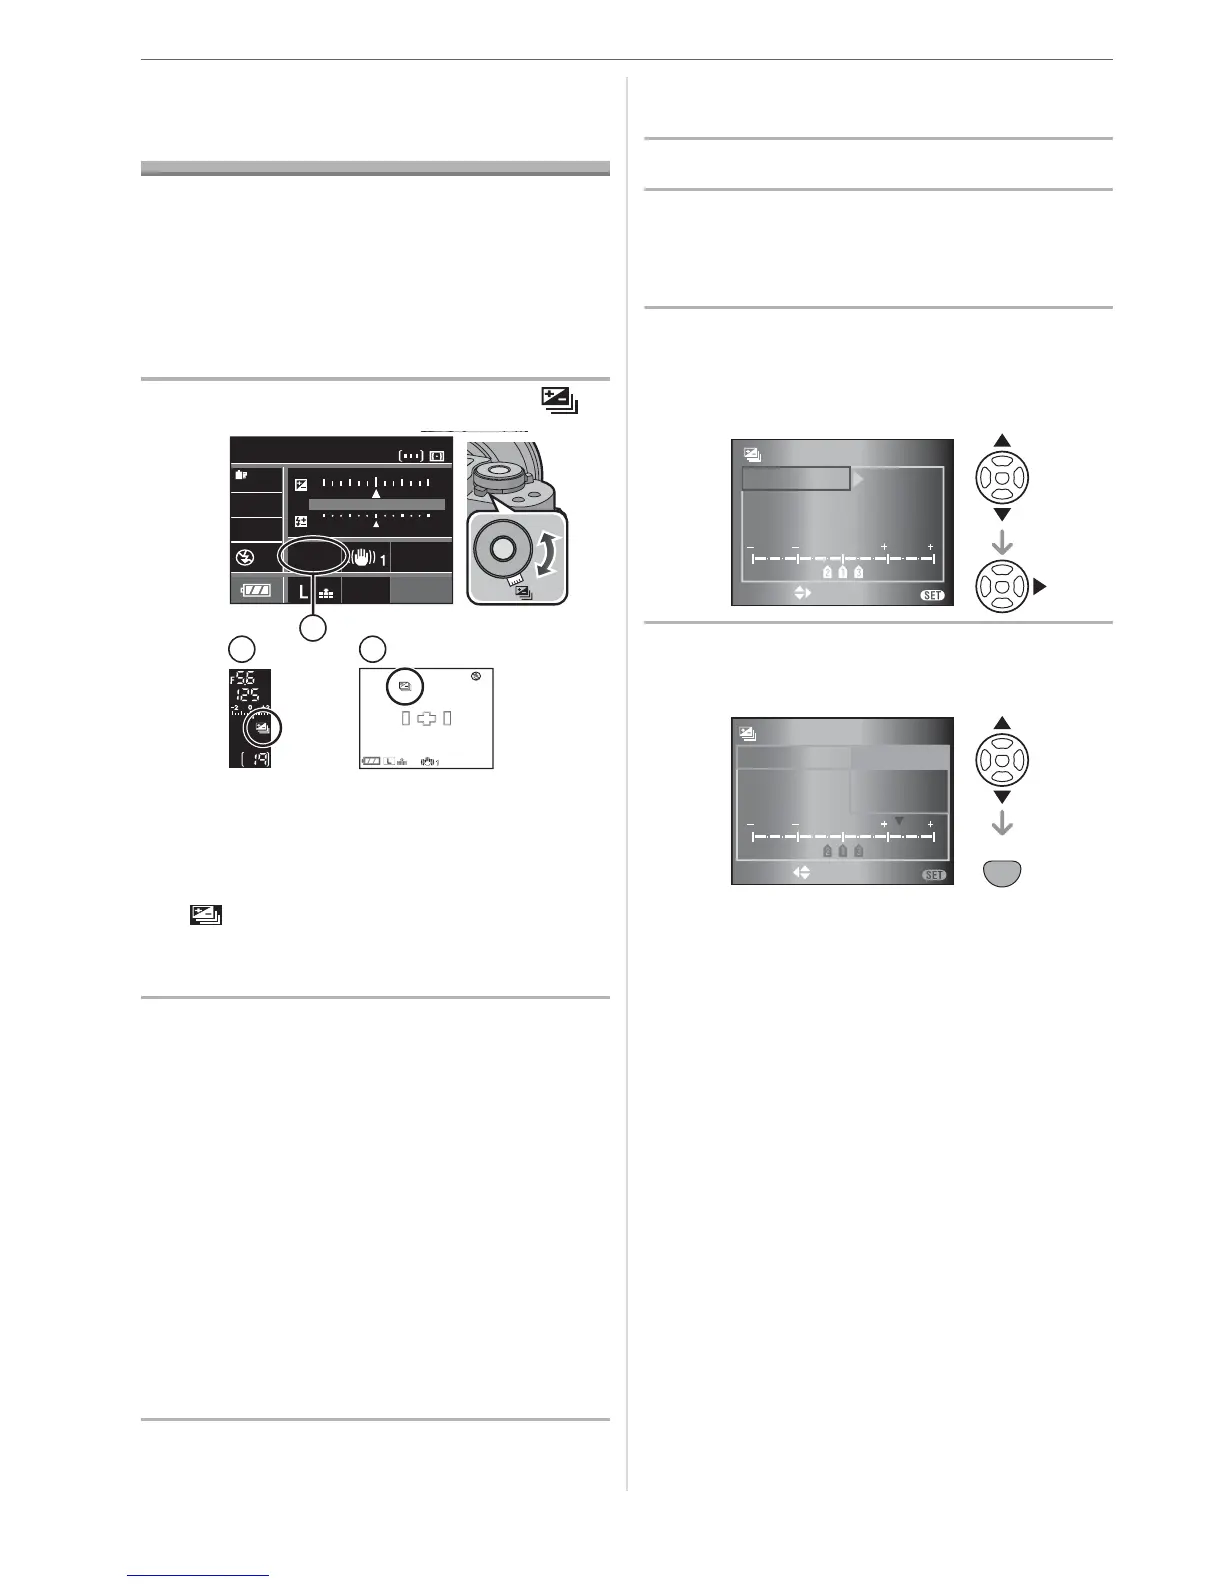
w Changing the settings for [NO./STEP]
and [SEQUENCE] in auto bracket
1 Press [MENU/SET].
2 Press
/
to select
[AUTO BRACKET] and then press
.
3 Press
/
to select [NO./STEP]
or [SEQUENCE] and then press
.
4 Press
/
to select the setting
and then press [MENU/SET].
When [NO./STEP] has been selected in
the screen shown in step
3
• [NO./STEP]
– [3/ 1/3 EV]
– [3/ 2/3 EV]
–[3/1EV]
– [5/ 1/3 EV]
– [5/ 2/3 EV]
–[5/1EV]
When [SEQUENCE] has been selected
in the screen shown in step
3
• [SEQUENCE]
(When taking 3 pictures)
– [0/B/A]
–[B/0/A]
P
STANDARD
ISO
100
AUTO
WB
19
NORMAL
CUSTOM
+1
+2
3BKT 1/3
ISO
100
STD
19
A
B
C
AUTO BRACKET
1
1
0
2
2
SEQUENCE
NO
./
STEP
3/ 1/3EV
0/
s
/
r
SELECT EXIT
MENU
AUTO BRACKET
1
1
0
2
2
SEQUENCE
NO
./
STEP
3/ 1/3EV
3/ 2/3EV
3/ 1EV
SET
MENU
SELECT
SET
MENU

 Loading...