Measuring
13
3.3 Protective Wire Test
This test serves to check the protective wire (PE) for dangerous contact voltage or
interruption. It is enabled in all marked positions RCD, R
A
and R
LOOP
(L-PE) of
the central selector.
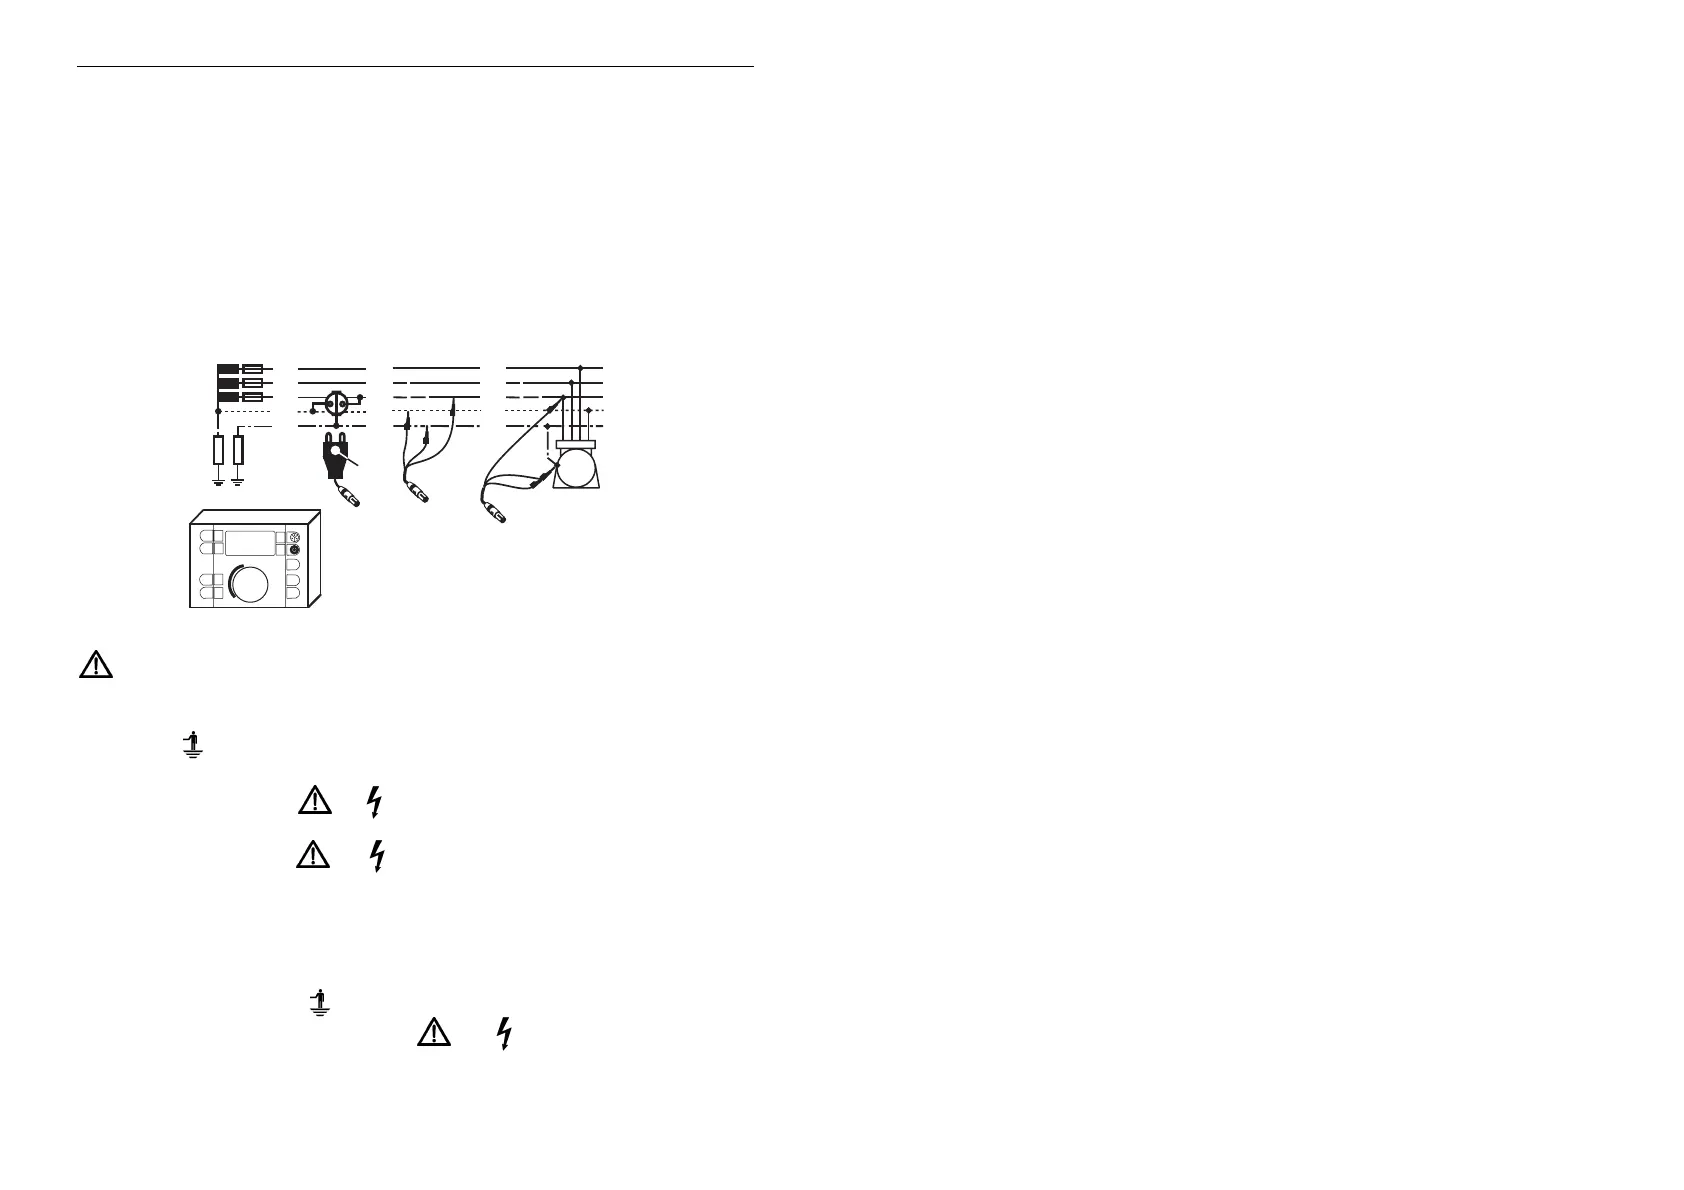
Measuring Process:
L
1
= brown
L
2
= black
L
3
= purple
Instrument
Marker
L3
L1
L2
R
B
L
2
L
1
L
3
N
P
E
(PEN)
L3
L1
L2
Instrument
Instrument
M
R
A
Observe overload capacity and connect instrument as shown.
When using the 3-pole measuring lead, mind the correct connection of PE!
Turn central selector to RCD R
A
or R
LOOP
(L-PE) and touch both the START-
button
R „ “ and an earthed/grounded point (water faucet etc.).
Now the voltage U
L-PE
and, for voltages between PE wire and contact electrode ≥
50 V, the flashing symbol „
PE “ are displayed.
If no interruption of the protective wire is detected, approx. half the mains voltage
and the flashing symbol „
PE “will be displayed after a switchover both in
position U
L-PE
and
U
N-PE
, after a switchover by pressing key.
Note:
To check the function, use the 3-pole measuring lead, connecting lead L
3
to live.
Touch START-button R „ “and simultaneously earthed/grounded part (water
faucet etc.). The display must now show „
PE “ .