What to do next:
v To install the microprocessor fan duct, see “Installing the microprocessor
fan duct.”
v To work with another piece of hardware, go to the appropriate section.
Installing the microprocessor fan duct
Attention
Do not open your server or attempt any repair before reading and understanding the Safety
Information and the Warranty and Support Information on the ThinkServer Documentation DVD
that comes with your product, and “Guidelines” on page 19. To obtain a copy of the
publications, go to:
http://www.lenovo.com/support
This section provides instructions on how to install the microprocessor fan duct.
To install the microprocessor fan duct, do the following:
1. Remove all media from the drives and turn off all attached devices and the
server. Then, disconnect all power cords from electrical outlets and disconnect
all cables that are connected to the server.
2. Remove the server cover. See “Removing the server cover” on page 21.
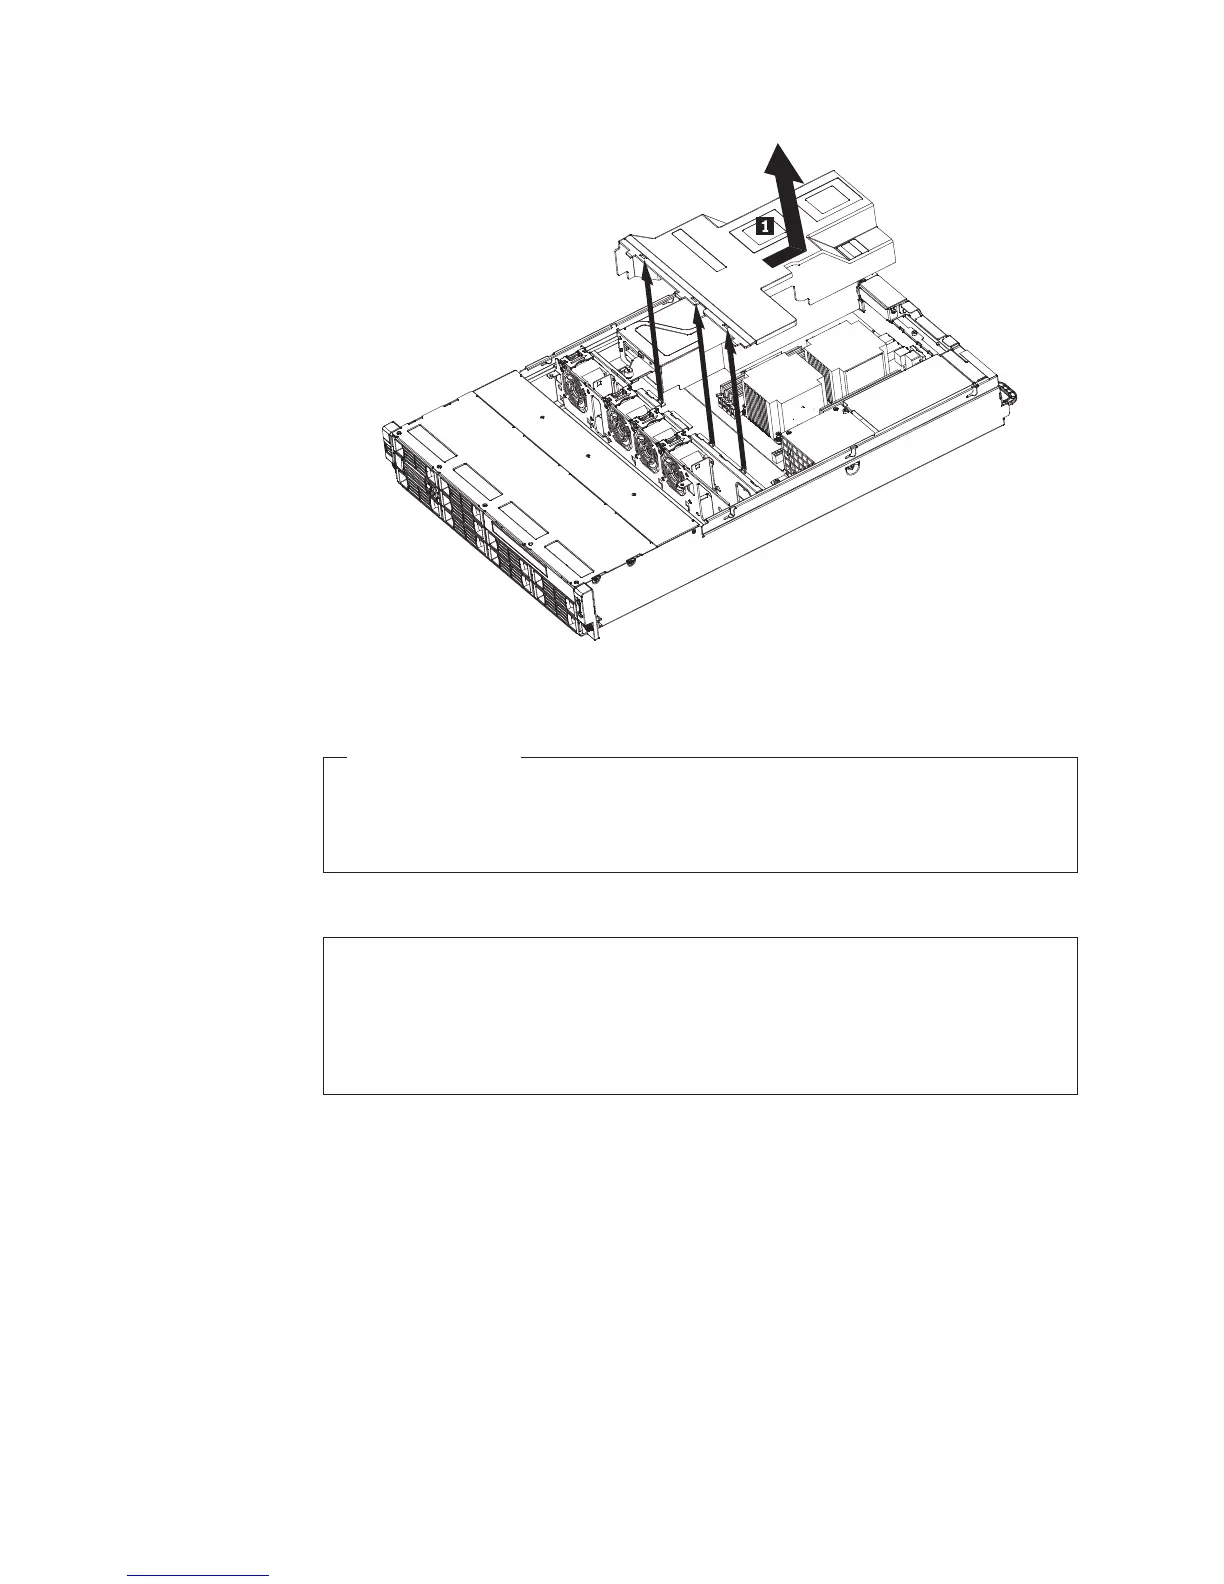
3. Place the microprocessor fan duct over the heat sink(s) and insert the three
plastic tabs on one side of the duct with the corresponding holes in the chassis.
Then, carefully pivot the other side down to install the duct in place.
Figure 38. Removing the microprocessor fan duct
52 Installation and User Guide