8.DisconnectthefrontpanelcableandthefrontpanelUSBcablefromtherearofthefrontpanelboard.
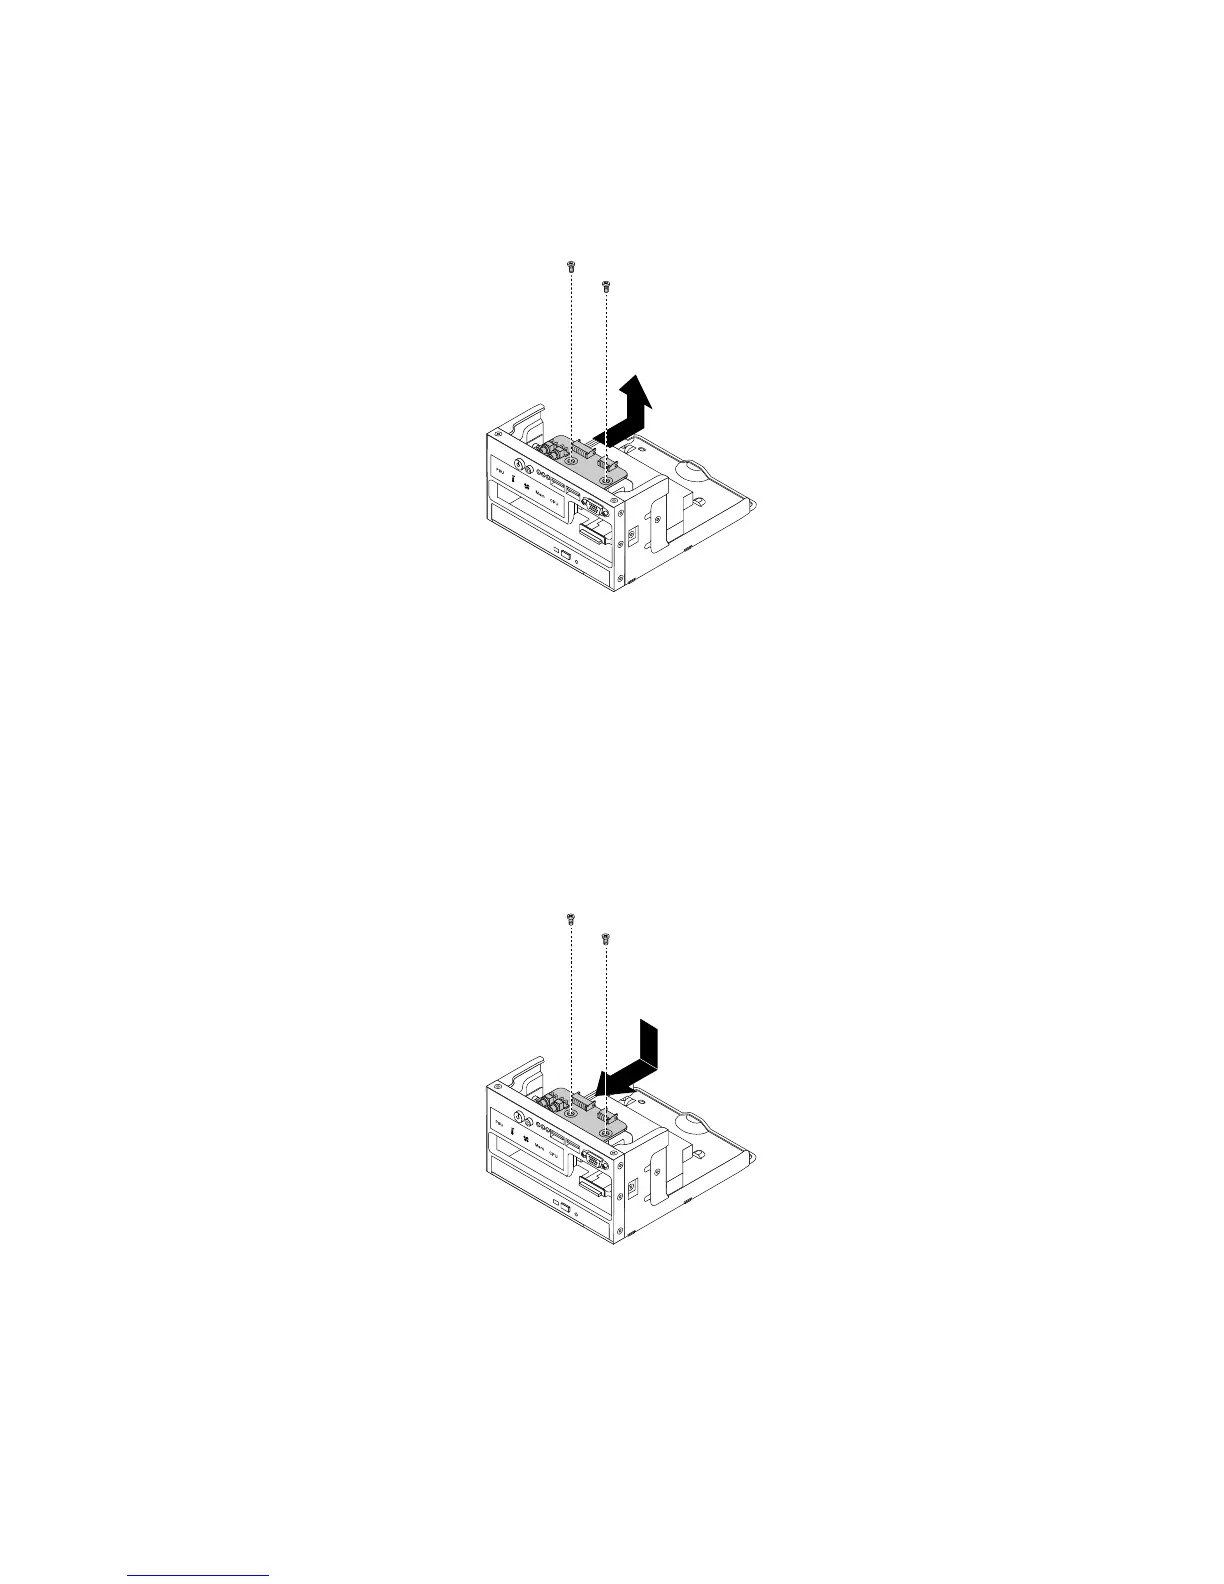
9.Removethetwoscrewsthatsecurethefrontpanelboardandthencarefullyremovethefrontpanel
boardfromtheleftcage.
Figure152.Removingthefrontpanelboardfromtheleftcageofservermodelswith2.5-inchhard-disk-drivebays
10.Touchthestatic-protectivepackagethatcontainsthenewfrontpanelboardtoanyunpaintedsurface
ontheoutsideoftheserver.Then,takethenewfrontpanelboardoutofthepackage.
Note:Carefullyhandlethefrontpanelboardbyitsedges.
11.Carefullypositionthenewfrontpanelboardontheleftcagesothatthefrontcontrols,connectors,and
LEDsarethroughthecorrespondingholesinthecageandthetwoscrewholesinthenewfrontpanel
boardarealignedwiththecorrespondingmountingstudsonthecage.Then,installthescrewsto
securethefrontpanelboardinplace.
Figure153.Installingthefrontpanelboardintheleftcageofservermodelswith2.5-inchhard-disk-drivebays
12.ConnectthefrontpanelcableandthefrontpanelUSBcabletotherearofthenewfrontpanelboard.
13.Reinstalltheleftcageandthenreconnectallcables.See“Removingandreinstallingtheleftcage”
onpage99.
14.Ifyouareinstructedtoreturntheoldfrontpanelboard,followallpackaginginstructionsanduseany
packagingmaterialsthataresuppliedtoyouforshipping.
190ThinkServerRD440UserGuideandHardwareMaintenanceManual