2-36
Basic Operation
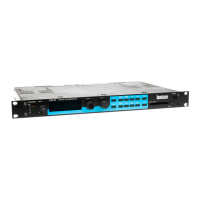
Lexicon
Press Load/✱ once to move the ✱ to the right of the Source value.
When the ✱ is in this position, ADJUST will change the Destination
value.
Note that the ✱ remains in the same position, so you can just turn
ADJUST to set the new Destination value. Set the value to +90.
Now our example has been modified so that the LFO sweeps the
FX Width Value from 0 to 90. This creates a dynamic alteration of
the effect’s spatial characteristics. Its stereo image changes
smoothly from mono to stereo, to surround, and back again.
Adding an Additional Pivot Point to the Patch
So far, our example uses only two pairs of patch values. The
Destination parameter moves linearly between the value assigned
at 000 and the value assigned at 127.
You can watch this change by displaying the Destination
parameter. Here’s how to jump directly to it from the patch:
Press Load/✱ repeatedly to return to the Patch 1 Destination
selection display.
The asterisk (✱) indicates that the Source
value will be altered when you turn
ADJUST.
Press Load/✱ to move the asterisk to this
position, where it indicates that
Destination values will be altered when
you turn ADJUST.
Patch 1 Values
✱ 000: -360 MONO
Patch 1 Values
000: ✱ -360 MONO
With the Destination value selected, turn ADJUST clockwise to set
the value to +0.
Patch 1 Values
000 : ✱ +0 Mono
Patch 1 Values
127 : ✱ +360 Mono
Patch 1 Values
127 : ✱ +90 L-R, R-L
Next, we’ll want to adjust the Destination value when the LFO is at
its maximum value. One way to do this is to press Load/✱ three
times to cycle the ✱ to the display of the Source value, and
continue on from there — but we’ve provided a short cut! Press
Edit to jump to the next assigned value ( in our example, the LFO
maximum value).
Patch 1 ✱ Dst
Controls FX Width
 Loading...