22
Parameter Description
Trails
Trails O: Any delay repeats or reverb decays are instantly muted
when the block is bypassed. Trails On: Any delay repeats or reverb
decays continue to decay naturally when the block is bypassed or a
dierentsnapshotisselected.
Looper
AsinglemonoorstereoLoopercanbeaddedasoneofthefoureectsblocks.
Looper Models (Mono or Stereo)
Model Based On*
6 Sw Mono Looper
Line 6 Original
1 Sw Mono Looper
Line 6 Original
6 Sw Stereo Looper
Line 6 Original
1 Sw Stereo Looper
Line 6 Original
Looper Type Max. Loop Length (Full Speed) Max. Loop Length (1/2 Speed)
Mono
40 seconds 80 seconds
Stereo
20 seconds 40 seconds
Looper Settings
Knob Parameter Description
1 Playback
Adjustslooperplaybacklevel.Youmaynditusefultoturn
this down a bit so your live guitar can be slightly louder.
2 Overdub
Relatively sets the level of your loop while overdubbing. For
example,ifyourOverdubLevelissetto90%,eachtimeyour
loop repeats, its volume will be reduced by 10%, sounding
quieter and quieter with each overdub pass.
3 Low Cut
Filters a portion of the loop's bass and/or treble frequencies,
whichcanimprovethemixwithyourliveguitar.
4 High Cut
6 Switch Looper
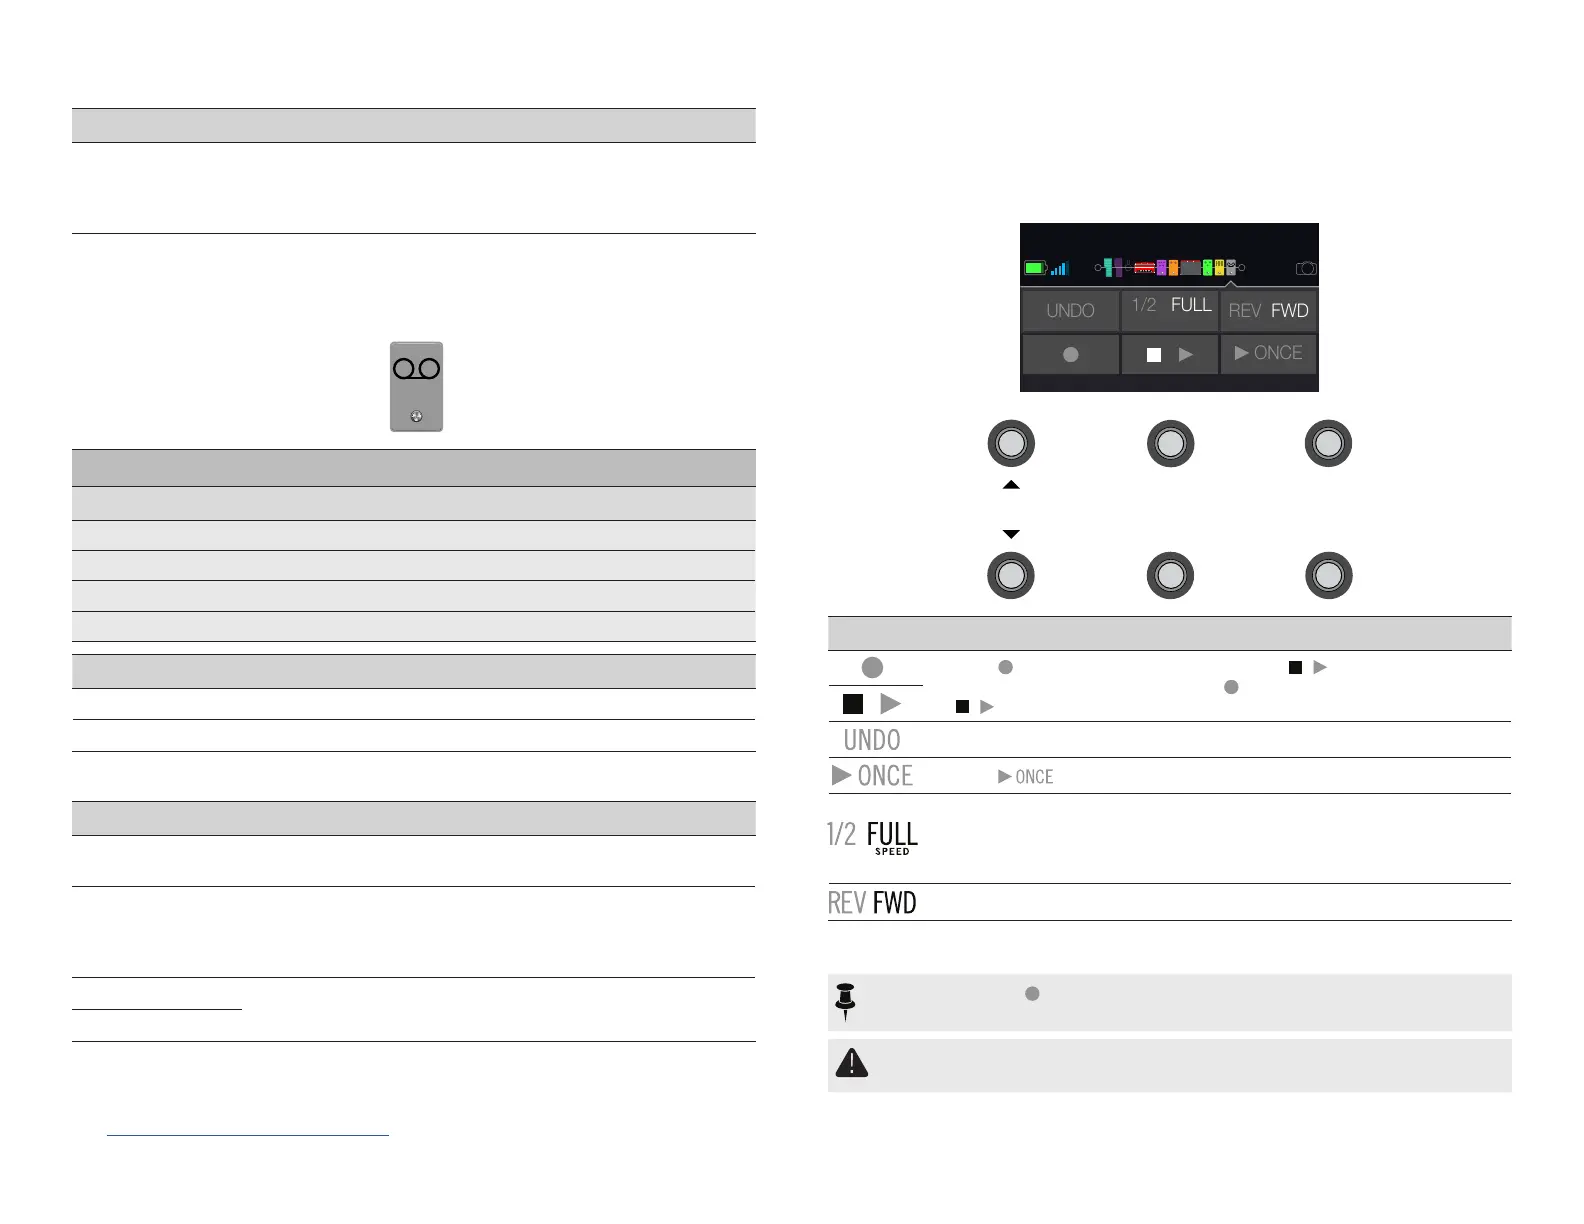
1. Add a 6 Switch Looper block to your preset.
2. Press the Looper assigned footswitch to open Looper mode:
BA
DC
OverdubPlayback Low Cut High Cut
SPEED
Switch Description
Step on to start recording a loop. Step on to end the loop and
immediately start playback. Step on to overdub additional parts. Step
on again to stop playback.
If you make a mistake on your last overdub, step on UNDO to erase it.
Step on to play the recorded loop once through.
Recording at full speed and then switching to 1/2 speed will also drop
the loop down one octave. Recording at 1/2 speed will double your
looping memory, and switching to full speed will cause the loop to play
at double speed (up an octave).
Step on REV/FWD to hear your loop backwards.
3. When nished, press MODE/EDIT/EXIT.
NOTE: If you press while loop playback is stopped, this will always record a
new loop, and any previous recording will be discarded.
IMPORTANT! You may change presets while looping, but loop playback will
stop unless the preset you select includes the same type of looper block.
*See "U.S. Registered Trademarks" on page 25.AllproductnamesusedinthisdocumentaretrademarksoftheirrespectiveownersandneitherYamahaGuitarGroupnorLine6areassociatedoraliatedwiththem.
These trademarks appear solely to identify products whose tones and sounds were studied by Line 6 during sound model development.
 Loading...