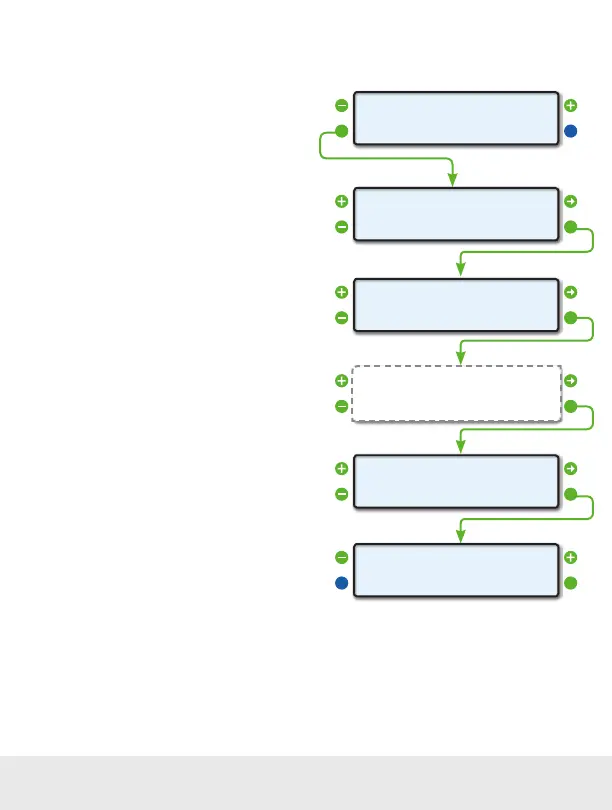
Displaying a Trip Value as an X-GAUGE
You can set any of the built-in trip values and
have them displayed as a gauge. This allows you
to monitor trip functions along with other gauge
functions.
In the example to the right, a custom X-GAUGE that
displays the Time Driven Today is set up.
Step 1
To get started, choose an empty memory slot from
the X-GAUGE Screen. Then press the lower left
function buttons next to EDIT.
Step 2
In the TXD Screen, the first character determines
which trip function will be displayed. Choose a
number from the Available Trip Parameters chart
on the next page.
The second character determines which trip to use.
Choose a number from the Trip Designations chart
on the next page.
When you’re done, press the lower right function
button next to OK to move to the next screen.
Step 3
For RXF, make the first character an 8 as shown to
the right.
An 8 as the first character is a special condition that
tells the ScanGauge that this is to be a trip gauge. All
values after the 8 are ignored.
When you’re done, press the lower right function
button next to OK to move to the next screen.
Steps 4 and 5
Do not make any changes to the RXD and MTH screens. Simply press the lower right function button
next to OK until you reach the name screen.
Step 1
Step 2
Step 3
Step 4 - 5
Step 6
Step 7
<EDIT
<XGAUGE
EXIT>
2>
-
+51_
OK>TXD
»
-
+800000000000
_
OK>RXF
»
-
+0000
OK>RXD
»
_
-
+TDT
OK>NAME
»
<CANCEL
<XGAUGE
SAVE>
TDT 2>
Make no changes to the RXD and
MTH program parameters
46 — www.ScanGauge.com