Do you have a question about the Loepfe YARNMASTER ZENIT+ and is the answer not in the manual?
Defines DANGER, ATTENTION, and informational symbols for safety warnings.
Provides useful hints and recommendations for operation and safety.
Operation and interaction via the touch-sensitive monitor screen.
Usage of the USB port for data import/export and screenshots.
Main navigation, menu contents, and navigation path elements.
Message windows, intervention notifications, and connection status.
Login, access level, language selection, and online help access.
Action buttons, logged-in user, date/time, software version, GUI switch.
Buttons for language, login, help, back, next, edit, confirm, cancel, undo.
Buttons for copying articles, starting/stopping lots, adjusting, resetting data, changing passwords, logging out, adding/deleting users.
Buttons for acknowledging messages and initiating firmware updates.
Buttons for general input and information display.
Process of choosing the desired user interface language from available options.
Steps to log in, including selecting user and entering password.
Method for inputting and confirming user passwords.
Description of privilege reset to 'Guest' upon logout.
Advisory to change passwords periodically after startup.
Path to access and modify date and time settings.
Steps to edit, confirm, and save date and time settings.
Steps to enter edit mode and modify base machine parameters.
Detailed fields for machine type, name, spindles, yarn count, etc.
Procedures for saving and confirming changes to base settings.
Configuration of default parameters applied to production groups.
Steps to modify and save default group settings.
Steps to modify and save default data acquisition parameters.
Path to access the firmware update interface.
Explains how to check and compare firmware versions.
Meaning of red/grey version numbers and offline status.
Steps to start the firmware update for the master module.
Steps to start the firmware update for the sensing head.
Symbols indicating update progress and success.
Visual confirmation of a successful firmware update.
Procedure to leave the edit mode after completing updates.
How to view detailed parameters by double-clicking an article.
Steps to enter edit mode and change article parameters.
Interface for setting class clearing parameters for different yarn types.
Symbols showing if class clearing is active or inactive.
Procedures for confirming and saving modified settings.
Options to save changes or cancel modifications.
Options to overwrite or save to a new article name.
Information on using factory-predefined articles as templates.
Modifying settings for production groups, with data reset.
Choosing an existing article to duplicate.
Opening the copy window and selecting target settings.
Defining the destination and name for the copied article.
Finalizing the article copying operation.
Viewing detailed group parameters by double-clicking.
Steps to enable editing of group configurations.
Configuration of spindle ranges, pilot spindles, sensing heads, lot, and articles.
Adjusting advanced or optional parameters for groups.
Settings for data acquisition within a group.
Procedure for saving configured group parameters.
Steps to select and start a production group.
Final confirmation for initiating the group.
Tracking the progress of spindle adjustments.
Individual monitoring of pilot spindle adjustment completion.
Indication that pilot spindle adjustments are successfully finished.
How fine adjustment affects non-pilot spindles.
Guidance on resolving issues with pilot spindle adjustments.
Requirement for starting subsequent spindle adjustments.
Path to access the diagnostic test mode.
Availability for cutting types and class fields.
Steps to enable and configure the test mode.
Setting test duration and choosing test parameters.
Defining which spindles are included in the test.
System response to faults during testing.
Automatic and manual termination of test mode.
Duplicating test configurations to other spindles.
Process of capturing and saving screen images to USB.
Creating and saving various system reports to USB.
Lists of reports available from DATA and SERVICE menus.
Steps for exporting selected data to a USB stick.
Choosing file format and confirming export action.
Acknowledging and quitting import/export functions.
Critical alert about overwriting files with the same name on USB.
Process of loading data from USB to the system.
Choosing specific data files for import.
Finalizing import/export operations.
Steps and password for performing a factory reset.
Process for restarting the system's central unit.
Details of the first installation method using 24 VDC power.
Details of the second installation method using AC power.
Details of the third installation method with a faceless unit.
Visuals of the central unit and its faceless variant.
How spindle computers and adapters connect to the system.
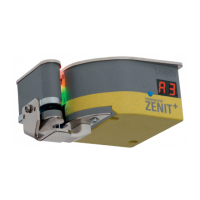
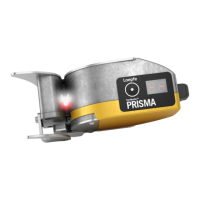
Description of how the sensing head connects to the system.
Note regarding the pluggable nature of all cable connections.
Functionality of the front USB port for data and screenshots.
Overview of rear connections including power, LAN, COM, and USB.
Specifics on the 24 VDC power connection and voltage warning.
Information on protective ground and Loepfe 2-wire bus connection.
Explanation of the power supply (PWR) and drive (HDD) status LEDs.
Operation of the power switch for standby and emergency restarts.
Details on LAN 1 (dedicated) and LAN 2 (DHCP) connections.
Information on the USB 2.0 and HDMI display ports.
Specifications for COM 1 (RS 485) and COM 2 (RS 232) ports.
| Brand | Loepfe |
|---|---|
| Model | YARNMASTER ZENIT+ |
| Category | Industrial Equipment |
| Language | English |