EasyManua.ls Logo

Lorex LNR110 Series - User Manual

Lorex LNR110 Series
186 pages
Print Icon
To Next Page IconTo Next Page
Loading...
Instruction Manual
LNR110 Series

Table of Contents

Questions and Answers

  • T
    Timothy JacksonJul 31, 2025
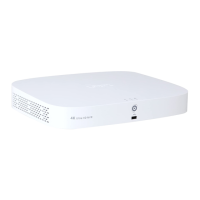
    What to do if there is no picture on Lorex LNR110 Network Hardware camera?
    • A
      Amy CooperJul 31, 2025
      If you are not seeing a picture from your camera on the selected channels, it could be due to a few reasons. First, check that the camera cables are securely connected at both the NVR and the camera. Try disconnecting and reconnecting them. You might also want to try moving the camera to another channel or using a different cable. If your cameras require power and are not using PoE, ensure they are using the correct power source as specified. Also, verify that your cameras are connected to the same LAN as the NVR and that any routers or switches between the NVR and the IP cameras are powered on.
  • S
    sierra64Aug 4, 2025
    Why is my Lorex Network Hardware NVR not powering on?
    • T
      Theresa GillAug 4, 2025
      If your Lorex NVR is not receiving power or powering up, it could be due to a loose or unplugged cable from the power adapter. Ensure all cables are connected correctly, and the power adapter is securely connected to the back of the unit. Another reason might be insufficient power. Check that the unit is powered on (LED indicators should be lit). If connected to a power bar or surge protector, try connecting directly to a wall outlet. Confirm the outlet has power by testing it with another device or trying a different outlet.
  • D
    Dr. Paula EvansAug 8, 2025
    How to fix Lorex LNR110 when hard drive is full?
    • R
      Robert BauerAug 8, 2025
      If your Lorex Network Hardware unit stops recording because the hard drive is full, the 'Overwrite' function might not be enabled. To resolve this, go to the Main Menu, select General, and beside 'HDD Full', choose 'Overwrite'. Click 'OK' to save the settings. This will allow the system to continuously record by overwriting older data when the hard drive reaches its capacity.
  • K
    knguyenAug 12, 2025
    Why is my Lorex LNR110 system not recording?
    • A
      Albert WhiteAug 12, 2025
      If your Lorex Network Hardware system isn't recording, recording may be disabled. Right-click in live view and click 'Record'. Ensure each channel is set to 'Schedule' or 'Manual'. If 'Schedule' is selected, verify the schedule settings are correct.
  • M
    Maurice MccoyAug 16, 2025
    What to do if Lorex LNR110 hard drive is not detected?
    • J
      James HernandezAug 16, 2025
      If the hard drive is not being detected by your Lorex system, it could be due to a few reasons. First, remove the housing and check that the hard drive cables are firmly connected. Also, if there is no hard drive in the system, open the housing and install a 3.5" SATA hard drive.
  • L
    Laura KleinAug 21, 2025
    Why am I not receiving email notifications from my Lorex LNR110?
    • E
      eric73Aug 21, 2025
      If you are not receiving email notifications from your Lorex Network Hardware, it could be because email notification is disabled. Also, if you want to use your own SMTP server, deselect the Default box, and enter your SMTP Server address, Port, User name, and Password in the respective fields. Finally, make sure that Send Email is checked for cameras you wish to receive email notifications from.
  • M
    mooreraymondAug 25, 2025
    How to fix Lorex Network Hardware mouse not detected?
    • J
      josephpowellAug 26, 2025
      If the mouse is not being detected by your Lorex system, first, firmly connect the mouse cable to the system. If that doesn't work, try re-connecting the power cord to restart the system.

Summary

Important Safeguards

General Precautions

General safety guidelines and warnings for operating the product.

Installation

Instructions and safety precautions related to product installation.

LNR110 Series Features

Basic Setup (LNR110 Series)

Connect the IP Cameras

Instructions for connecting IP cameras to the NVR or network.

FLIR Cloud

Information about the FLIR Cloud™ service for remote access.

Connecting Cameras to the Local Area Network (LAN)

Connecting cameras via a LAN using a PoE switch or power adapters.

Using the System

Adjusting Camera Image Settings

Guide to configuring individual camera image settings like brightness and contrast.

Adjusting Camera Zoom & Focus

Configuring motorized lens zoom and focus settings for compatible cameras.

Setting The Time

Instructions for setting the system's date, time, and time zone for accurate logs.

Recording

Setting up Scheduled or Manual Recording

Configuring the system for scheduled or manual video recording.

Search (Playback)

Playing Back Video from the Hard Drive

Steps to search and play back recorded video files from the system's hard drive.

Backup

Backing up Video

Steps to back up video recordings to a USB drive.

Using Video Clip Backup

Selecting and saving specific video clips during playback to a USB drive.

Managing Passwords and User Accounts

Changing Passwords

How to change the system's user account passwords for security.

Adding Users

Guide to creating new user accounts with specific permissions.

Using the Main Menu

Camera

Menu for managing IP cameras, setting recording, and custom titles.

Recording

Menu for setting camera recording parameters like resolution and frame rate.

Configuring Recording Quality

Customizing video quality settings for main and sub streams.

Setting

Configuring general system, schedule, network, recording, and motion settings.

Network

Configuring network parameters for system connectivity.

Selecting DHCP or Static IP Address (TCP;IP)

Setting up IP address configuration using DHCP or static assignment.

Configuring DDNS Settings

Setting up Dynamic DNS service for remote system access.

Configuring Email Alerts

Configuring the system to send email alerts for events like motion detection.

Event

Configuring settings for motion detection, video loss, and system warnings.

Configuring Motion Detection

Setting up motion detection areas, sensitivity, and system responses.

Configuring Video Loss Settings

Configuring settings for video loss events and system responses.

Configuring Hard Drive Warnings

Setting up warnings for hard drive status such as errors or fullness.

Configuring Network Warnings

Configuring notifications for network issues like disconnections or IP conflicts.

Storage

Configuring recording schedules and managing connected hard drives.

Configuring the Video Recording Schedule

Setting custom schedules for continuous or motion-based recording.

Formatting the Hard Drive

Instructions for formatting the hard drive before use.

Configuring General System Settings

Configuring miscellaneous system settings like language and video standard.

Setting the System to Factory Defaults

Resetting the system to its original factory default settings.

Upgrading Firmware from USB

Instructions for upgrading system firmware using a USB drive.

Connecting to Your System Over the Internet on PC or Mac

Connect your System to Your Router

Connecting the NVR to the router via an Ethernet cable.

Connect to the System Over the Internet

Installing client software and connecting to the system via the internet.

Using FLIR Cloud Client for PC or Mac

Live View

Viewing live video feeds from connected systems using the client.

Live View Controls

Detailed controls and options within the Live View interface.

Controlling PTZ Cameras

Controlling PTZ cameras remotely using the FLIR Cloud™ client.

Playback

Accessing and playing back recorded video saved on connected systems.

Playback Controls

Detailed controls for managing video playback, including speed and timeline navigation.

Downloading Video to your Computer Hard Drive

Saving recorded video clips from the system to a computer.

Alarm CFG

Configuring alarms for the client software to receive alerts.

Account

Setting up user accounts and passwords for the client software.

Connecting to your System Using Smartphone or Tablet Apps

iPhone

Guide to connecting and using the FLIR Cloud™ app on an iPhone.

iPad

Guide to connecting and using the FLIR Cloud™ app on an iPad.

Android

Guide to connecting and using the FLIR Cloud™ app on Android devices.

DDNS Setup (Advanced)

DDNS Setup-Access your System Remotely over the Internet

Setting up DDNS for remote system access via the internet.

LNR110 Series Hard Drive Installation

LNR110 Series Troubleshooting

Lorex LNR110 Series Specifications

General IconGeneral
ModelLNR110 Series
TypeNetwork Video Recorder
Resolution Support1080p, 720p, D1, CIF
Hard Drive Support1 x SATA
Video CompressionH.264
Video Output1 x HDMI, 1 x VGA
Network Interface1 x RJ-45 10/100Mbps
Remote ViewingiOS, Android
Operating Temperature-10°C to 55°C (14°F to 131°F)

Related product manuals