Connecting a PTZ Camera (LNR110 Series)
18
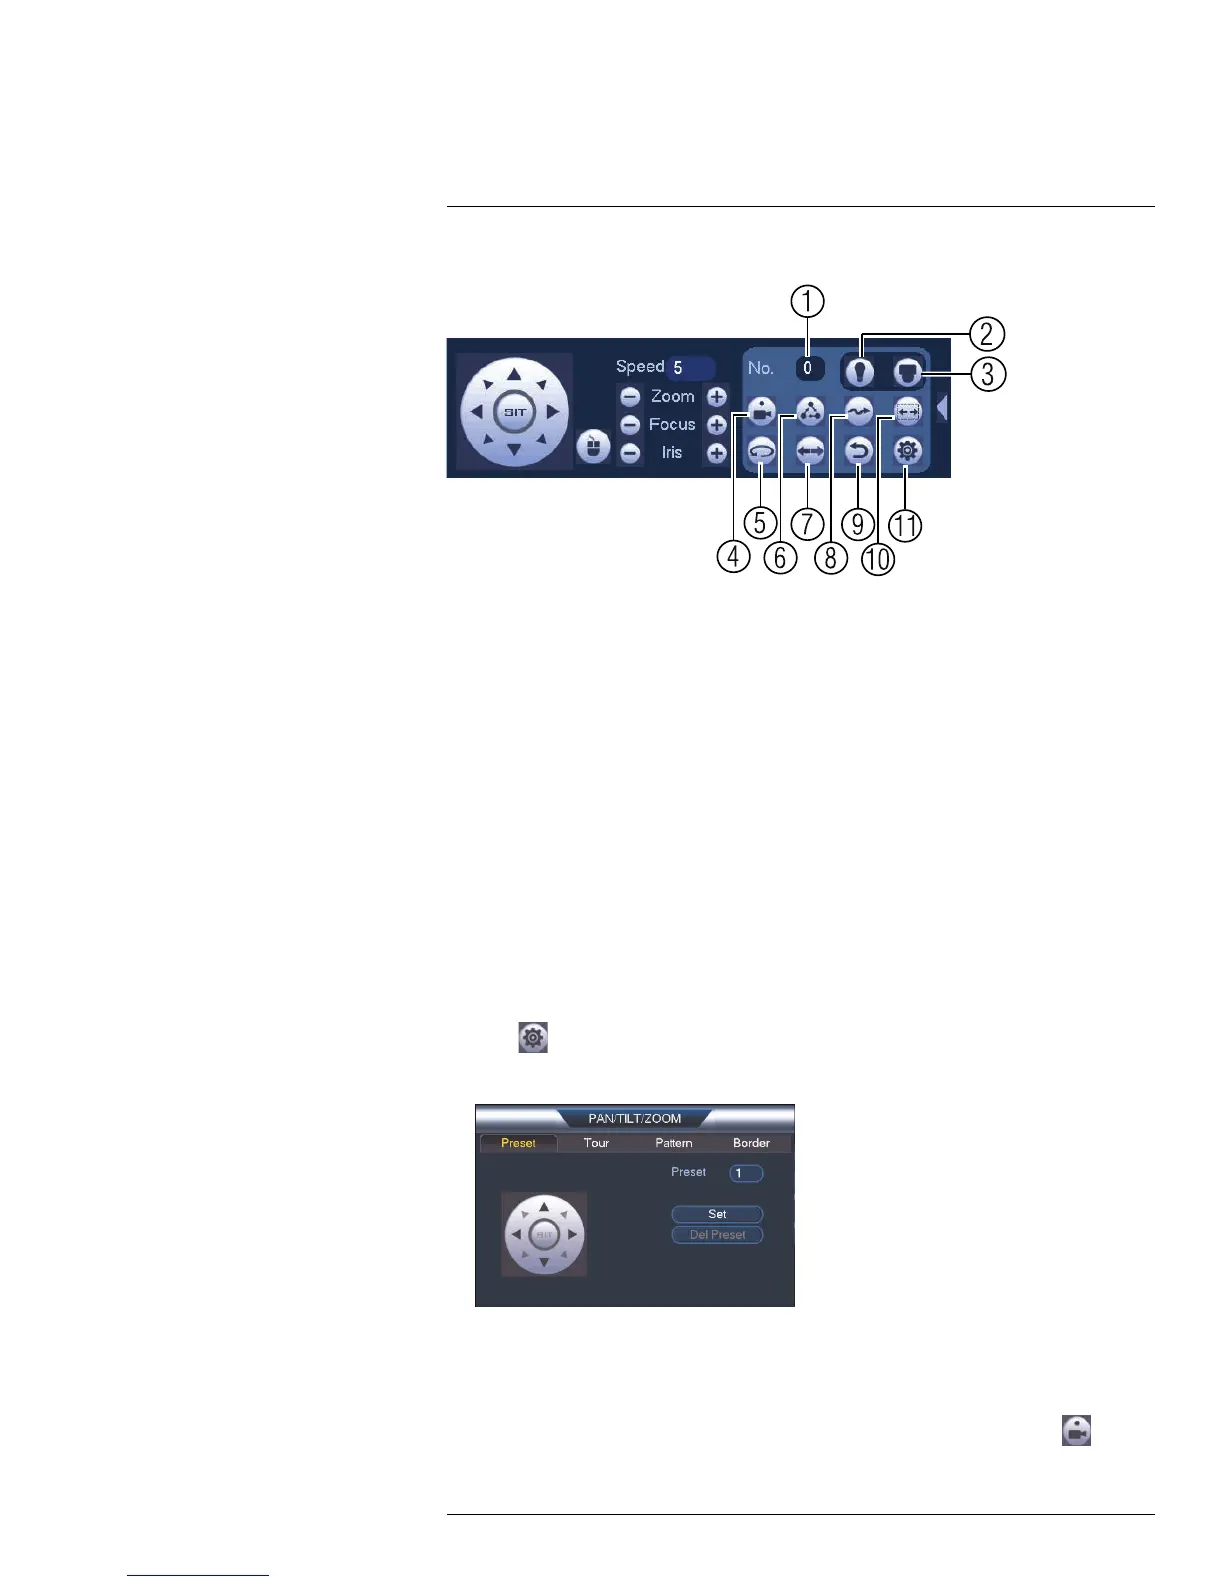
Advanced PTZ controls overview:
1. No.: Select the number of the action you want to perform.
2. Not supported.
3. PTZ camera menu: Click to open the camera’s OSD menu. This may not be sup-
ported on all camera models.
4. Preset: Click to call the selected preset.
5. Autopan: Click to start autopan. During autopan, the camera will continuously pan
360°.
6. Tour: Click to run the selected tour.
7. Flip: Click to flip the camera 180°.
8. Reset: Click to move the camera to the home position.
9. Pattern: Click to run the selected pattern.
10. Auto scan: Click to run the selected autoscan.
11. Aux: Click to open the aux menu, where you can set up Presets, Tours, Patterns, and
Auto Scans.
18.2.1 Presets
Presets will save a camera position for quick retrieval.
To add presets:
1. Click
to open the aux menu.
2. Click the Preset tab.
3. Enter the number of the preset you want to create under Preset.
4. Move the camera to the desired position and click Set.
To go to a preset:
• Under No., select the number of the preset you would like to go to and click
.
#LX400070; r. 1.0/27147/27147; en-US
159
 Loading...