Page 25 of 60
located on the connector located on the bottom of the colposcope camera. Make sure to match the bump
to the notch. The cable will plug in easily. Do not force it in.
Diagram 2.5-14
NOTE: Please adjust the cable if needed so that there is enough cable slack near the colposcope camera
head to allow it to move easily
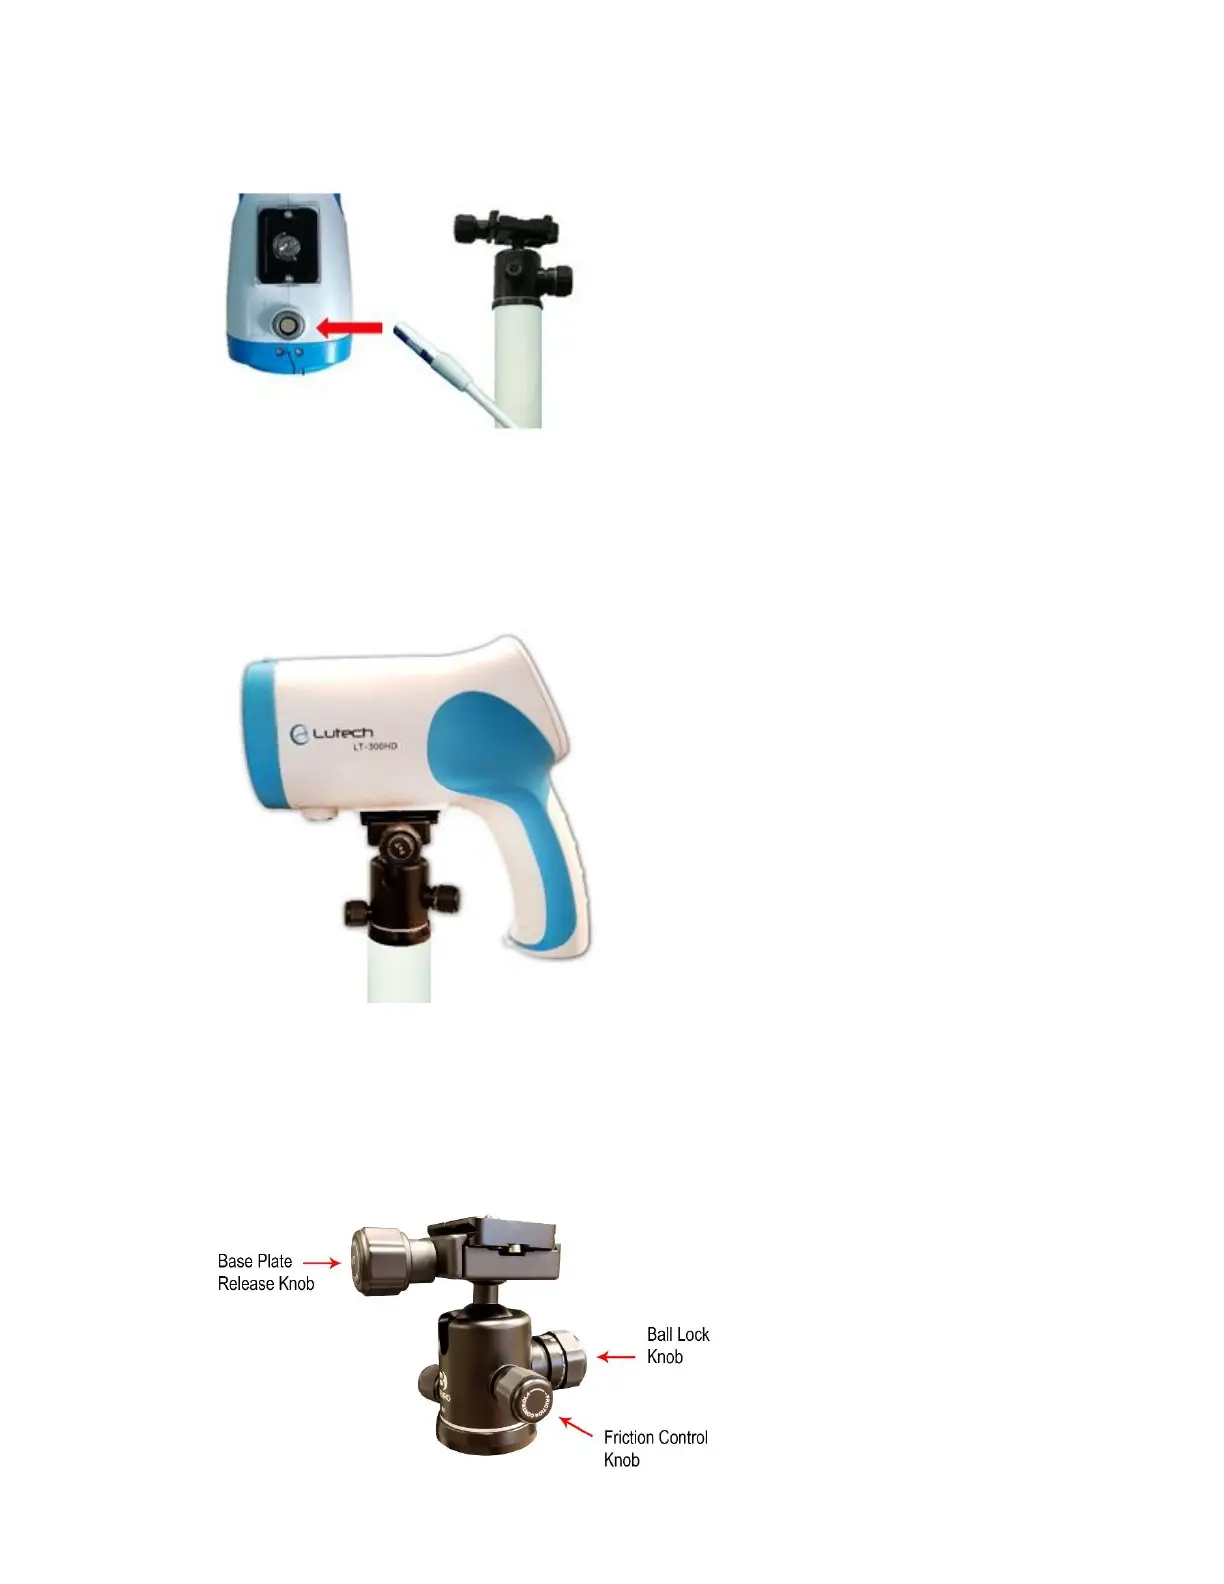
12. Slide the camera base plate onto the camera mount and tighten the base plate release knob clockwise to
secure the colposcope.
Diagram 2.5-12
CAUTION:
• Do not let go of the colposcope camera without ensuring that the base plate release knob is
tightened correctly, and the camera head is stable.
• Do not let go of the colposcope camera until the ball lock is tightened. The ball lock and friction
control knob both adjust the tension on the ball socket and can both be used to customize the
movement of the camera.