Page 39 of 60
Function buttons on the remote:
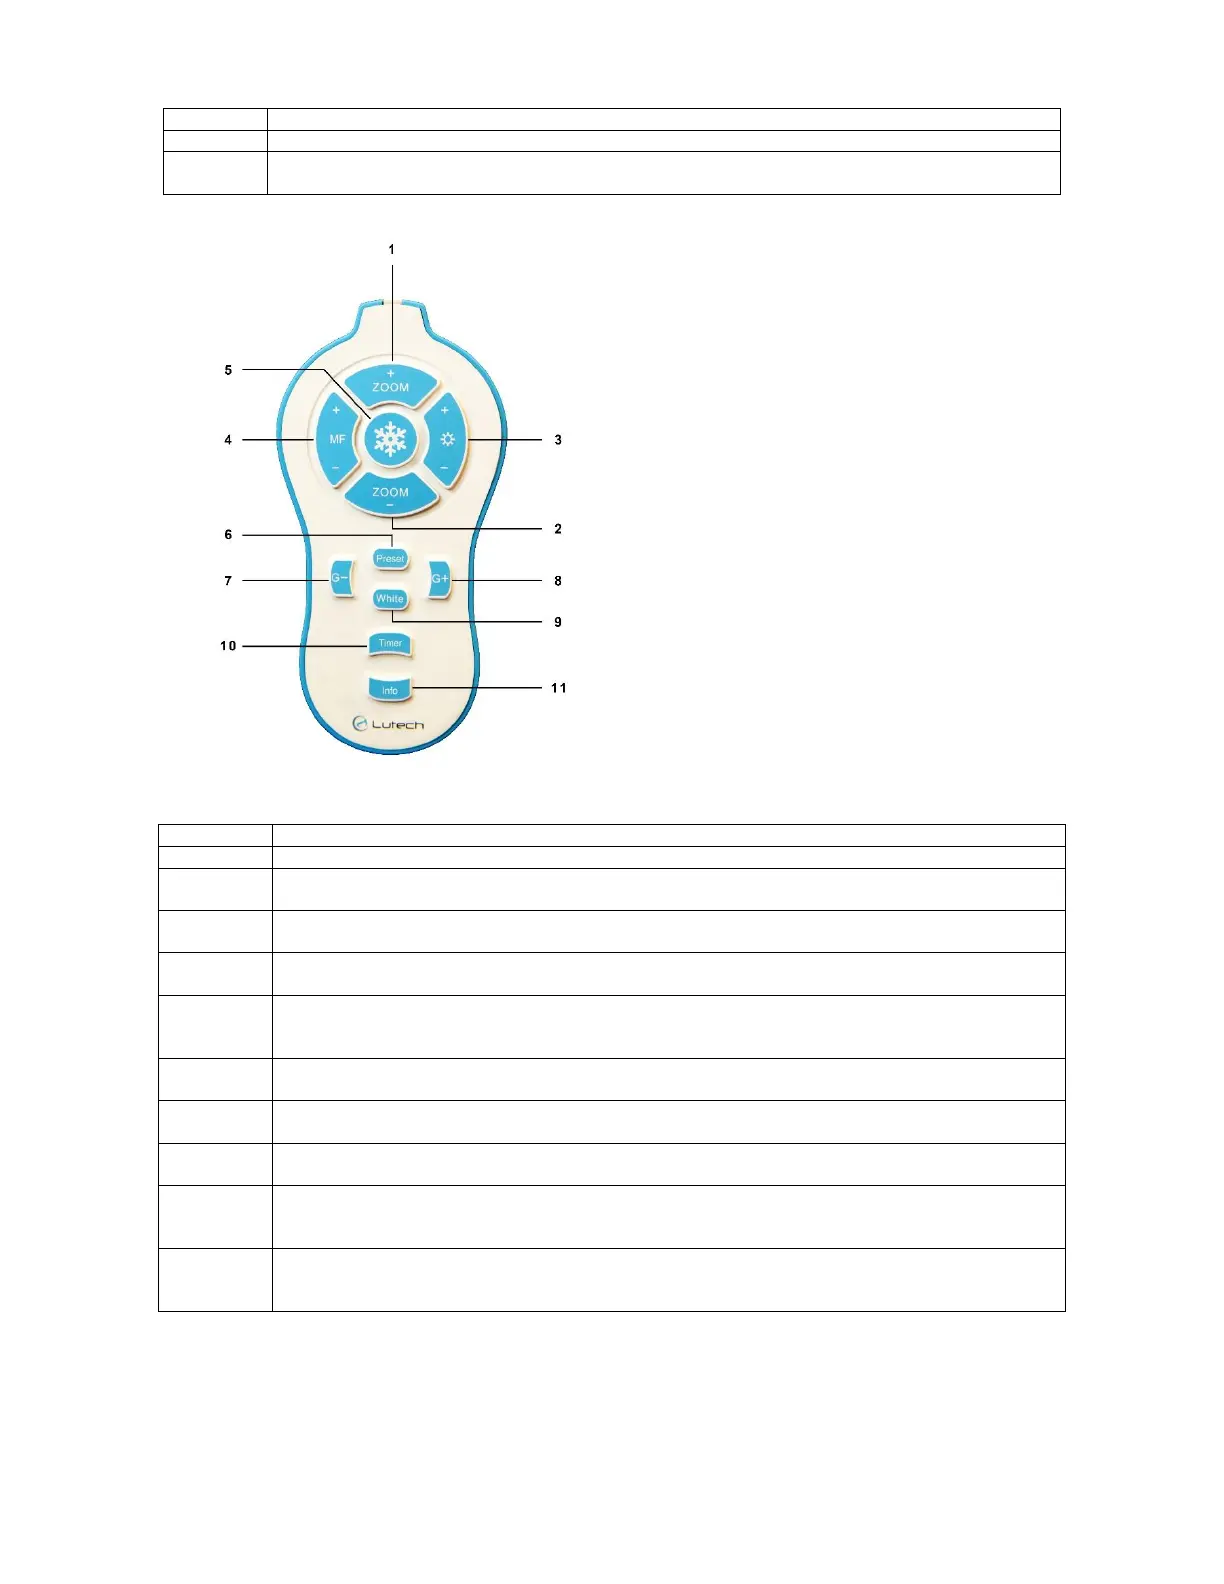
Diagram 5.2-2
5.3 Tips for Achieving Optimal Image Clarity
The following are tips for obtaining optimal image quality and clarity.
Zoom In: Focus in on one area, magnifying it.
Zoom Out: Focus out from one area, to see more of the object being examined.
Power indicator: When the colposcope connected to an AC power source, the indicator
light will turn green.
Zoom In: Focus in on one area, magnifying it.
Zoom Out: Focus out from one area, to see more of the subject being examined.
Increase/Decrease Brightness: Increases/Decrease the brightness level of the LED
circular light source.
Manual Focus In/Out: Adjust manual focus of the image to allow clarification of either
the center or peripherals of the image.
Freeze: Freezes the live feed image on the screen. Press again to unfreeze the
image.
Preset: Saves a green filter level for quick access.
Short press: Go to the last green filter level saved.
Long press: Save the current green filter level as the preset green filter level.
Decrease Green Filter: Gradually decrease the amount of green filter added to the
image.
Increase Green Filter: Gradually increase the amount of green filter added to the
image.
White Filter: Return the image to its natural state and takes away any color filters
applied to it.
Timer: The timer can be used for tests such as the acetic acid test. Press to start a
timer starting from 0 with increments of 1 second. Press again to stop. Once stopped,
the timer will disappear from the screen.
Info: Display information on magnification level and focus mode on the screen.
NOTE: This does not affect the timer.