Page 34 of 60
Chapter 4: TV Screen or Workstation Setup
NOTE: Unless specifically noted for one or the other, the following information is true for both the LT-300 SD
and the LT-300 HD digital video colposcopes.
At the user’s discretion, the colposcope may be connected to a TV screen or a computer (desktop or laptop).
The TV screen is used as an option if there is no need to retain any pictures or videos from the colposcopy.
The computer will allow the user to save pictures and video from the exam and integrate it into their EMR or
reporting systems. Below is a comparison of functions to help you decide what you may need.
NOTE: Lutech works with various telemedicine companies by providing the LT-300 SD and LT-300 HD
colposcope as an accessory for their telemedicine units. If you have a telemedicine infrastructure in place,
you may be able to obtain the LT-300 HD as an add-on component. Please contact your telemedicine
representative for more information.
4.1 TV Screen Setup
If there is no need to save pictures or video, you can simply connect the colposcope to a TV monitor.
NOTE: To use the colposcope with a TV screen, it must be connected to an AC power source. It will not
work on battery power.
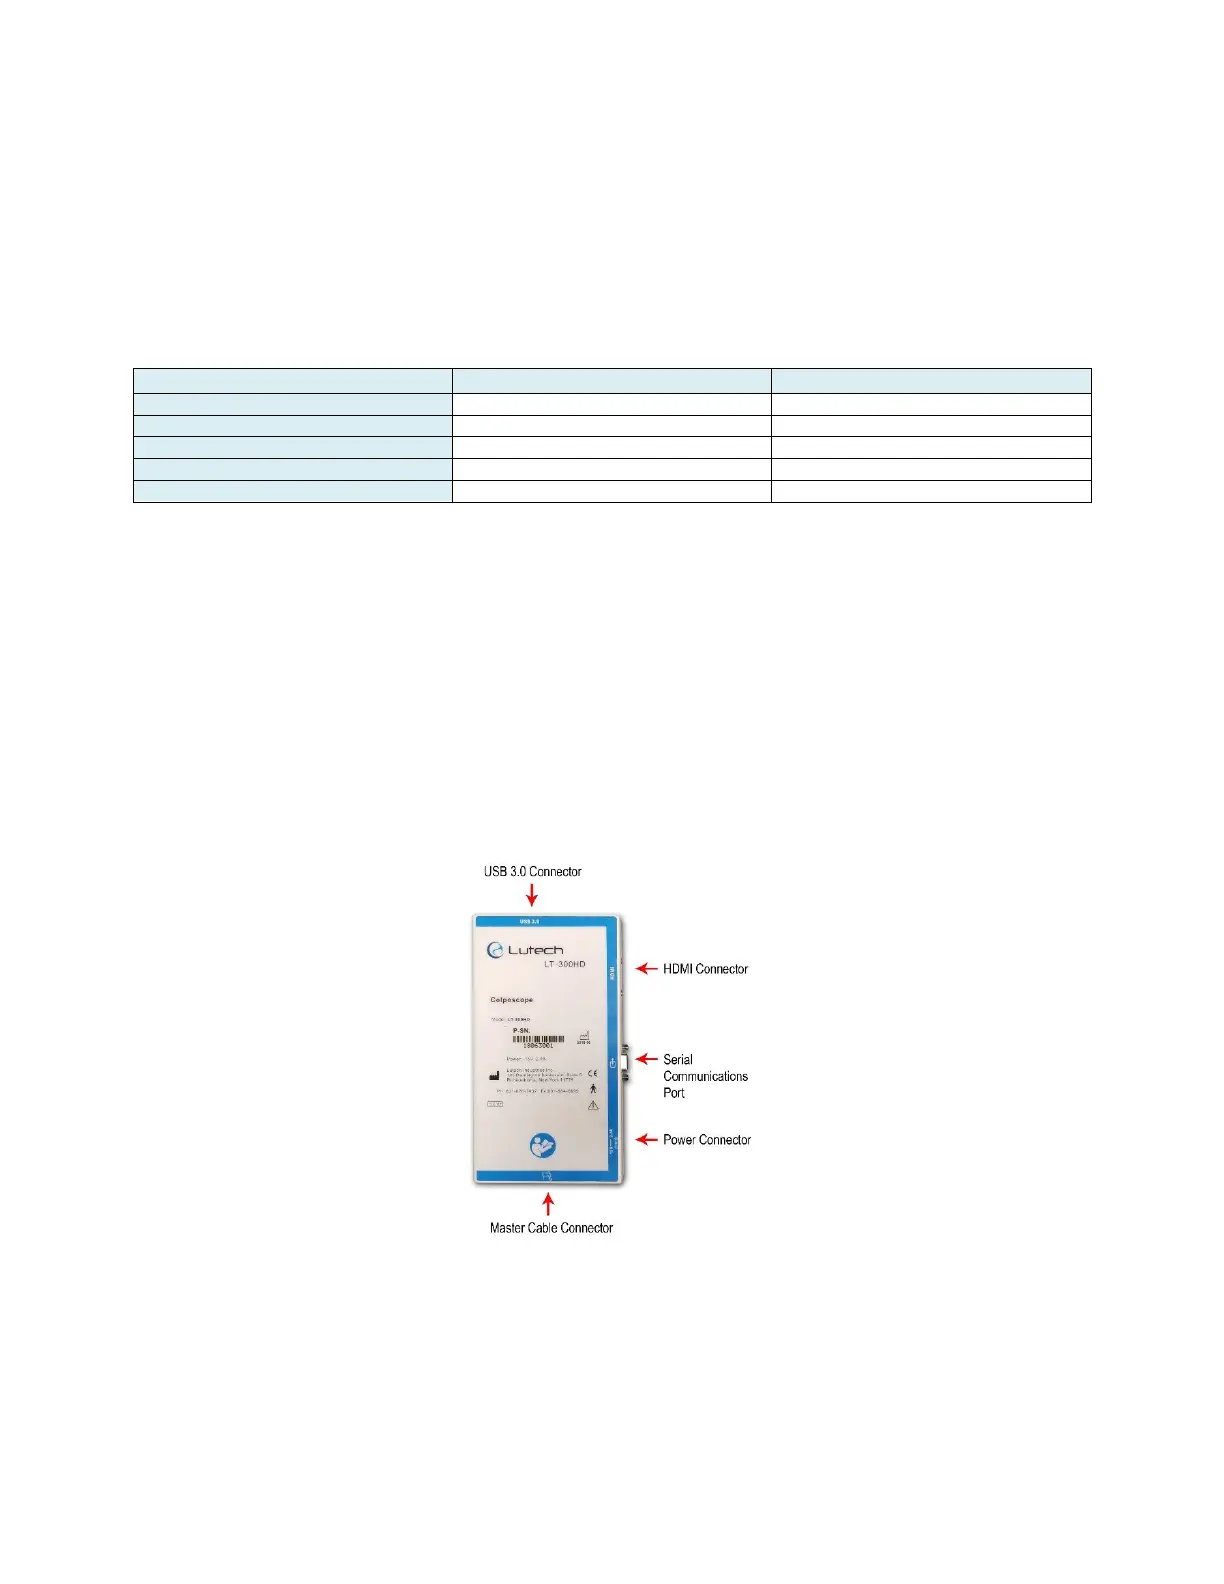
The power box connectors are all labeled in the front.
Diagram 4.1-1
To connect the LT-300 SD or LT-300 HD colposcope to a TV monitor, follow the steps below.
1. Make sure the colposcope is turned off.
2. Connect the HDMI cable provided with the colposcope to the power box. Connect the other end to the TV.
3. Connect the colposcope’s power adapter to the power box and then plug the power adapter into a wall
socket.
4. Turn the colposcope on by pressing the power button located on top of the mini LCD screen.