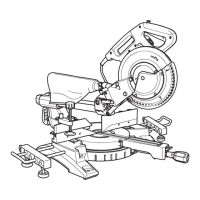
EasyManuals Logo

Makita LS1018-R Technical Information

Makita LS1018-R
48 pages
To Next Page IconTo Next Page
To Previous Page IconTo Previous Page
Page #20 background imageLoading...
Page #20 background image
P 17/ 45
Repair
[3] DISASSEMBLY/ASSEMBLY
[3] -6. Lower blade guard
Fig. 53
(1) Unscrew M6 Locknut and remove Lower blade guard.
DISASSEMBLING
Fig. 54
ASSEMBLING
Fig. 55
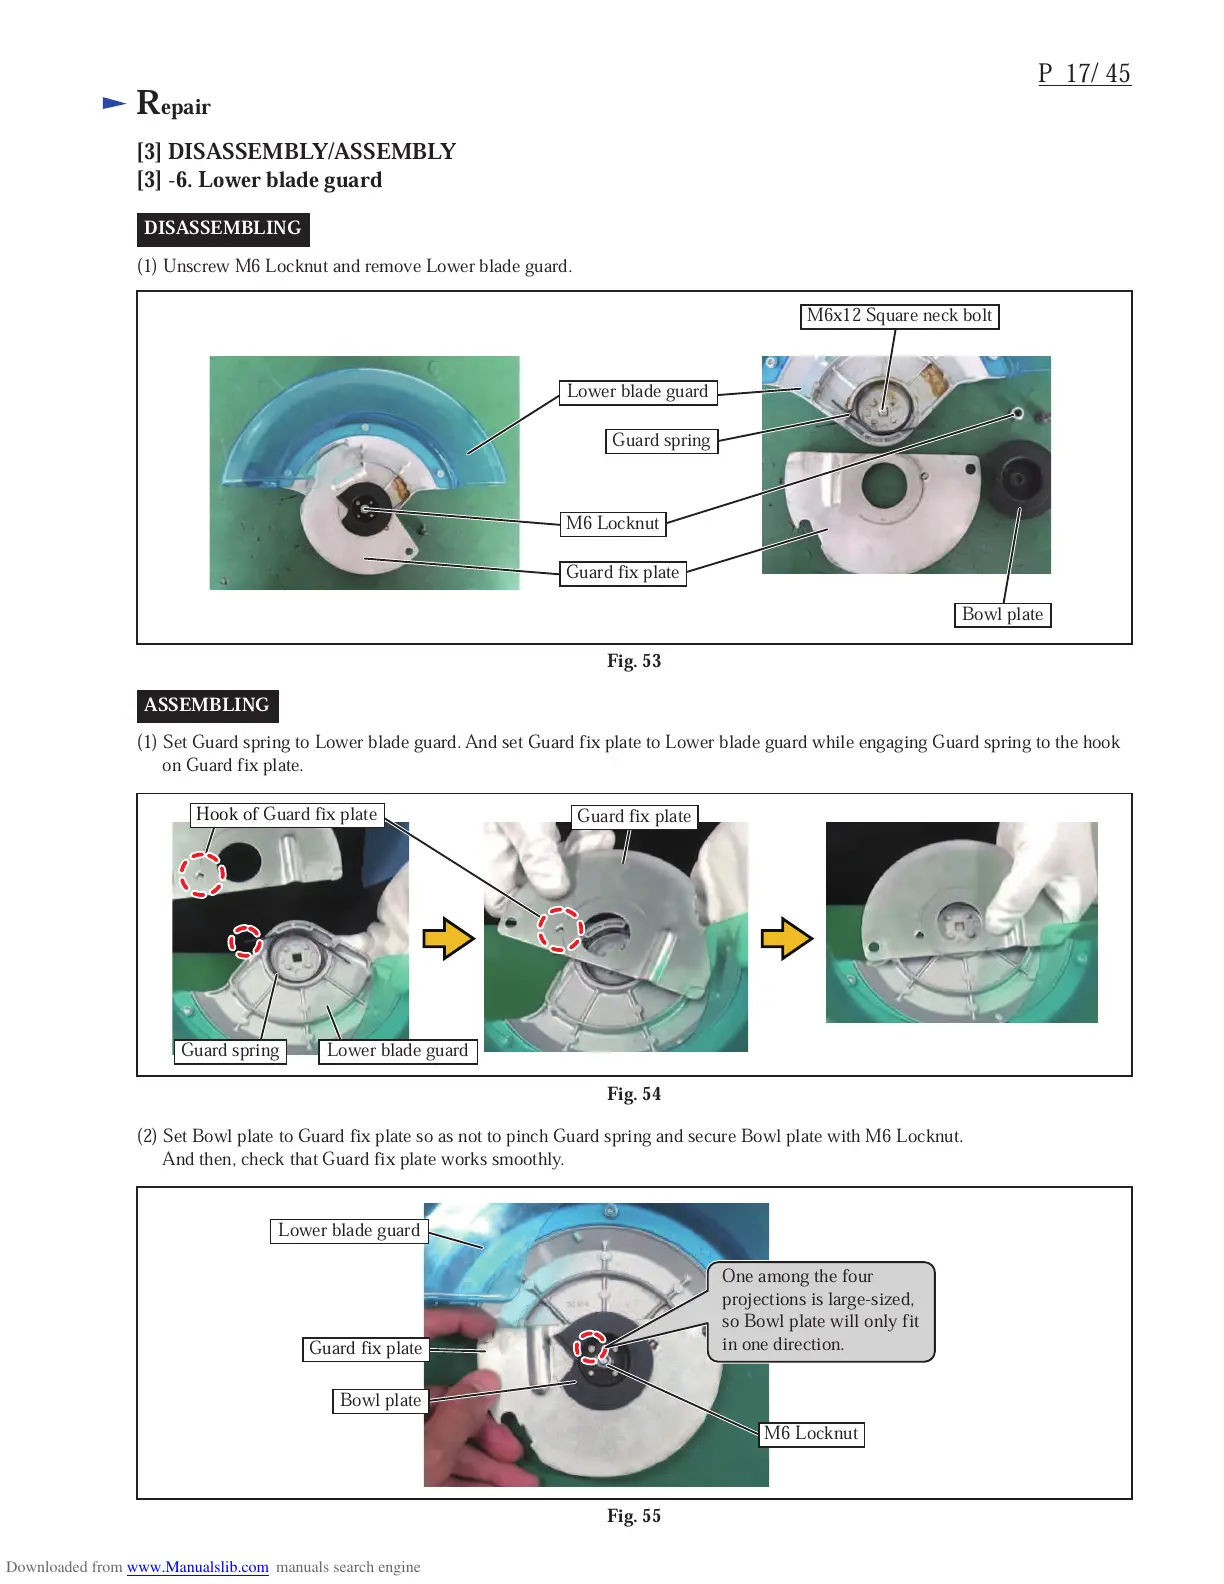
(1) Set Guard spring to Lower blade guard. And set Guard fix plate to Lower blade guard while engaging Guard spring to the hook
on Guard fix plate.
(2) Set Bowl plate to Guard fix plate so as not to pinch Guard spring and secure Bowl plate with M6 Locknut.
And then, check that Guard fix plate works smoothly.
M6 Locknut
Lower blade guard
Guard spring
Guard fix plate
Bowl plate
Guard spring
M6x12 Square neck bolt
Lower blade guard
Guard fix plate
Lower blade guard
Bowl plate
Guard fix plate
Hook of Guard fix plate
M6 Locknut
One among the four
projections is large-sized,
so Bowl plate will only fit
in one direction.

Other manuals for Makita LS1018-R

Questions and Answers:

Question and Answer IconNeed help?

Do you have a question about the Makita LS1018-R and is the answer not in the manual?

Makita LS1018-R Specifications

General IconGeneral
BrandMakita
ModelLS1018-R
CategorySaw
LanguageEnglish

Related product manuals