P 32/ 45
Repair
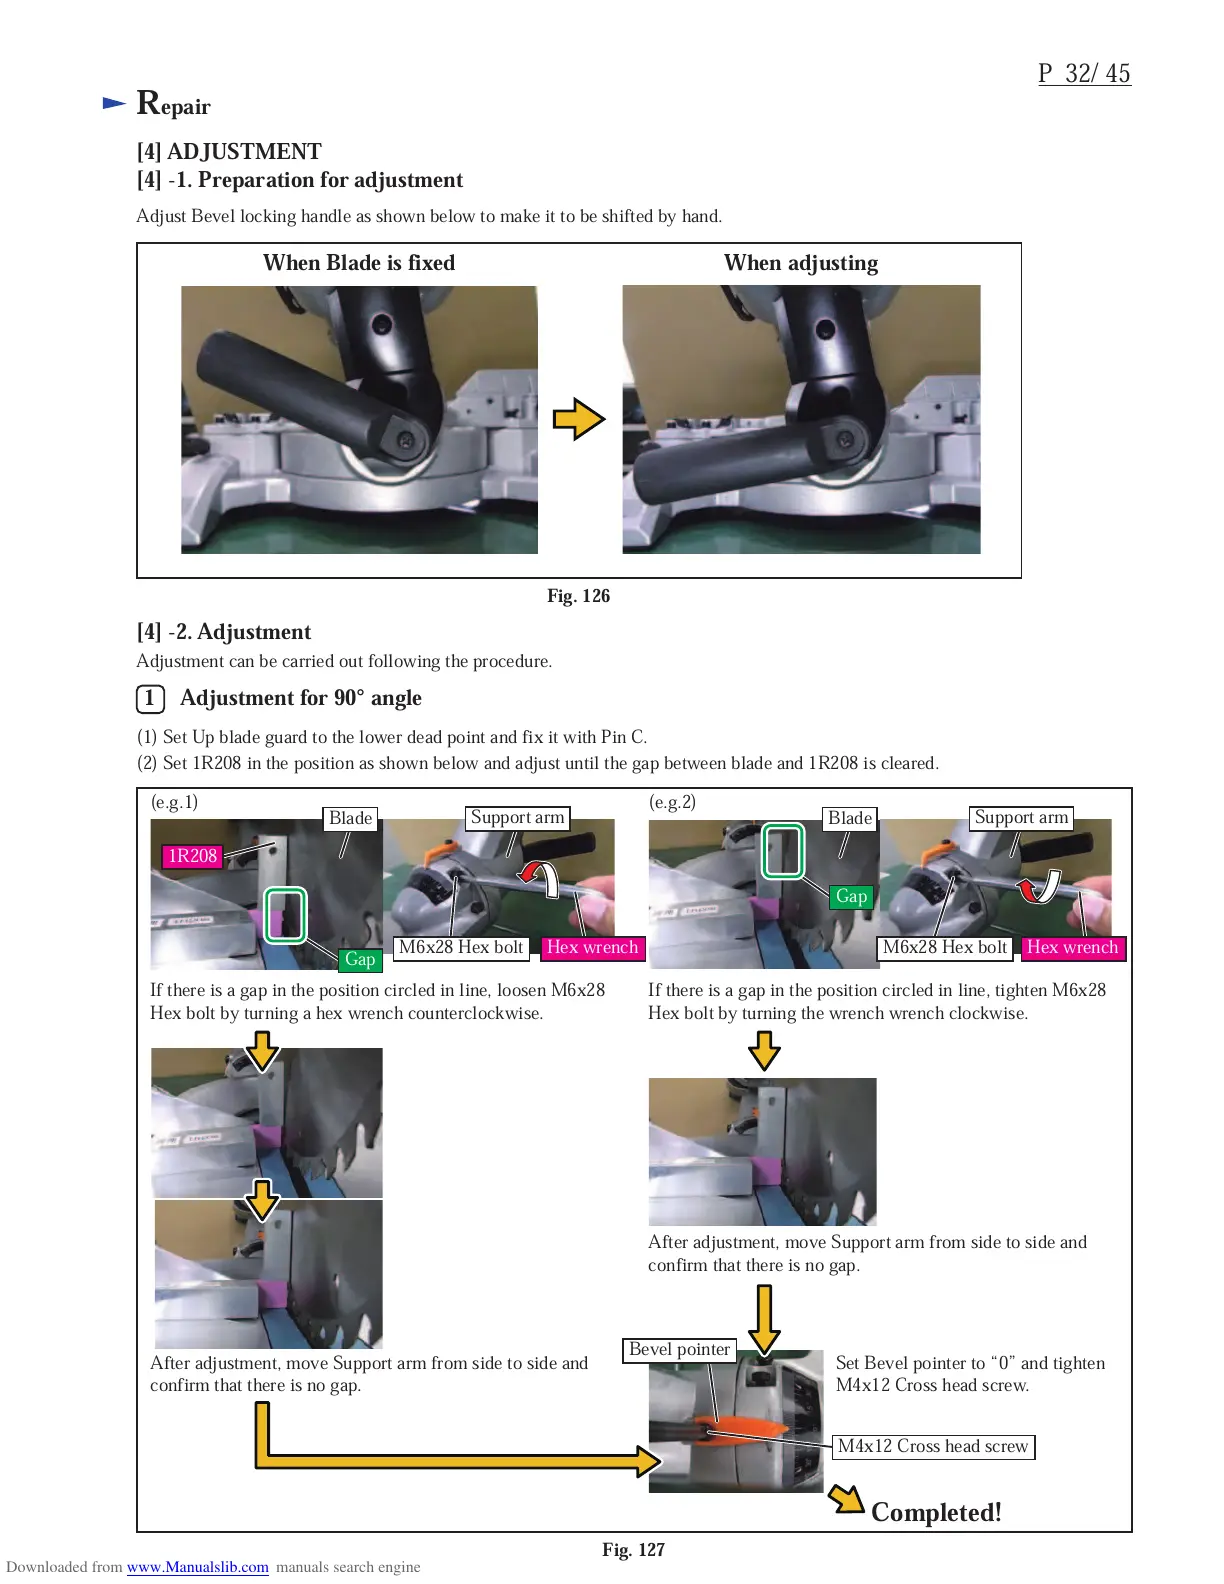
[4] ADJUSTMENT
[4] -1. Preparation for adjustment
When Blade is fixed When adjusting
Adjust Bevel locking handle as shown below to make it to be shifted by hand.
[4] -2. Adjustment
(1) Set Up blade guard to the lower dead point and fix it with Pin C.
(2) Set 1R208 in the position as shown below and adjust until the gap between blade and 1R208 is cleared.
(e.g.1) (e.g.2)
If there is a gap in the position circled in line, loosen M6x28
Hex bolt by turning a hex wrench counterclockwise.
After adjustment, move Support arm from side to side and
confirm that there is no gap.
After adjustment, move Support arm from side to side and
confirm that there is no gap.
Set Bevel pointer to “0” and tighten
M4x12 Cross head screw.
If there is a gap in the position circled in line, tighten M6x28
Hex bolt by turning the wrench wrench clockwise.
Adjustment can be carried out following the procedure.
Fig. 126
Fig. 127
Adjustment for 90° angle
1
Blade Blade
Support arm
Bevel pointer
Support arm
1R208
M6x28 Hex bolt M6x28 Hex bolt
Completed!
M4x12 Cross head screw
Hex wrench Hex wrench
Gap
Gap
 Loading...