Chapter 1 - Basic info
70
Chapter 6 - Exposure Modes
auto bracketinG mode
When in situations where it is difficult to determine the best exposure compensation, it is advisable
to change the exposure setting gradually (from normal to under and over). Continuous turning up
of the values eventually leads to auto bracketing.
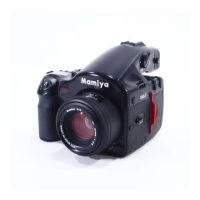
After multiple turns, the mark “RP” will appear in the main LCD.
Repeat turning will lead to a countdown being displayed on the main LCD and after taking a
photo the camera will return to auto bracketing mode.
1. Turn the shutter release mode
selector lever to the “S” or “C”
position.
When set at the “S” position, one frame
can be shot with each press of the
shutter release button. In the “C” mode,
the camera takes three (or two) frames
successively with one press of the shutter
release button.
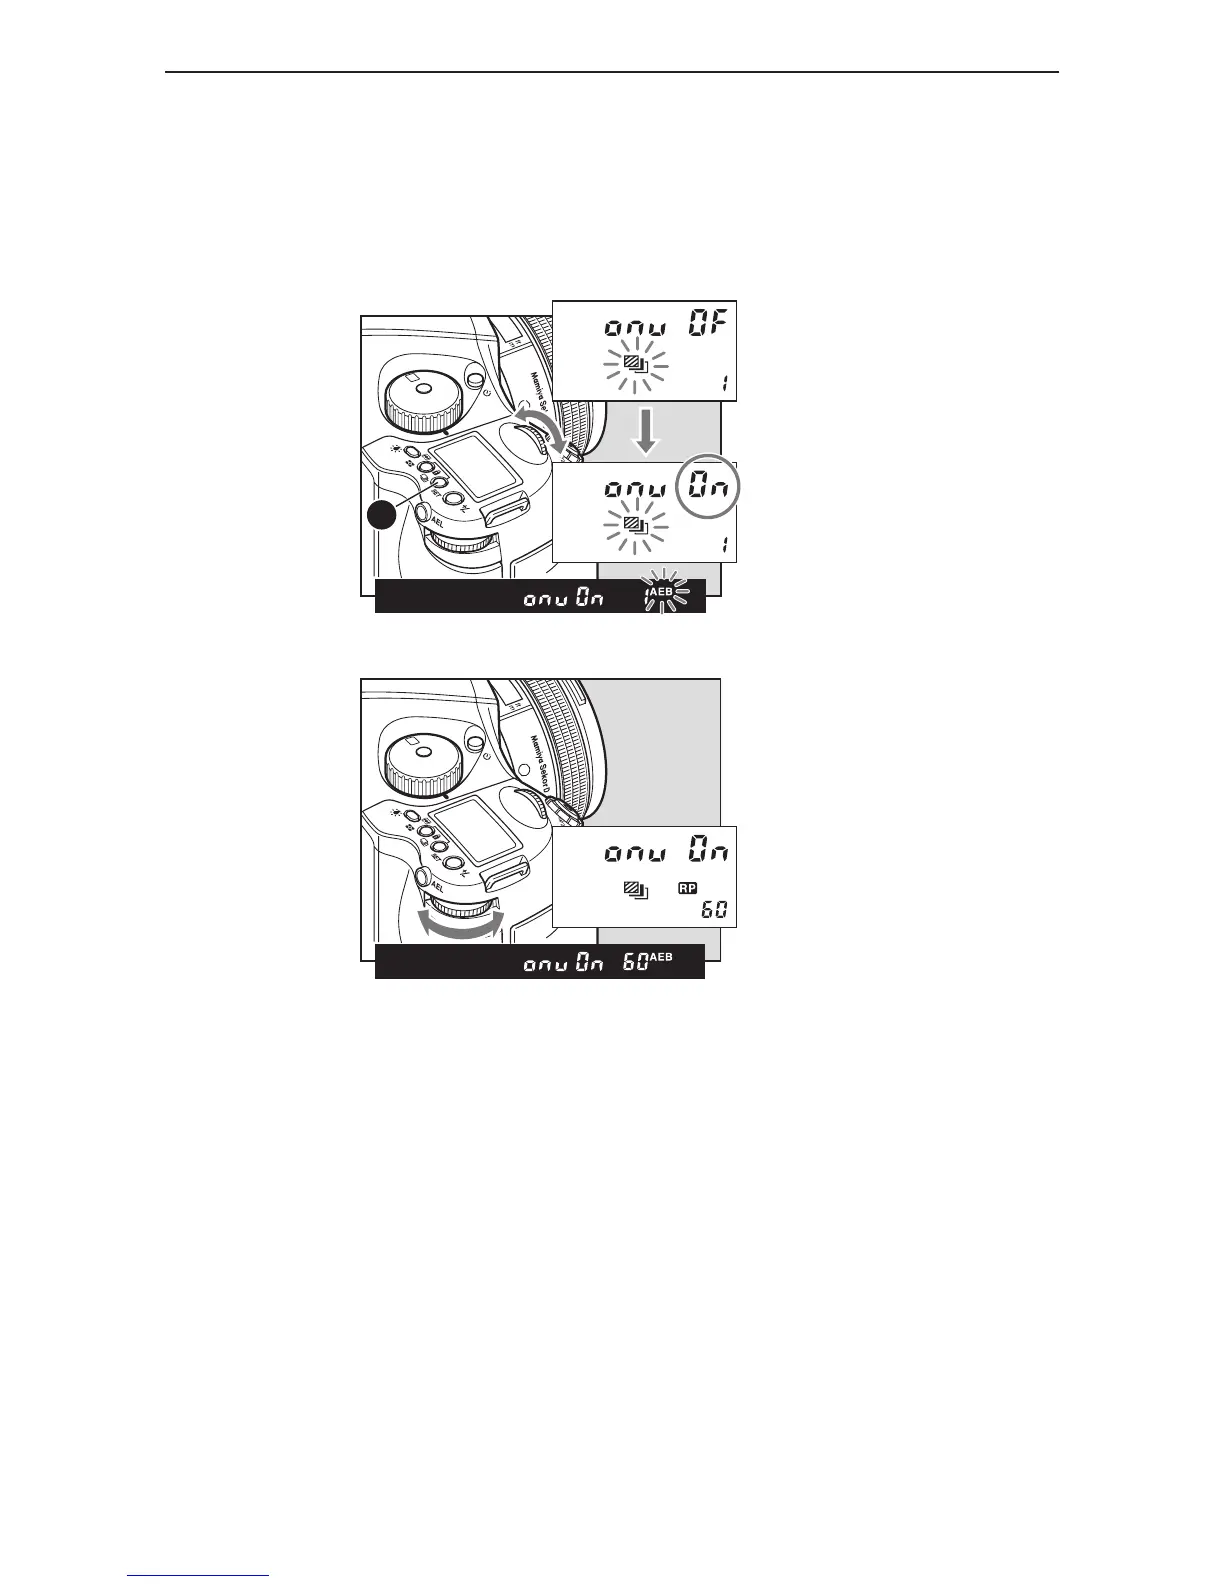
2. By pressing the auto bracketing
button, auto bracketing mode is
selected.
In the main LCD, the auto bracketing mark
will flash on and off. As it is flashing, turn
the front
dial to “On”.
3. By further turning, more values can
be selected.
The rear dial can also be used for setting.
From 1 to 10 turns the value increases in
single units, while 10 to 60 turns means
increases by units of 10. “On” allows
unlimited values to be set.