ENGINELUBRICATION
Checkingtheoilpump
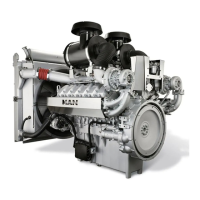
Checkingtheringgearaxialplay
•PlacetheDialgaugeholder[107](2)withDial
gauge[108](1)ontheoilpump
•PlacetheDialgauge[108](1)againsttheringgear
(3)withapreload
•Presstheringgear(3)towardsthedrivegear
•ZerotheDialgauge[108](1)
•Presstheringgear(3)towardstheDial
gauge[108](1)andcheckthedifference
Thepermittedaxialplayontheringgear(3)is0.040
–0.090mm.
Iftheaxialplayisoutoftolerance,tanewoilpump.
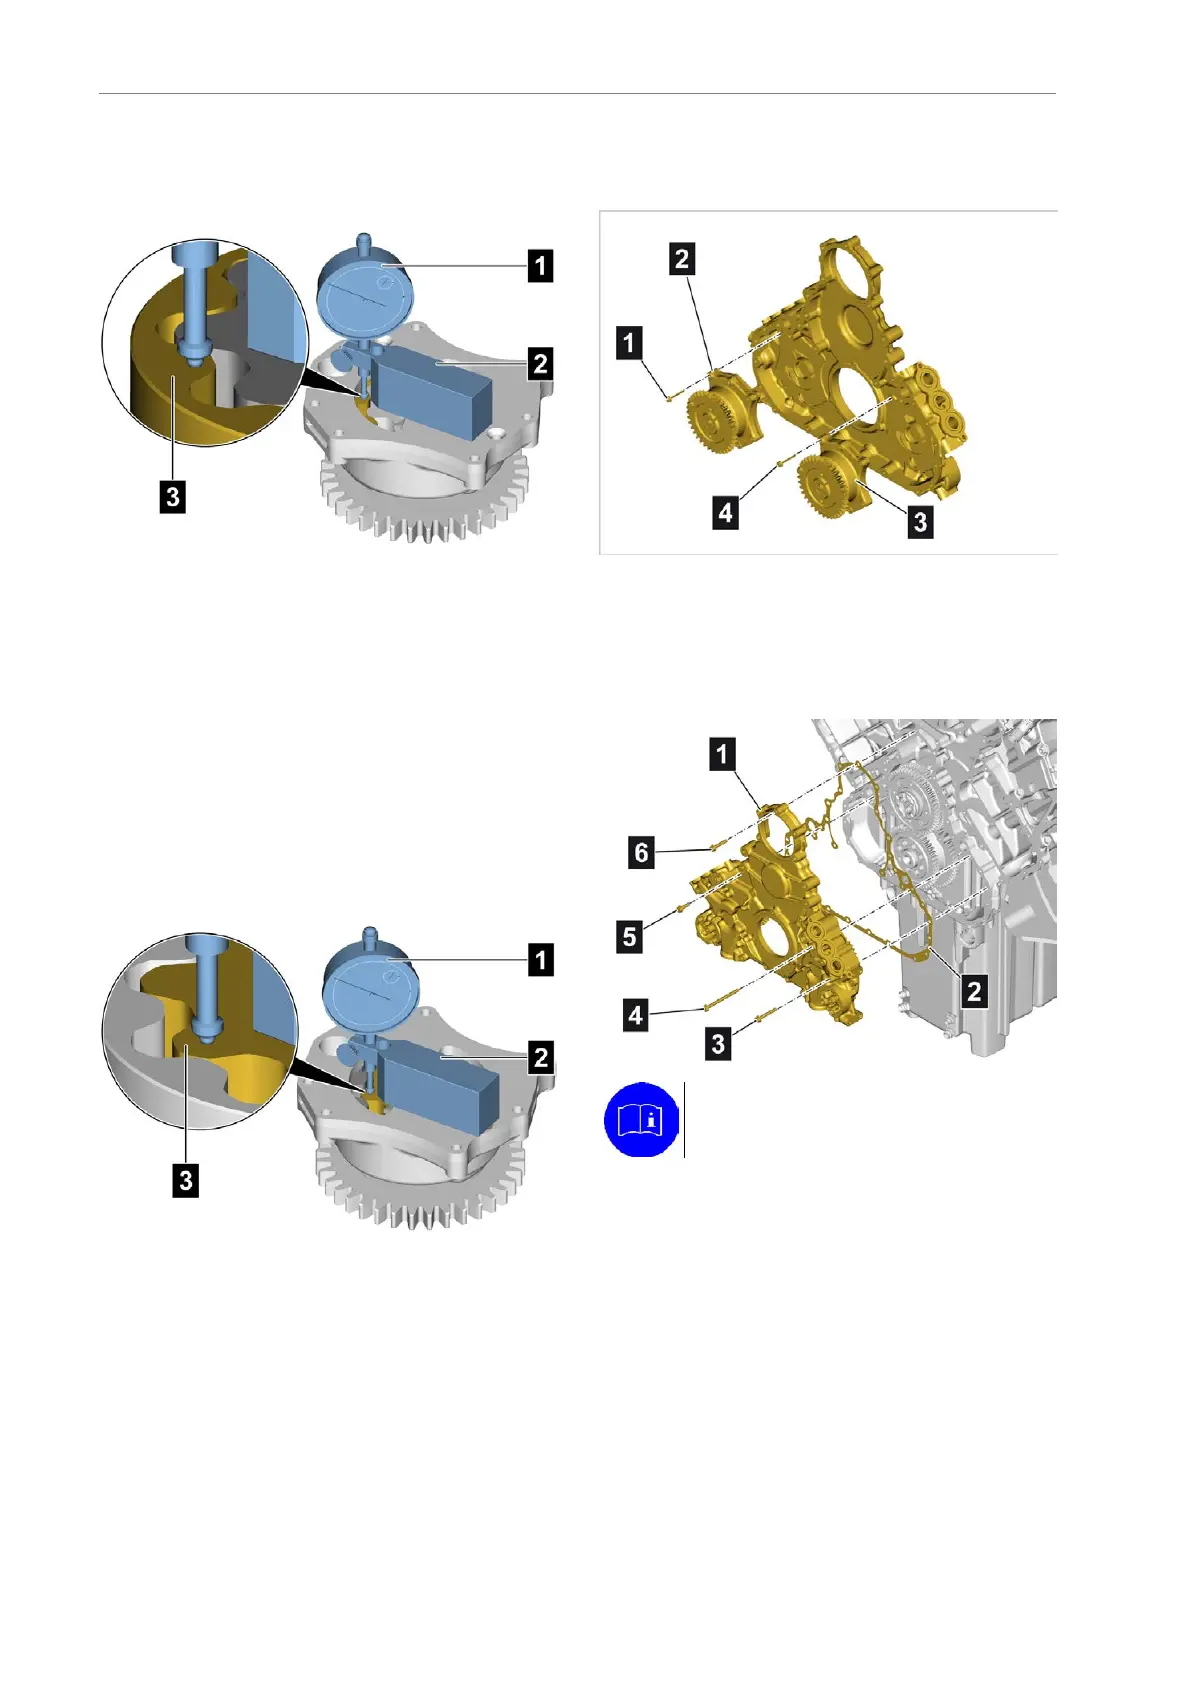
Checkingtherotoraxialplay
•PlacetheDialgaugeholder[107](2)withDial
gauge[108](1)ontheoilpump
•PlacetheDialgauge[108](1)againsttherotor(3)
withapreload
•Presstherotor(3)towardsthedrivegear
•ZerotheDialgauge[108](1)
•Presstherotor(3)towardstheDialgauge[108]
(1)andcheckthedifference
Thepermittedaxialplayontherotor(3)is0.035–
0.080mm.
Iftheaxialplayisoutoftolerance,tanewoilpump.
Installingoilpumps
Installingoilpumps
•Positiontheoilpumps(2)and(3)
•Screwinthenewmountingbolts(1)and(4)and
tightenthembyhandasmarked
•Tightenthemountingbolts(1)and(4)to15Nm
Attachingthecover
Note
Attachthesealwiththescreen-printed
sidefacingthecrankcase.
•Cleanthesealingsurfaces
•Positionthecover(1)withanewseal(2)
•Screwinthenewmountingbolts(3),(4),(5)and
(6)asmarkedandthentightenthem
292AE63stedition
 Loading...