POWER TRAIN MLC80A-1/MLC90A-1/MLC100A-1/MLC100-1 SERVICE/MAINTENANCE MANUAL
7-8
Published 10-09-2020, Control # 259-06
ENGINE MAINTENANCE
Refer to the Engine Manufacturer’s Manual supplied with the
crane for engine maintenance intervals and procedures.
ENGINE BELT ROUTING
AIR CLEANER MAINTENANCE
See Figure 7-8 for the following procedure.
The air cleaner requires periodic maintenance due to the
following:
• Clogged air cleaner filters prevent adequate air flow to
the engine, causing poor starting and increased exhaust
emissions.
• An improperly installed or damaged air cleaner can
allow dirty air to be drawn directly into the engine.
Either condition can cause engine damage. To maintain
engine protection and air cleaner filter service life, inspect
the air cleaner at the following intervals.
Daily Inspection
Daily or Every 8 Hours of Engine Operation (whichever
occurs first)
Check the service indicator (1) with the engine running. The
indicator gives a visual indication when it is time to change
the air cleaner filters.
A yellow stem in the indicator window (1A) extends as the air
cleaner filters become plugged. Change the air cleaner filters
when the yellow stem reaches the red zone of the window.
The yellow stem remains locked in place when the engine is
stopped. The reset button (1B) on the top of the indicator can
be pressed at any time. When the engine is started, the
indicator stem returns to the proper reading.
Monthly Inspection
Monthly or Every 200 Hours of Engine Operation
(whichever occurs first)
• Inspect the rubber reducers, the reducing elbows, and
the tubing between the air cleaner and the engine for
cracks or other damage that might allow unfiltered air to
enter the engine. Replace worn or damaged parts.
• Check for loose clamps. Tighten as required.
• Check the air cleaner housing (2) for damage that may
allow unfiltered air to enter the engine. Replace the
housing if it is damaged.
• Inspect the cover (4). Make sure it securely in place.
Changing the Air Cleaner Filters
1. Lock out tag out the crane.
2. Un-clip and remove the cover (4).
3. Remove the primary filters (5) gently to avoid dislodging
dust from the filters.
There will be some initial resistance, similar to breaking
the seal on a jar. Using the handle (5A) on each filter,
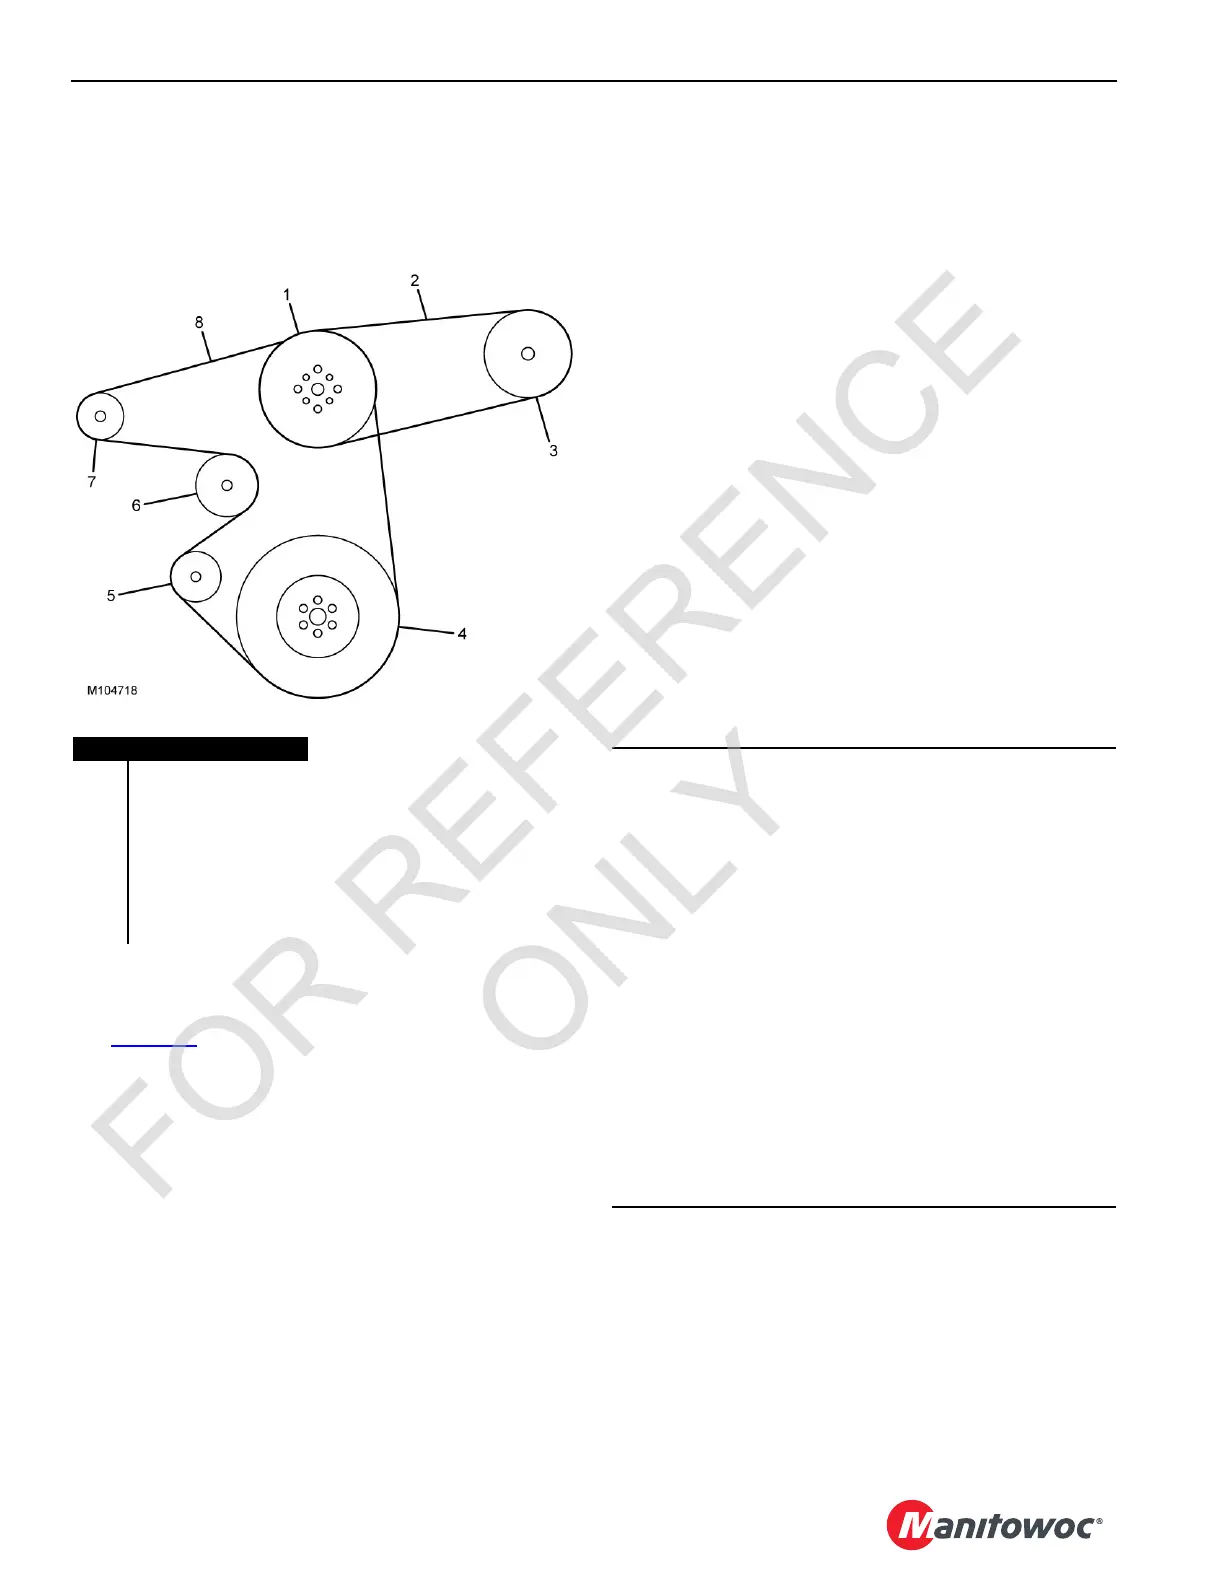
Item Description
1Fan Pulley
2Belt 2
3 A/C Compressor
4 Harmonic Balancer
5 Tensioner
6 Water Pump
7 Alternator
8Belt 1
FIGURE 7-7
CAUTION
Avoid Engine Damage!
• Stop the engine before servicing the air cleaner.
Otherwise, unfiltered air will be drawn directly into the
engine. Never operate the engine without the air
cleaner or filters.
• Before servicing, clean the fittings, the mounting
hardware, and the area around the components to be
removed.
• Replace the secondary filter as quickly as possible to
prevent contaminants from entering the engine
intake.
• Do not attempt to clean and reuse old filters. Discard
them and install new filters. Cleaning filter elements
by impact or compressed air voids the warranty and
can degrade or damage the filter media, leading to
engine damage.
 Loading...


