Manitowoc Published 10-09-2020, Control # 259-06 7-9
MLC80A-1/MLC90A-1/MLC100A-1/MLC100-1 SERVICE/MAINTENANCE MANUAL POWER TRAIN
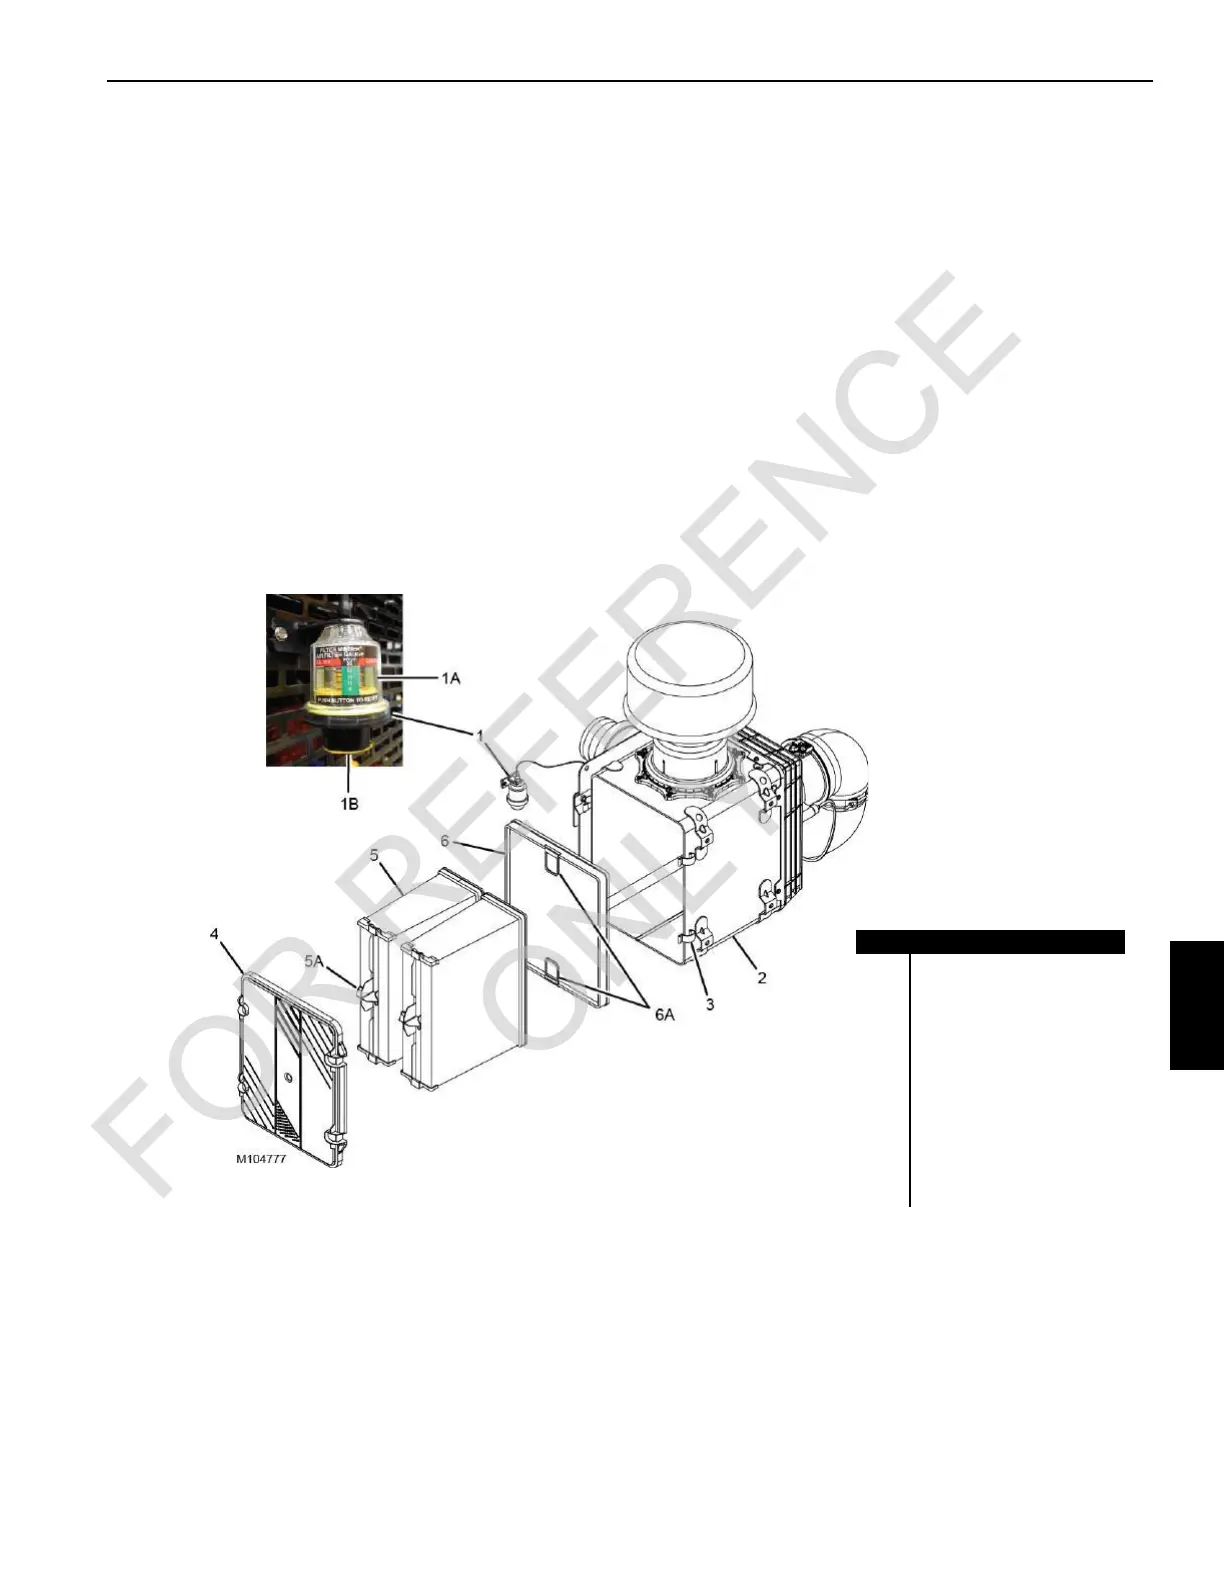
move the end of the filter back and forth to break the
seal.
NOTE: The secondary filter (6) should be replaced every
third time the primary filters (5) are replaced.
4. If required, remove the secondary filter (6) by pulling on
the tabs (6A). Take care to avoid dislodging dust from
the filter.
5. Dispose of the old filters according to local
environmental regulations.
6. Using a clean damp cloth, wipe clean the inside of the
cover, the sealing surfaces, and the inside of the air
cleaner housing. These areas must be clean and free of
grease and loose contaminants.
7. Inspect the new filters, especially the sealing areas.
Never install damaged filters.
The filters have O-rings that provide an air-tight seal.
8. If removed, carefully install the new secondary filter (6) –
O-ring side first – with the tabs and gently push it into the
back of the housing. Apply pressure to all four corners to
make sure the filter is completely secure in the housing.
9. Carefully install the new primary filters (5) – O-ring side
first – using the handles. Make sure all surfaces are
sealed inside the housing.
10. Make sure the seal is in place and install the cover (4)
with the clips (3). The cover should go on without extra
force.
Never use the clips on the cover to force the filters into
the air cleaner. It is tempting to assume that the cover
will do the job of sealing the filters, but it will not. Using
the cover and clips to push the filters into the housing
could damage the housing and will void the warranty.
11. Push the reset button (1B) on the service indicator (1).
Item Description
1 Service Indicator
1a Indicator Window
1b Reset Button
2 Air Cleaner Housing
3Clip (Qty 4)
4 Cover
5 Primary Filter (Qty 2)
5A Handle
5 Plastic Rings
6 Secondary Filter
7 Tab (Qty 2)
FIGURE 7-8
 Loading...


