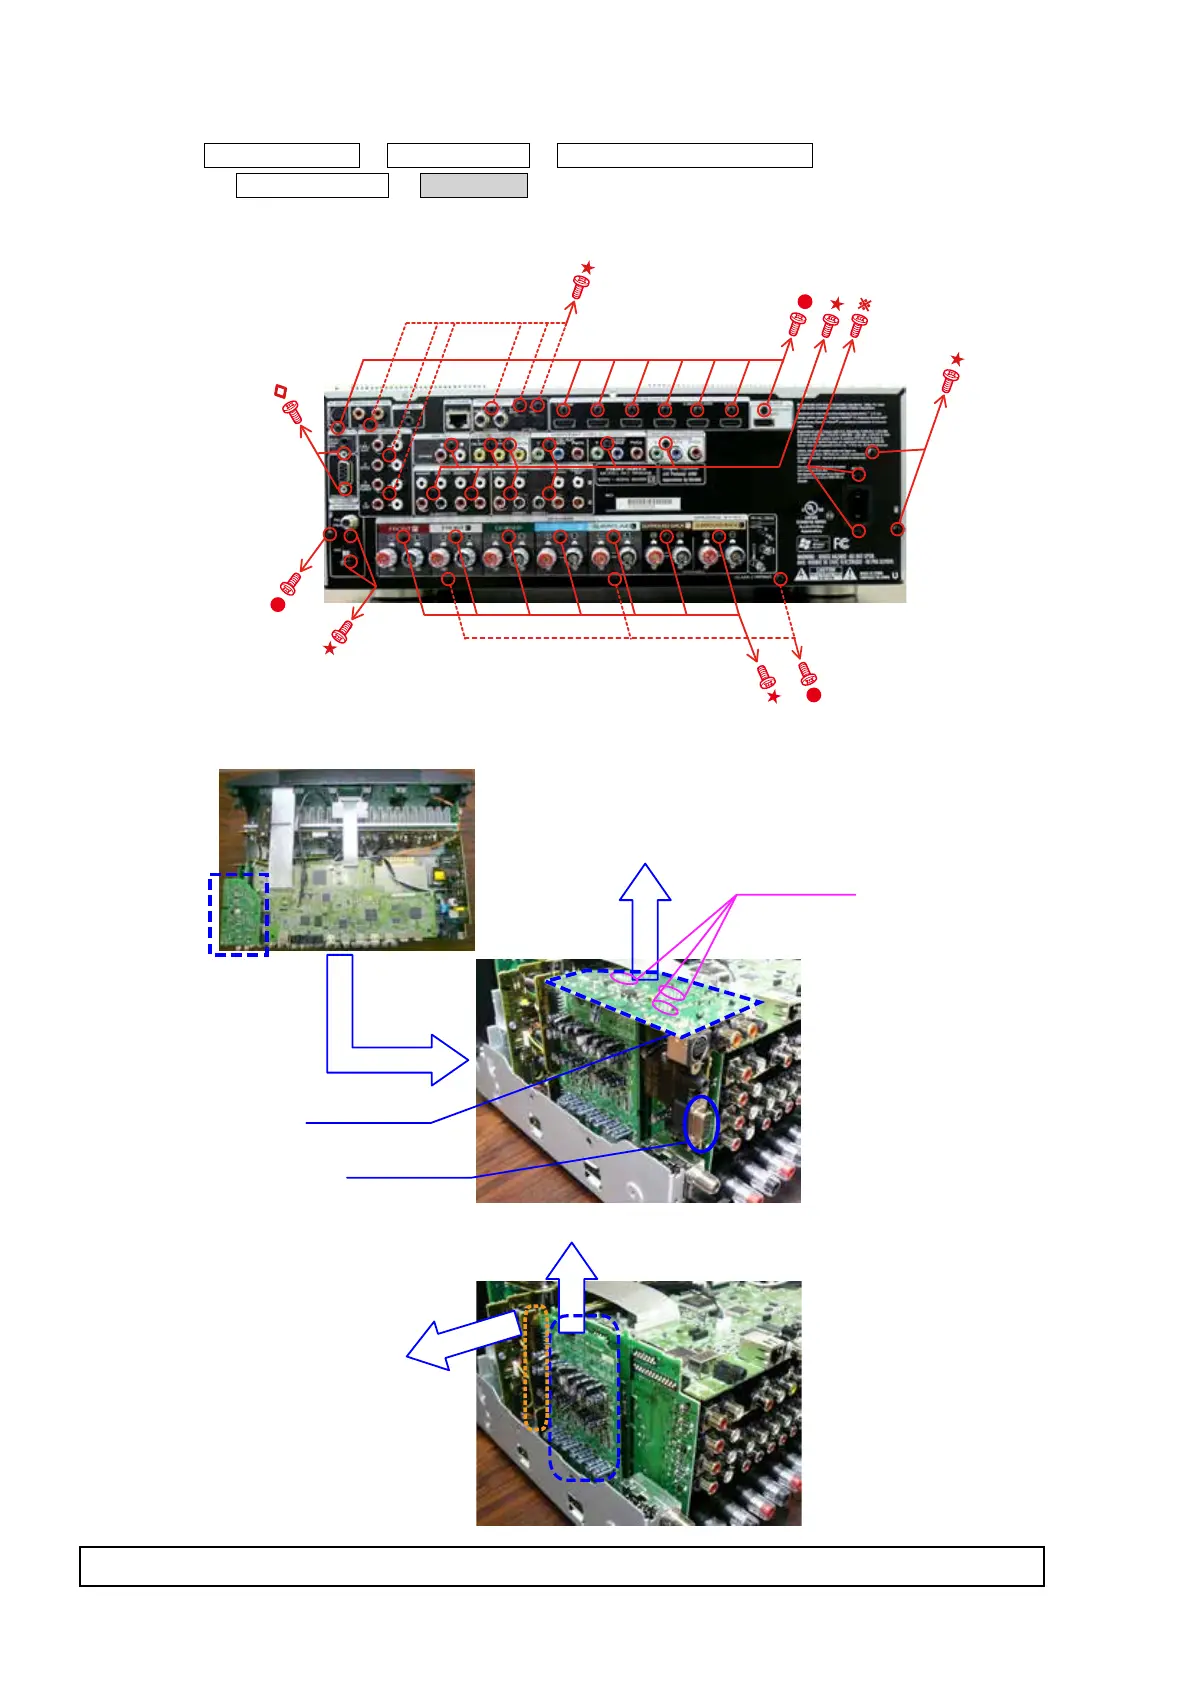
2. PCB MX PORT/RS232C/HDAM CNT/HDAM
Proceeding : TOP COVER
→
BACK CHASSIS
→
PCB MX PORT/PCB RS232C
→
PCB HDAM CNT
→
PCB HDAM
(1)
Remove the screws.
(2) Disconnect the connector board.
Shooting of photograph: A
Board to board
PCB MX PORT / RC232C ASSY
PCB RS232
PCB HDAM
HDAM CNT
PCB MX PORT
Please refer to "EXPLODED VIEW" for the disassembly method of PCB RC5_MX,
RS232, HDAM_CNT and HDAM.
14