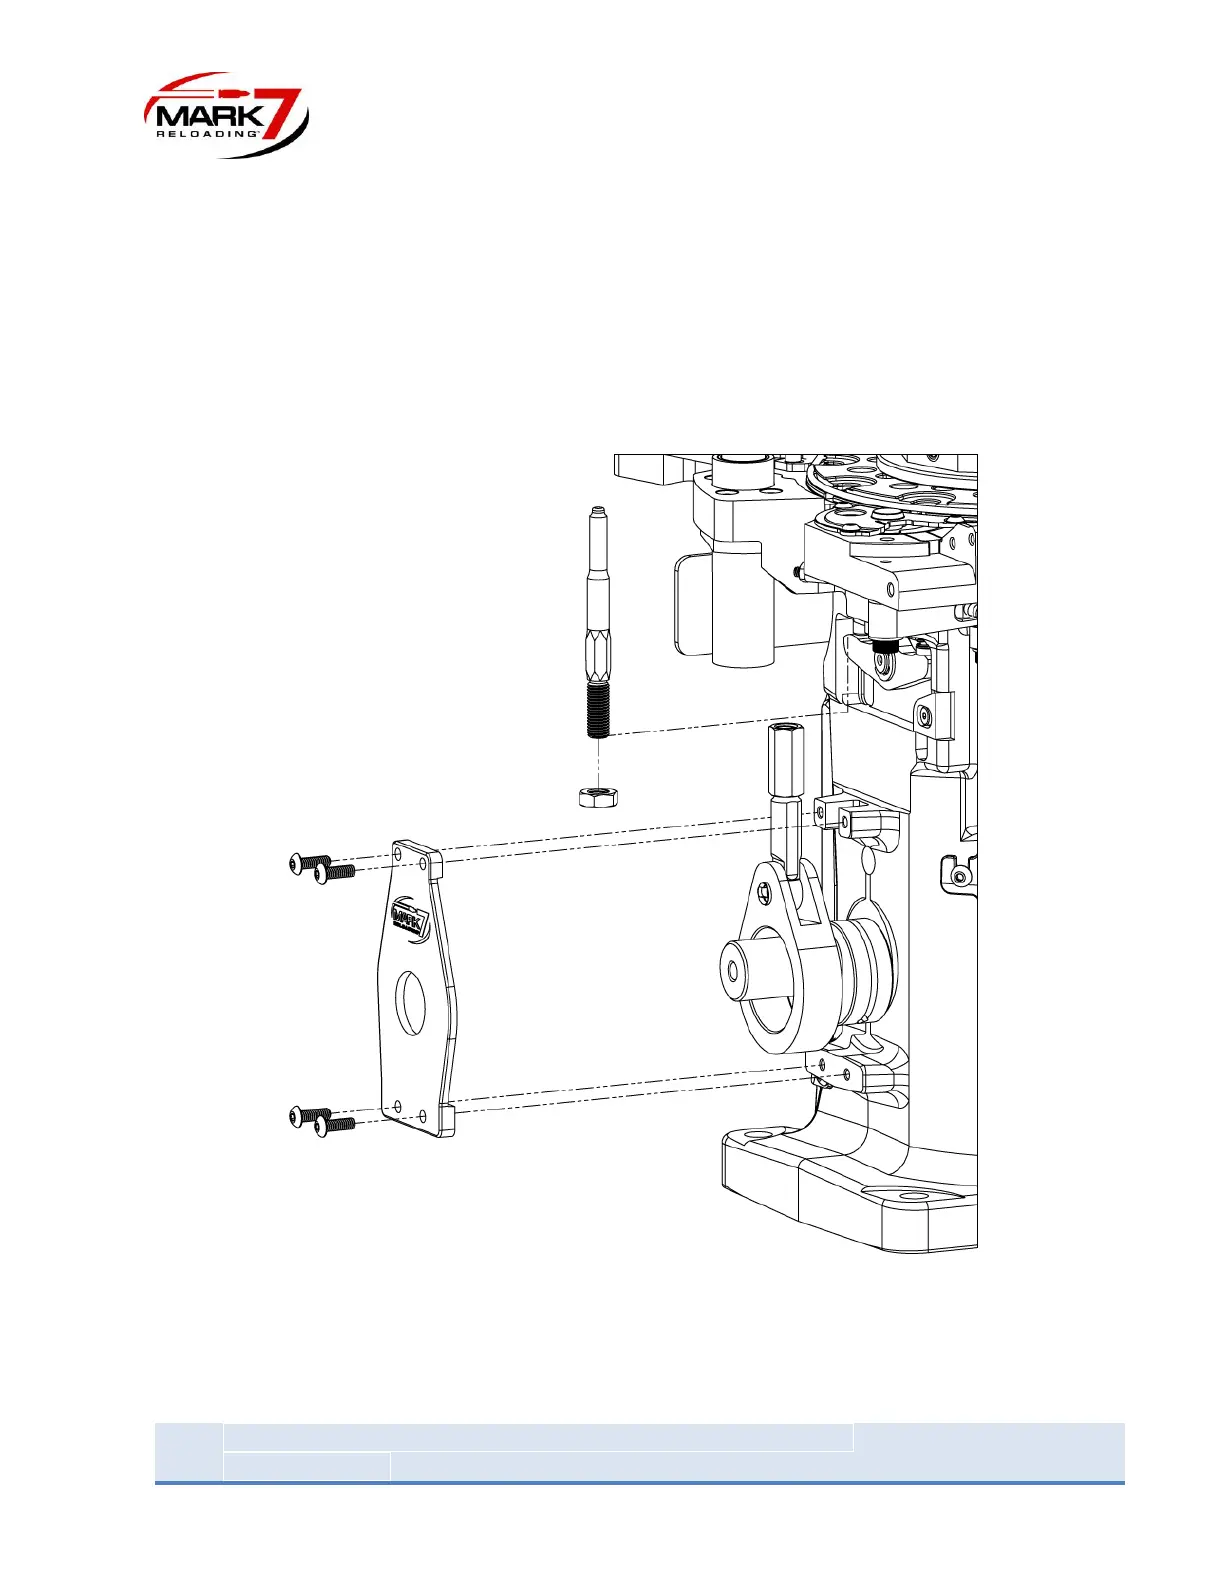
4) Swage Rod Change
Loosen the 2 set screws in the handle shaft adapter and slide the handle and adapter assembly off the
shaft. Then remove the shaft key from the shaft. Remove the 4 screws on the swage rod linkage plate
and pull off the plate. Next loose the lock nut on the swage rod and unscrew swage rod from the
coupler. Hold the swage rod all the way up and slide the linkage slightly to the right on the shaft until it
clears the bottom of the swage rod. Slide the swage rod out of the press. Swap the lock nut onto the
desired size swage rod. Note: the swage rod for small primers is engraved with a “3” and the rod for
large primers is engraved with a “4”. Slide the swage rod into the press and reassemble in reverse order.
Figure 28: Swage Rod removal