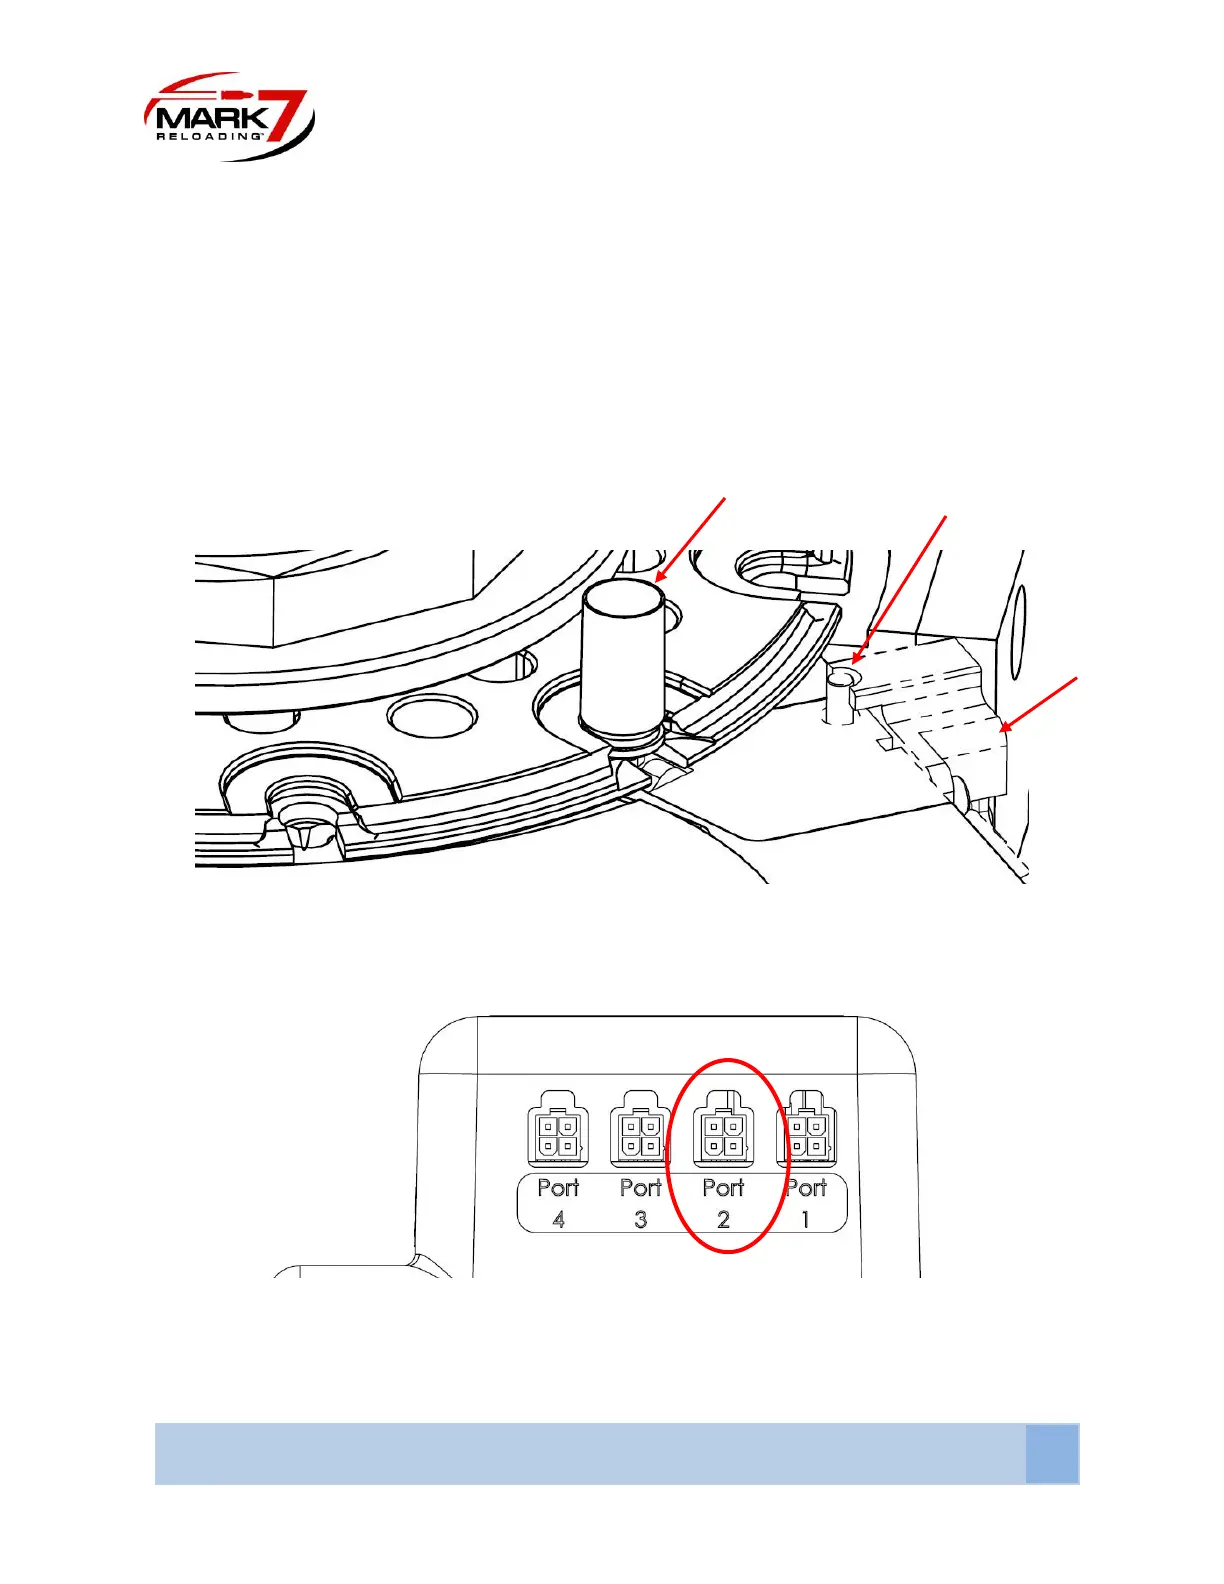
Step 5: Adjusting Optical Sensor to Desired Primer Depth
With the machine powered off and the tool head in the UP POSITION place a case with a seated primer
to the desired depth into station #5. Make sure the Shellplate nut is fully threaded down to the desired
tightness. When you Install the Primed case, you will notice the indicator Pin will move up slightly. With
the case installed the top of the indicator pin should be FLUSH with the top of the Sensor Housing. If the
sensor Housing is higher or lower loosen the two socket head Screws on the back of the sensor housing
and reset the height.
Figure 34 : Setting Optical Sensor Position
Step 6: Plug the Sensor into Port #2 on the rear of the electronics unit
Figure 35 : Plug Sensor into Port #2 as Shown