– User and Installation Manual
7.7.2 MasterAdjust
Step 1. Make sure that all power sources (AC and DC) are turned off.
Step 2. Make sure the AC IN and AC OUT breakers are open.
Step 3. Make sure the "On/Charge only"-switch position is "Charge only" () on all units.
Step 4. Check all connections are firmly tightened.
Step 5. On all units, set DIP switches 1 and 2 on for MasterBus operation.
Step 6. First install the DC fuses and then close the battery switch.
Check the DC voltage between plus and minus on each unit.
Step 7. Close the connection compartment of each unit.
Step 8. Switch all units on ("On/Charge only"-switch position is " On" (I)).
Step 9. At start-up all units will display an error (LEDs 2 and 3 will be blinking red). This is normal.
Note: Cluster settings are done in the unit chosen as Primary (L1) unit only. However, battery settings
must be configured for all units separately.
Step 10. In MasterAdjust, right-click the USB:MasterBus device and select Login.
Step 11. Select 1=Installer and enter the password.
Step 12. Go to the Configuration tab of the unit that you want to make the L1 unit and give the unit a
logical name.
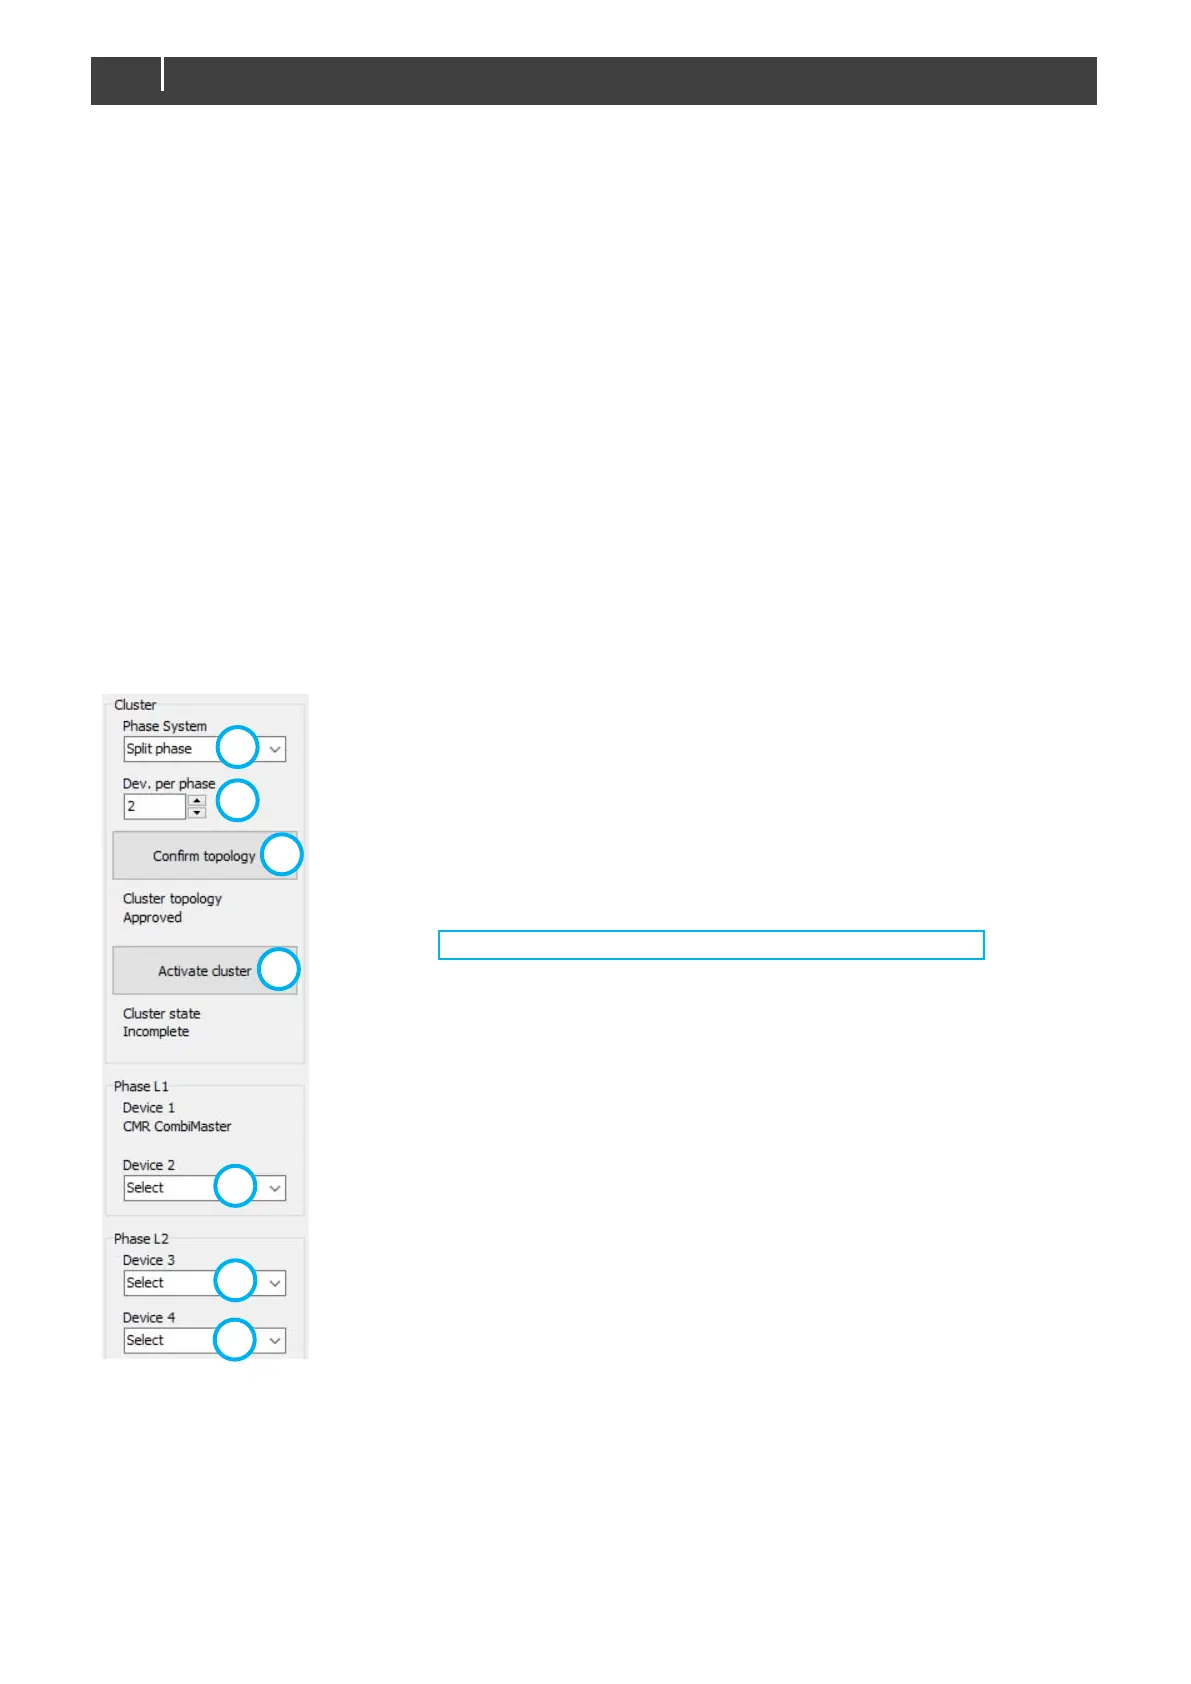
Step 13. From the Phase System drop-down list, select Split phase or
Single phase.
Step 14. With the Dev. per phase stepper, select PER PHASE the number
of units in parallel (Primary + Replica). In our example this is 2.
Step 15. Click the Confirm topology button to enable selection of the other
units. Per phase one or more drop-down lists will appear. In our
example there are 4 units in total.
Step 16. From the Device # drop-down lists, select the required unit(s).
Note: pay attention to the phase the unit is attached to!
Step 17. Click the Activate cluster button.
Notice the Cluster topology and Cluster state.
Topology monitors the size of the cluster i.e., whether selected units is equal
to selected number of devices.
State monitors the configuration state of the cluster, which can be:
- Incomplete; indicating not all devices have been selected yet
- Not activated; indicating for all devices a unit has been selected. Clicking
the Activate cluster button will bring the selected units into this cluster.
- Activated; the units have successfully been placed into this cluster.
- Standalone; no cluster ‘topology’ has been selected.
- Replica; another device is cluster-primary, and this unit is part of that
cluster.
- Double device; a device has been selected more than once.
- Missing devices; a selected device is no longer present on the MasterBus
network.
- Cluster conflict; an error is made in the selection of the cluster topology.