The AFG has an interchangeable loadcell cartridge, which
allows selection of different capacity load cells to be fitted to
the AFG console.
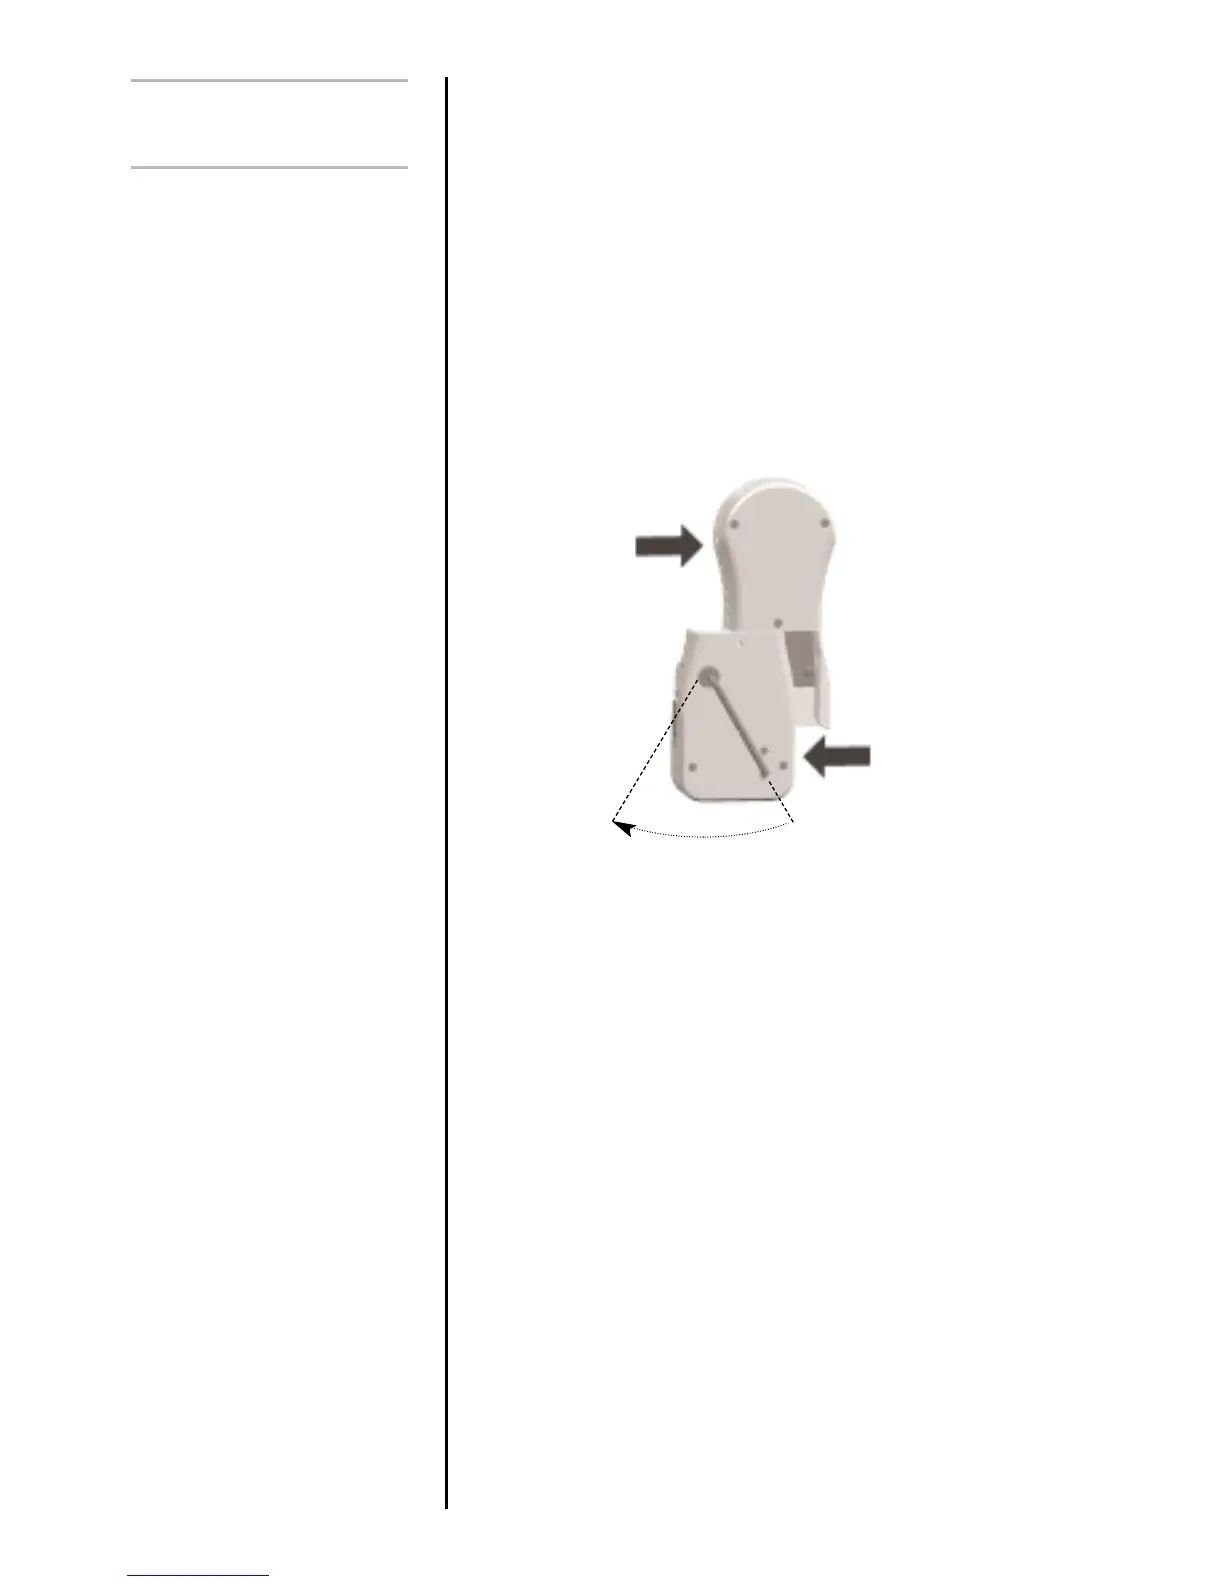
To exchange the cartridge, power down the gauge and
remove it from the test stand if it is fitted to one.
Turn the gauge face down and insert a 4mm Allen key
(supplied) into the boss on the back of the ALC.
To unlock the ALC rotate the boss anti-clockwise with the Allen
key through approximately 30º to release the spring loaded
locking cam. Whilst still holding the Allen key in position slide
the ALC away from the AFG console to the left. See Figure 5.
To fit the new ALC, first insert the Allen key into its boss and
rotate the locking cam as above. Slide the ALC into the AFG
console, ensuring that the mating surfaces are correctly
aligned.
Push the ALC firmly home into the AFG console and, to lock
it, tighten the locking cam by rotating the Allen key clockwise
until slight pressure is felt. Take care not to over tighten the
locking cam.
All Advanced Loadcell Cartridges have a 15-pin ‘Smart’
connector port on the right hand side for interface with
Mecmesin external ‘Smart’ force and torque sensors. This
allows you to use your existing AFG console to perform
additional tests without the need for a dedicated instrument.
To connect a ‘Smart’ sensor, power down the gauge and
plug in the ‘Smart’ force or torque sensor to the 15-pin ‘Smart’
port. Power on the AFG. The ‘Smart’ transducer will be
automatically recognised and the capacity displayed.
page 10
Additional Force &
Torque Sensors
Interchangeable Advanced
Loadcell Cartridges (ALC)’s
Warning! Incorrect alignment
of the ALC may lead to
damage to the ALC interface
pins.
‘Smart’ sensors
Warning! The AFG must be
powered down when
connecting or disconnecting
smart transducers.
Note: Connecting a new
‘Smart’ transducer causes the
default settings within
Advanced Menu Options to
be installed
30˚
Fig. 5