|
33
VIKING 4G E, S
Rev. 1.0 (29.1.2020)
Installation
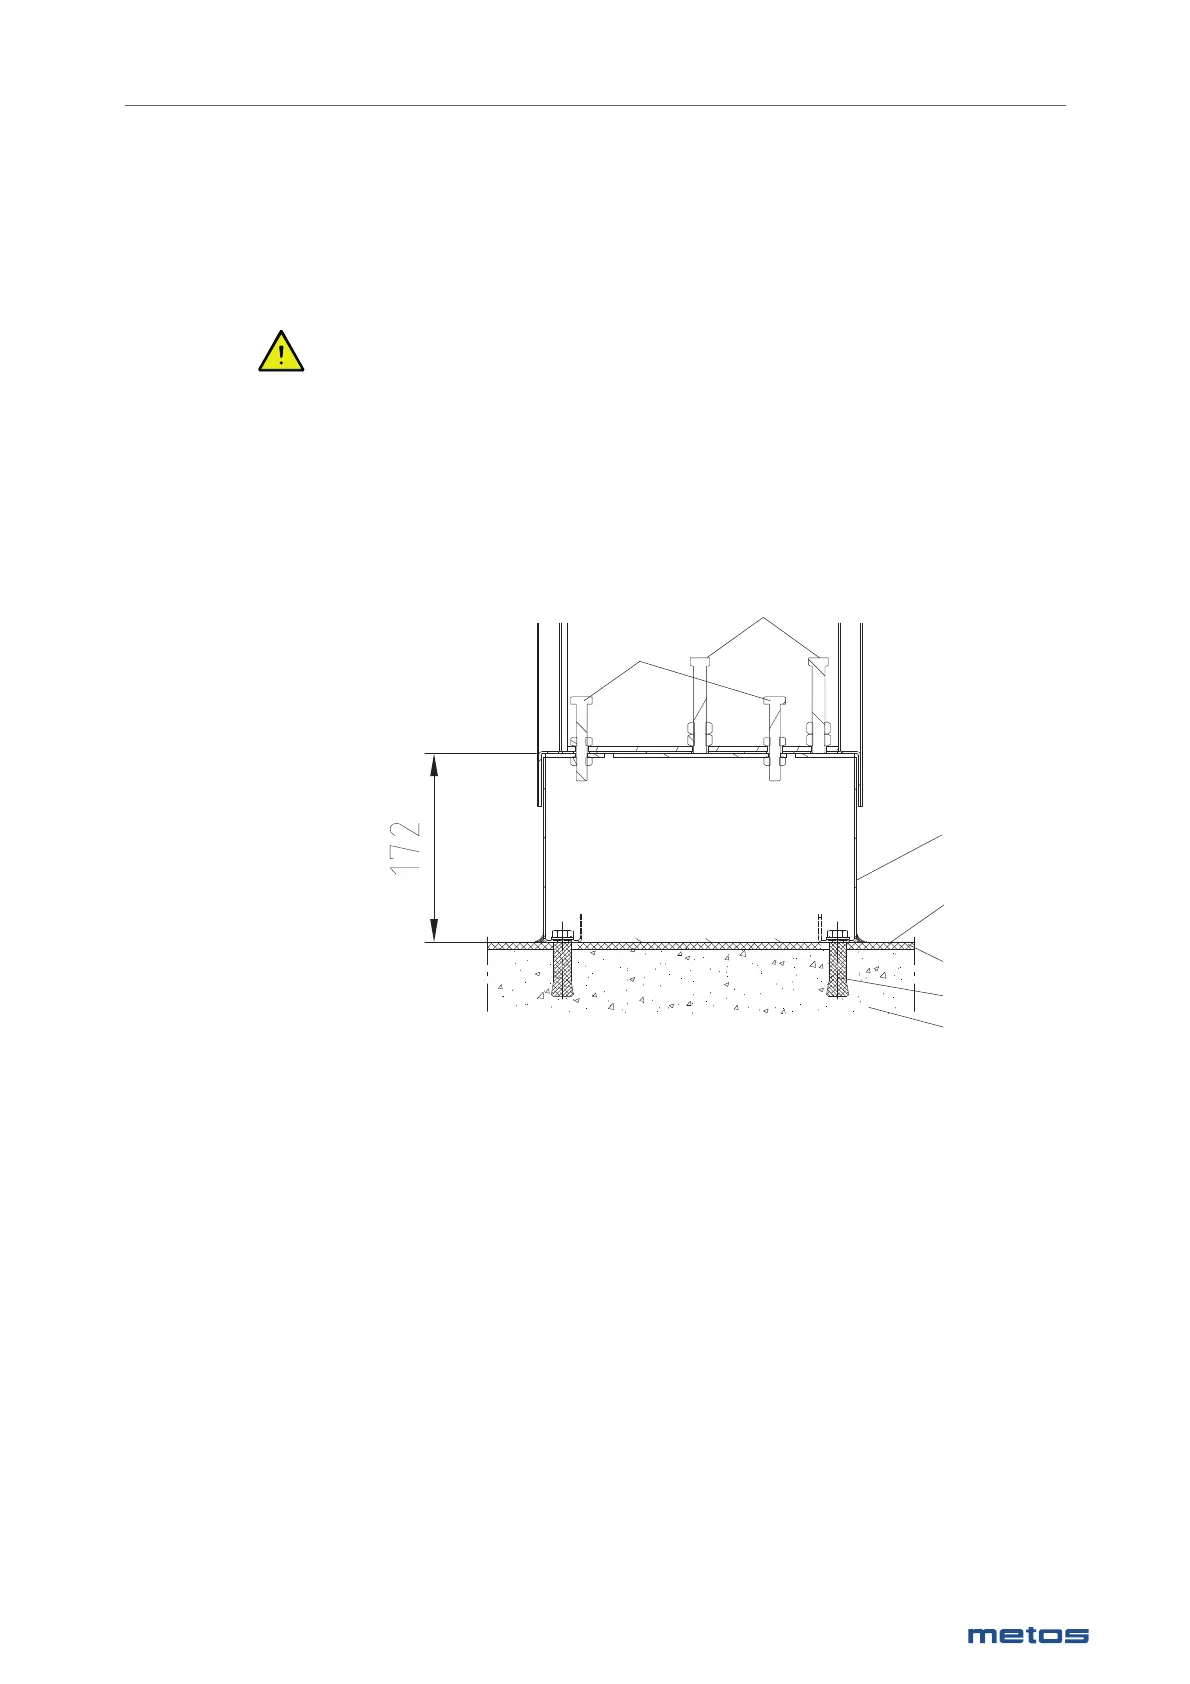
6.4.3. Surface installation frame fi xed to the fl oor
Surface frames are mounted according to the installation drawing, with the help of installation guides
supplied with the delivery. If the inclination of the fl oor is very steep, it may be necessary to level the
surface frame closer to the horizontal by placing stainless steel spacers between the frame and the fl oor.
This will ensure that the adjustment range of the pillars is adequate.
Pieces of stainless steel plate should be used as spacers that are large enough and have a suitable hole
for the fi xing bolt. Washers or other small spacers are not allowed.
The fi xing bolts for the surface installation must be chosen according to the fl oor construction. A type rec-
ommended is a UKA M10x150 chemical bolt, which suits various fl oor materials. Alternatively expansion-
shell bolts or equivalent can be used. The junction of the surface frame and the fl oor is fi lled with fl ooring
material. The main points concerning the installation of the surface frame are shown in the picture below.
1. Surface frame
2. Concrete casting
3. Fixing bolt for surface frame
4. Finished fl oor surface
5. Floor coating
6. Fixing bolt
7. Adjusting bolt
Place the kettle on the surface installation frame and adjust to a horizontal position with 4 adjusting bolts.
When the kettle is in a horizontal position it must be fi xed to the surface frame with the help of the fi xing
bolts. The control pillar has 4 bolts and the support pillar has 2 bolts. Tighten the fi xing bolts carefully. Do
not seal the space between the kettle pillars and surface installation frames, as there must be enough
change of air.
1
4
3
2
5
7
6